How To Use Apache JMeter To Perform Load Test On Mobile App

In an era where mobile app performance is critical, Apache JMeter emerges as a powerful tool for conducting thorough load tests.

This technical guide delves into using JMeter to simulate real-world user traffic and network conditions, critically analyzing how a mobile app withstands varied load scenarios.

It involves configuring JMeter for mobile environments, setting up proxy settings for accurate request capture, and crafting realistic user interaction scripts.

The process aims to uncover performance metrics, such as response times and error rates, essential for pinpointing scalability and efficiency issues.

This comprehensive approach ensures that your mobile application is not only functional but also resilient under heavy user load, a key to maintaining a competitive edge in the dynamic app market.

app testing

Understanding Load Testing and Its Significance for Mobile Apps

Load testing involves simulating real-world usage scenarios to evaluate how an application behaves under different levels of demand. For mobile apps, factors like network latency, varying device capabilities, and fluctuating user loads can significantly impact performance.

Load testing helps identify potential bottlenecks, such as server overloads or inefficient code, allowing developers to optimize their apps for a smoother user experience. It enables them to anticipate and address performance issues before they affect end-users, thereby enhancing reliability and satisfaction.

Getting Started with Apache JMeter

Apache JMeter is an open-source Java-based tool renowned for its versatility in performance testing, including load testing mobile applications. Mentioned below is the guide that can help you get started with Apache JMeter:

Download and Install Apache JMeter: Visit the official Apache JMeter website and download the latest version. Installation instructions are provided for different operating systems, ensuring a smooth setup process.

Familiarize Yourself with the Interface: Apache JMeter features a user-friendly interface with various components such as Thread Group, Samplers, Logic Controllers, and Listeners. Understanding these components is crucial for creating effective test plans.

Prepare Your Mobile App for Testing: Ensure your mobile app is ready for testing by deploying it on a test environment accessible to Apache JMeter. This may involve configuring the network.

JMeter Configurations

To perform a load test on mobile applications using Apache JMeter, you’ll need to set up JMeter and configure your mobile device to connect through a proxy. Here’s a summarized guide based on information from multiple sources:

Install Apache JMeter: Ensure Java Development Kit (JDK) is installed on your PC. Download Apache JMeter and run it.

Configure JMeter for Recording:

  • Add a Thread Group to your Test Plan in JMeter.
  • Add a Logic Controller, such as a Recording Controller, to the Thread Group.
  • Add a Listener, like the View Results Tree, to observe requests and responses.
  • Add an HTTP(S) Test Script Recorder to your Test Plan. Set the port (e.g., 8080 or 8888) that will be used for recording.

Configure Mobile Device for Proxy:

  • Connect both your PC and mobile device to the same Wi-Fi network.
  • On your mobile device, go to Wi-Fi settings and modify the network settings to use a manual proxy.
  • Set the proxy hostname to your PC’s IP address and the proxy port to the one you specified in JMeter.

Install JMeter’s Certificate on Mobile Device:

  • Find the ApacheJMeterTemporaryRootCA.crt file in JMeter’s bin folder.
  • Transfer and install this certificate on your mobile device. You may need to set a screen lock password if prompted.

Record Mobile App Traffic:

  • Start the HTTP(S) Test Script Recorder in JMeter.
  • Operate the mobile app as normal. JMeter will record the HTTP requests made by the app.
  • Stop the recording in JMeter once you’re done and save the Test Plan.

Run and Analyze the Test Plan:

  • Execute the recorded script in JMeter.
  • Use the View Results Tree Listener to analyze the responses of each request.

A video tutorial to make the process clearer:

Designing Effective Load Test Plans

Creating comprehensive load test plans is essential for obtaining meaningful insights into your mobile app’s performance. Here’s a step-by-step guide to designing effective load test plans using Apache JMeter:

  1. Identify Test Scenarios: Start by identifying the key user scenarios or workflows within your mobile app. These could include actions such as logging in, browsing products, making purchases, or interacting with multimedia content.
  2. Define User Behavior Profiles: Determine the distribution of user interactions based on factors like frequency, concurrency, and duration. This helps simulate realistic usage patterns during load tests.
  3. Configure Thread Groups: Thread Groups in Apache JMeter allow you to define the number of virtual users (threads) and their behavior. Adjust parameters such as ramp-up time and loop counts to simulate gradual increases in user load.
  4. Select Appropriate Samplers: Samplers represent different types of requests sent to the server, such as HTTP requests for REST APIs or JDBC requests for database interactions. Choose the relevant samplers based on your mobile app’s architecture and functionalities.
  5. Add Timers and Logic Controllers: Timers help introduce delays between user actions, mimicking real-world user behavior. Logic Controllers enable conditional and iterative execution of test elements, enhancing test realism and flexibility.
  6. Configure Assertions: Assertions verify the correctness of server responses, ensuring that the mobile app functions as expected under load. Define assertions to validate response status codes, content, or performance thresholds.
  7. Set Up Listeners for Result Analysis: Listeners capture and display test results in various formats, including tables, graphs, and summary reports. Choose appropriate listeners to monitor key performance metrics such as response times, throughput, and error rates.

Executing and Analyzing Load Tests

Once your load test plan is configured, it’s time to execute the tests and analyze the results. Follow these steps to execute load tests using Apache JMeter:

  1. Start the Test: Run the load test plan within Apache JMeter by clicking the “Start” button. Monitor the progress as virtual users simulate user interactions with the mobile app.
  2. Monitor System Resources: Keep an eye on system resource utilization during load tests, including CPU, memory, and network bandwidth. Excessive resource consumption may indicate performance bottlenecks that require attention.
  3. Collect and Analyze Results: After the load test completes, review the results collected by Apache JMeter’s listeners. Pay attention to performance metrics such as response times, latency, throughput, and error rates. Identify any anomalies or areas for improvement.
  4. Generate Reports: Apache JMeter offers built-in reporting capabilities to generate comprehensive test reports in formats like HTML, CSV, or XML. Share these reports with stakeholders to communicate test findings and recommendations effectively.

Conclusion

So, after understanding the complete process, we can conclude certain benefits linked with JMeter mobile performance testing:

  • Zero investment since it is an open-source tool!
  • Accessible on both Android and iOS devices.
  • The simplest and most efficient tool to check mobile performance.
  • It is very user-friendly and has an interactive UI.

Hopefully, after going all through this guide, you will be capable of recording a JMeter script for mobile performance testing.

FAQs

How to Test a Mobile Application ? [A Detailed Guide]

As smartphones become more and more important in the world of mobile app development, developers and testers play key roles in shaping the landscape. Even though there are millions of apps on the market, only a few are able to stand out. In this very competitive field, coming up with new ideas is only the beginning. Making sure applications work perfectly becomes the most important aspect of success.

What is mobile application testing?

Mobile application testing (MAT) explores the complex realm of making sure mobile-optimized software applications run smoothly on a variety of platforms and conditions. It’s a complex field with many different technical nuances.

Tests for functionality:

Non-Functional Testing:

  • Confirming that the application conforms with rules regarding accessibility for people with impairments.
  • Testing an app’s functionality and adapting its content for various linguistic and cultural contexts is known as localization.
  • Assessing how easy and comprehensive the processes are for installing and uninstalling apps.
  • Monitoring and enhancing an app’s effect on the battery life of a device.

Technical Details:

  • Automation: For effective and scalable testing, use automated testing frameworks and tools like Appium, XCTest, and Espresso.
  • Device Labs and Cloud-based Testing: Without being constrained by physical space, testing can be done on a variety of devices and configurations by leveraging cloud services and hardware emulation platforms.
  • Testing APIs: App programming interfaces (APIs) that drive the functionality of mobile apps are validated.
    Performance Optimization Techniques: Code profiling and memory leak detection are two techniques that can be used to improve the stability and responsiveness of apps.

Extra Things to Think About:

  • Security Testing Tools: To find security flaws and possible code injection threats, use specialized tools like Burp Suite and MobiSec.
  • Testing procedures should be integrated into CI/CD pipelines for quicker feedback and better quality throughout the development lifecycle. This is known as continuous integration and continuous delivery, or CI/CD.
  • Emerging Technologies: Modifying testing protocols to account for new technologies such as mobile app integration of artificial intelligence (AI), virtual reality (VR), and augmented reality (AR).

Testing mobile applications necessitates a thorough knowledge of a variety of technical topics, reliable testing procedures, and ongoing adjustment to the constantly changing mobile environment. Testers can guarantee great mobile app experiences for users across a wide range of devices and levels of complexity by learning these subtleties.

Step#1: Know the mobile application testing essentials

Device and Platform Landscape:

  • Fragmentation: Android’s diverse device and OS fragmentation remains a challenge. 2023 data shows Android 13 adoption is still slow, with older versions like Android 11 and 12 dominant. Testing across a representative range of devices and OS versions is crucial.
  • iOS Evolution: While iOS fragmentation is minimal, the rapid release cycle presents challenges. Ensure your testing strategy accounts for the swift adoption of new iOS versions among a large user base.
  • Emerging Platforms: Consider the growing importance of wearables, foldable phones, and gaming consoles for specific app categories.

Connectivity and Performance:

  • Network Fluctuations: Test app performance under various network conditions (Wi-Fi, cellular data, varying bandwidths) to mimic real-world user experiences.
  • Battery Drain: Battery optimization is a key user concern. Implement battery consumption testing tools and techniques to identify and address power-hungry elements.
  • Location-Based Services: Apps relying on GPS or other location services require thorough testing in different geographical areas and network conditions.

Security and Privacy:

  • Data Protection: With privacy regulations like GDPR and CCPA in place, robust data security testing is paramount. Utilize security testing tools and strategies to identify vulnerabilities and ensure data-handling compliance.
  • API Security: APIs powering mobile apps require dedicated security testing to prevent unauthorized access and potential data breaches.
  • Biometric Authentication: Integrate testing for features like fingerprint and facial recognition, including potential spoofing attempts and accessibility considerations.

Usability and Accessibility:

  • Touch and Gesture Control: Thoroughly test intuitive touch and gesture interactions to ensure a smooth and responsive user experience.
  • Accessibility Compliance: Ensure apps are accessible to users with disabilities by adhering to WCAG guidelines and testing with assistive technologies.
  • Localization and Internationalization: For global audiences, test app functionality and content adaptation for different languages and cultural contexts.

Automation and Emerging Trends:

  • AI-powered Testing: Explore the potential of AI-powered testing tools for automated script generation, anomaly detection, and intelligent test selection.
  • Cloud-based Testing Platforms: Leverage cloud-based testing services to access a vast range of devices and configurations for efficient and scalable testing.
  • Performance Optimization Techniques: Utilize performance profiling tools and code analysis techniques to optimize app resource consumption and responsiveness.

Types of Mobile Application

The type of mobile app you are testing plays a very important role in defining your testing process. So, be very clear about which type of mobile app you are going to test. They are largely categorized into three different types:

  1. Mobile web applications: These are the web pages that you open through the mobile browser.
  2. Native Apps: These are the applications that are developed for one particular platform. (iOS, Android, Windows 10 Mobile, Tizen, BlackBerry).
  3. Hybrid: It is an amalgamation of mobile web apps and native apps.

Step #2: How to strategize your mobile application testing efforts?

Navigating the intricate terrain of mobile app testing requires a solid roadmap. A well-defined strategy is the compass that guides your efforts, ensures efficiency, and ultimately delivers exceptional app experiences. Here are some key steps to conquer the mobile app testing mountain:

1. Define Your Objectives:

  • What are you testing for? Identify core goals, whether it’s functionality, performance, security, or user experience.
  • Who are your users? Understanding their demographics, devices, and usage patterns helps prioritize testing scenarios.

2. Chart Your Course:

  • Choose your testing types: Functional, non-functional, compatibility, security—decide which types align with your objectives.
  • Select your tools and techniques: Utilize automation frameworks like Appium, XCTest, or cloud-based testing platforms for scalability.

3. Conquer Device Diversity:

  • Map your device landscape: Consider popular devices, OS versions, and screen sizes relevant to your target audience.
  • Embrace emulators and simulators: Leverage hardware emulation platforms for efficient testing across a wide range of configurations.

4. Focus on the User Journey:

  • Plan user flow testing: Define and test key user scenarios to ensure a smooth and intuitive experience.
  • Integrate usability testing: Gather user feedback at different stages to identify and address potential usability issues.

5. Prioritize and Optimize:

  • Apply risk-based testing: Focus on critical functionalities and high-risk areas based on potential impact and likelihood of failure.
  • Optimize your test suite: Continuously refine and maintain your test scripts for efficiency and effectiveness.

6. Embrace Automation:

  • Automate repetitive tasks: Free up resources for manual testing by automating regression testing and basic functionality checks.
  • Explore AI-powered tools: Consider utilizing AI-powered testing solutions for intelligent test selection and anomaly detection.

7. Build Bridges and Collaborate:

  • Communicate effectively: Share testing plans, progress reports, and findings with developers and stakeholders.
  • Foster a culture of collaboration: Encourage feedback loops and joint problem-solving for continuous improvement.

8. Embrace the Climb:

  • Stay updated on trends: Keep your finger on the pulse of new technologies and emerging testing methodologies.
  • Adapt and refine: Be flexible and adjust your strategy based on project needs, user feedback, and industry advancements.

Step #3: How To Test?

Choosing between mobile manual and automated testing involves weighing the strengths of each approach. Manual testing proves invaluable for exploratory scenarios, usability, and tasks requiring human intuition, especially during initial testing phases and UI/UX evaluation.

Automated testing excels in repetitive, high-volume test scenarios, offering efficiency, consistency, and swift feedback. Striking a balance between these methods is key to meeting dynamic testing needs, leveraging manual testing for qualitative insights and automated testing for streamlined, repetitive tasks. The decision hinges on project specifics, emphasizing the harmonious integration of human expertise and automation efficiency.

Which is better – Emulators or simulators?

The choice between emulators and simulators in app testing depends on the specific testing needs, goals, and context of the project. Both emulators and simulators have their advantages and limitations, and the decision often comes down to the nature of the testing requirements. Let’s explore the key differences and considerations:

Emulators:

  1. Advantages:
    • More Realistic Environment: Emulators provide a more realistic representation of the actual device environment, including hardware and software.
    • Support for Native Apps: Emulators are better suited for testing native applications that interact closely with device hardware.
  2. Considerations:
    • Resource Intensive: Emulators can be resource-intensive, requiring significant system resources to run multiple instances for different devices.
    • Slower Execution: Emulators may run slower than simulators, especially when simulating complex device interactions.
  3. Use Cases:
    • Emulators are preferred for testing scenarios that require a closer approximation to real-world device behavior, especially for native applications or cases where hardware features need to be emulated.

Simulators:

  1. Advantages:
    • Faster Execution: Simulators generally run faster than emulators, making them more efficient for quick testing iterations.
    • Easier Setup: Simulators are often easier to set up and use, making them accessible for rapid testing in various scenarios.
  2. Considerations:
    • Less Realistic Environment: Simulators may not fully replicate the complexities of real device hardware, leading to potential differences in behavior.
    • Limited Hardware Interaction: Simulators may not accurately simulate certain hardware interactions, limiting their effectiveness in certain testing scenarios.
  3. Use Cases:
    • Simulators are suitable for scenarios where the focus is on quick testing iterations, broad compatibility testing, or when the specific hardware characteristics are less critical.

Considerations for Choosing:

  1. Testing Goals: Consider the specific goals of your testing. If you need a highly accurate representation of real device behavior, especially for native apps interacting with hardware, emulators may be more suitable.
  2. Resource Constraints: Assess your system resources. Emulators tend to be more resource-intensive, and if you need to run multiple instances simultaneously, simulators might be a more practical choice.
  3. Testing Speed: If rapid testing iterations are a priority and you can tolerate some level of abstraction from real device behavior, simulators may offer quicker testing cycles.
  4. Application Type: The nature of your application (web, hybrid, or native) and its dependencies on specific hardware features may influence the choice between emulators and simulators.

Cloud-based testing of the mobile application

Scalability: Cloud-based testing ensures thorough coverage across a variety of operating systems, device models, and configurations by giving access to a wide range of real devices and emulators/simulators.

Efficiency: By reducing testing cycles and speeding up time-to-market, testing teams can run tests concurrently. Teams that are geographically separated can collaborate thanks to the cloud’s remote accessibility, which guarantees consistent testing environments.

Flexibility: By automating the testing process and boosting overall efficiency, cloud-based testing enables smooth integration with CI/CD pipelines. This flexibility ensures this adaptability to the shifting demands of development projects.

Cost-effectiveness: Businesses can save money by avoiding the requirement for large physical device labs and related maintenance expenses. Because cloud platforms can scale on demand, teams can assign resources according to project requirements and minimize costs.

Real-world Network Conditions: Cloud-based testing makes sure that programs are assessed in real-world network scenarios, which helps to find problems with responsiveness and performance. This realism improves the applications’ dependability in a range of use cases.

Accessibility: Cloud-based testing enables testing teams to work together more easily by facilitating remote device access and guaranteeing consistent testing environments across geographic boundaries.

Integration: To facilitate automated testing procedures, the cloud offers smooth integration with CI/CD pipelines. This integration supports a continuous and more effective testing methodology while also streamlining workflows.

Thorough Coverage: Testing teams can attain thorough coverage by utilizing a varied array of cloud-based devices, guaranteeing that applications function flawlessly and are compatible with a broad spectrum of devices and configurations.

Which one is better—mobile manual or automated testing?

The choice between mobile manual and automated testing depends on project requirements. Manual testing is effective for exploratory testing, usability, and scenarios requiring human intuition. It’s beneficial for initial testing and UI/UX evaluation.

On the other hand, automated testing excels in repetitive, high-volume test scenarios, ensuring efficiency, consistency, and quicker feedback. Combining both approaches optimally addresses the dynamic testing needs, leveraging the strengths of manual testing for qualitative assessment and automated testing for repetitive, time-intensive tasks.

Ultimately, the decision hinges on the project’s nature, timeline, and the balance between human insight and the efficiency of automation.

Step #2: Stages of Mobile application testing

Let us now learn about the various stages of the mobile application. Here is the list:

1. Documentation Testing

The beginning of mobile testing takes place during documentation testing, the preparatory stage.
Even before the development of the app starts, the testers are handed over screen layouts, navigational charts, and other requirements that are obscure in the design.
In this phase, you need to analyze the requirements for wholeness and discrepancy. All the discrepancies found in this stage are required to be resolved before the development begins
The documentation phase marks the creation and analysis of requirements (specification, PRD), Test Cases, a test plan, and a traceability matrix.

2. Functional testing

It helps you test whether your mobile application works as expected and in accordance to the requirement specifications. While you are performing functional testing for your app, keep the following factors in mind:

  • Business functionality of your app like banking, social networks, ordering and delivery of food, education, tickets, the game industry, etc.
  • Target audiences like companies, students, entrepreneurs, etc.
  • Distribution channels like Google Play, direct delivery, App Store, etc.

The basic validations that you need to test in functional testing are:

  • Installing and running the application
  • Fields testing
  • Business functionalities testing
  • Interruptions testing
  • Constant user feedback testing
  • Update testing
  • Device resources testing

3. Usability Testing

Usability testing ensures that your application offers convenient browsing to your customers and creates an intuitive interface that abides by industry standards. It promises fast and easy-to-use applications. The usability of your application is judged based on these three basic criteria:

  • Satisfaction
  • Efficiency
  • Effectiveness

4. UI (User Interface) testing

User Interface (UI) testing ensures that your application’s GUI meets all the required specifications.

5. Compatibility (Configuration) testing

Compatibility (Configuration) testing validates the optimal performance of your application on different devices based on their size, screen resolution, version, hardware, etc. Compatibility testing also takes care of

  • OS Configuration
  • Browser Configuration
  • Database Configuration
  • Device Configuration
  • Network Configuration

Compatibility testing can be further divided into
Cross-platform testing: Testing your mobile application compatibility with different operating systems: Windows, iOS, Android, BlackBerry, etc.
Cross-browser testing:    Testing your mobile application compatibility in different browsers (Google Chrome, Mozilla Firefox, Opera Mini, etc.
Database testing:    Testing your mobile application compatibility in different database configurations: DB2, Oracle, MSSQL Server, MySql, Sybase.
Device Configuration testing:  Testing your mobile application compatibility on different devices based on

  • Device type: smartphone, tablet, etc.
  • Device configuration: processor type, RAM, battery capacity, screen resolution, etc.

Network configuration testing:   Testing your mobile application compatibility in different network configurations (TDMA, GSM) and standards (2G, 3G, 4G).

6. Performance testing

Performance testing helps you test your application’s reaction and constancy under a specific workload.
Performance testing attributes

  • Load Testing: Done to check the application’s behavior under normal and extreme loads.
  • Stress Testing: Done to test the application’s ability to sustain stress. It ensures that your application is capable of bearing undue stress.
  • Stability Testing: Tests if your application can work well for a longer period within normal loads.
  • Volume Testing: Conducted to test your application’s performance when subjected to a huge volume of data.
  • Concurrency testing: Tests the performance of your application when multiple users are logged in.

7. Security testing

Security testing validates the security features of your application. It also analyzes the risks of application hackers, protection, viruses, and unauthorized access to extremely sensitive data.

8. Recovery testing

Recovery testing tests the ability of your application to withstand and successfully recover from possible and potential failures caused by software issues, hardware failures, or communication problems.

9. Localization testing

Localization testing tests the adaptability of your application for a specific target audience based on cultural specifics.

10. Change-related testing

Finally, when complete testing is done, you might find some bugs, resulting in a certain piece of code to change to eliminate those bugs. After these code changes you again need to carry out a round of testing. This basically includes:

  • Re-testing or confirmation testing: to test that all the detected defects are successfully fixed.
  • Regression testing: sometimes, code changes can even disturb the functioning of existing and properly working functions. Regression testing is done to ensure that the new changes did not lead to the appearance of new bugs.

11. Beta testing

 Beta testing is done by real users on real devices to validate usability, functionality, compatibility, and reliability.
Before pushing your app forward for beta testing, take into account the following factors

  • A number of testing participants
  • Testing duration
  • Shipping
  • Demographic coverage
  • Testing costs

Beta testing is a good investment, ensuring a better quality of your mobile app.

12. Certification testing

Certification testing tests whether your application meets the standards, licensing agreements, terms of use and requirements of stores like the App Store, Google Play, and Windows Phone.
How to Test a Mobile Application

Challenges of mobile application testing

  • Device Fragmentation: Diverse devices and OS versions, with Android leading the chaos.
  • Network Fluctuations: Consider spotty coverage, varying bandwidths, and offline scenarios.
  • Security & Privacy: Data breaches, API vulnerabilities, and privacy regulations demand vigilance.
  • Performance woes: battery drain, resource hogging, and lag under diverse conditions.
  • Usability & accessibility: touch and gesture control, screen sizes, and catering to diverse abilities.
  • Automation Hurdles: Balancing automation benefits with manual testing finesse.
  • Keeping Up with Trends: New technologies like AR/VR and AI integration introduce new testing needs.
  • Resource Constraints: Balancing testing needs with budget and time limitations.
  • Communication & Collaboration: Bridging the Gap between Testers, Developers, and Stakeholders.
  • Constant Testing Cycle: Adapting to rapid release cycles and evolving user expectations.

Tips to test mobile application

Preparing for the Pre-Test:

  • Understand Your App Completely: Prior to testing, become an expert by studying the architecture, functionalities, and possible points of failure.
  • Think Mobile First: Give up thinking like a desktop! Think about context-specific features, smaller screens, and touch interactions.
  • Chart the Hardware Environment: To customize testing, determine your target devices, operating systems, and hardware constraints.

Testing Recommended Procedures:

  • Accept Real Devices: For more accurate testing and bug finding, give real devices precedence over emulators.
  • Tool Selection Intelligence: Select testing tools according to your requirements and level of experience, not just what’s popular.
  • Cloud Testing Advantage: For effective testing across a range of devices, take advantage of cloud-based testing platforms.
  • Open Developer Secrets: For in-depth investigation and analysis, make use of developer options and hidden debugging menus.
  • Emulation Allies: Use emulators and simulators efficiently to find bugs early and conduct rapid iterations of testing.

Efficiency and Optimisation:

Performance Under the Microscope: Carry out thorough performance tests with a range of load levels, device configurations, and network conditions.
Automation Balance: For thorough coverage, strike a balance between the effectiveness of automation and the dexterity of manual testing.
Boost Your Beta Testing: Before launching, use beta testing to find usability problems and obtain feedback from actual users.

Additional Tips:

Make the Most of Your Time: Set aside specific time for each testing stage, including performance, security, and functional testing.
Consider accessibility: By using accessibility testing techniques, you can make sure your app works for a range of skill levels.
Keeping up: Accept lifelong learning, investigate novel testing instruments and techniques, and adjust to changing fashions.
It’s All About Communication: To guarantee seamless testing and problem-solving, work well with developers, designers, and stakeholders.
Security Highlight: Never disregard security testing! To protect user data and the integrity of your app, make use of security tools and best practices.

Popular Mobile app testing tools

For functionality testingAppium, Selendroid, Robotium, Ranorex.
For usability testing: Reflector, User Zoom,  Loop.
For mobile application interface testing: iMacros, FitNesse, Jubula, Coded UI,  LoadUI.
For compatibility testing:  CrossBrowserTesting, BrowserStack,  Browsera, Litmus,  Rational ClearCase,  Ghostlab.

For performance testing: Apteligent, NeoLoad,  New Relic.
For Security Testing: OWASP Zed Attack Proxy, Retina CS Community, Google Nogotofail, Veracode,  and SQL Map.
Hope this article might have given an overview of mobile application testing. Stay tuned for more such informational articles.

How to Find Bugs in Game Testing?

In the dynamic world of game development, where creativity meets technology, one crucial aspect often goes unnoticed: game testing. While the spotlight shines on captivating visuals, immersive storylines, and thrilling gameplay, the game testers work tirelessly behind the scenes to ensure a smooth and enjoyable experience for players.

Game testing is vital in the development process, serving as the quality control checkpoint that guarantees a polished and bug-free game. Game testers meticulously play through every aspect of the game, identifying and reporting any glitches, errors, or inconsistencies that might hinder the player’s experience.

But the significance of game testing extends far beyond simply fixing bugs. It’s a vital tool for:

  • Ensuring game stability and performance: Testers identify and report issues that could disrupt gameplay, such as crashes, freezes, and lag. This ensures players a smooth and immersive experience, preventing frustration and negative reviews.
  • Balancing gameplay: Game testing helps maintain a balance in gameplay mechanics, ensuring that no element is too powerful or weak. This creates fair and engaging gameplay for players of all skill levels.
  • Identifying usability issues: Testers provide feedback on the game’s user interface and controls, ensuring they are intuitive and easy for a wider audience. This makes the game more accessible and enjoyable for everyone.
  • Enhancing game quality: By proactively addressing issues and collecting player feedback through testing, developers can continuously improve the game’s quality and polish, keeping players engaged and coming back for more.

In essence, game testing bridges the developer’s vision and the player’s experience. The meticulous attention to detail and relentless pursuit of quality ensure players immerse themselves in a world free from distractions and frustration, allowing them to enjoy the game’s true potential.

testbytes-mobile-app-testing-banner

Game testing is crucial for ensuring a smooth and enjoyable user experience. Here are some unconventional methods, alongside examples, to uncover hidden bugs and defects:

Break the Rules:

  • Example: Instead of saving the game at designated checkpoints, try saving mid-action or in unusual locations. This might reveal issues with save functionality.
  • Example: Repeatedly press buttons rapidly or try to perform actions in illogical sequences. This can expose flaws in game logic or responsiveness.

Use Unconventional Methods:

  • Example: Play the game in reverse order or skip crucial steps. This can highlight missing prompts or inconsistencies in the game flow.
  • Example: Try walking through walls or interacting with objects in unintended ways. This can uncover collision detection problems or unintended consequences.

Test All Functions Everywhere:

  • Example: Try using all available items and abilities, even in seemingly irrelevant situations. This might reveal hidden interactions or unintended effects.
  • Example: Explore every corner of the game world, including seemingly inaccessible areas. This can expose missing textures, visual glitches, or hidden secrets.

Test Beyond the Scope:

  • Example: Play the game with minimal inputs or user actions. This can highlight issues with AI behavior or game balance.
  • Example: Play the game with maximum inputs, such as engaging in intense combat or triggering multiple events simultaneously. This can expose performance bottlenecks or stability problems.

Appoint New Testers for Each Build:

  • Example: Rotating testers with fresh perspectives can help identify bugs experienced testers may overlook.
  • Example: Different testers have different playstyles that can reveal diverse bugs and defects.

Examine Effects:

  • Example: Play the game with modified settings, such as changing graphics quality or audio options. This can reveal compatibility issues or performance problems.
  • Example: Run the game for extended periods or under extreme conditions, such as low battery or high temperatures. This can expose stability issues or memory leaks.

Test with Different Peripherals:

  • Example: Test the game with controllers, keyboards, and other input devices. This can unearth compatibility issues or control problems.
  • Example: Test the game on different audio systems and headsets to ensure optimal sound quality and compatibility.

Importance of Exploratory Testing in Game Testing

Unlike its scripted counterpart, exploratory testing embraces the unknown, inviting testers to venture beyond the confines of written test cases and delve into the depths of the game world with a curious spirit.

In game development, where captivating experiences and flawless gameplay reign supreme, exploratory testing emerges as a vital force. Unlike its scripted counterpart, exploratory testing embraces the unknown, inviting testers to venture beyond the confines of written test cases and delve into the depths of the game world with a curious spirit. This freedom fosters an environment of discovery, uncovering hidden bugs and defects that might otherwise remain undetected.

Here’s why exploratory testing is an integral part of ensuring a smooth and bug-free gaming experience:

  • Uncovers the Unexpected: By exploring the game world in diverse ways, testers can uncover hidden bugs that might not be triggered by following predetermined test cases. This includes triggering unexpected events, trying illogical combinations of actions, and pushing the boundaries of the game’s mechanics.
  • Enhances Creativity and Problem-Solving: Exploratory testing encourages testers to think creatively and approach the game from different perspectives. This leads to a deeper understanding of the game mechanics and a more comprehensive identification of potential issues.
  • Improves Game Quality: By proactively discovering and resolving bugs early in the development process, exploratory testing significantly improves the game’s overall quality. This reduces the risk of encountering critical bugs later in development, saving time and resources.
  • Adapts to Changes: Unlike scripted test cases that become obsolete with game updates and changes, exploratory testing is inherently adaptable. Testers can adjust their approach based on new features and modifications, ensuring the testing process remains relevant and practical.
  • Focuses on User Experience: Exploratory testing emphasizes the user’s perspective. By playing the game in a way that simulates a real player’s experience, testers can identify issues that might hinder immersion or disrupt the gameplay flow.

Beta Testing! It’s Important!

Beta testers are typically given access to an unfinished version of the game and are encouraged to play it as much as possible and report any bugs they find. This allows developers to identify and fix bugs before the game is released, which can help to improve the overall quality of the game.

In addition to finding bugs, beta testing can also help to:

  • Get feedback from players: Beta testers can provide valuable feedback on the game’s gameplay, graphics, and overall feel. This feedback can help developers make changes to the game before it is released.
  • Build hype: Beta testing can help to build hype for a game by giving players a sneak peek at what to expect. This can help to generate excitement and anticipation for the game’s release.
  • Identify potential problems: Beta testing can help identify potential problems with the game that may not have been apparent during development. This can help developers fix these problems before the game is released.

There are a few different ways to offer beta versions of games. Some developers release open betas, which are available to anyone who wants to play them. Others release closed betas, which are only available to a small group of people, such as friends, family, and members of the press.

Beta testing can be a great way for gamers to get their hands on a new game early and help to make it better. However, it is important to remember that beta versions of games are not always finished and may contain bugs. If you are considering participating in a beta test, it is important to be aware of the risks involved.

Conclusion

While the thrill of the game captivates players, the meticulous efforts of game testers often remain unseen. Their dedication goes beyond simply identifying bugs; it encompasses ensuring stability, balancing gameplay, and crafting a seamless experience that engages and enchants.

From unconventional testing techniques to collaborative beta initiatives, game testers bridge the gap between developer vision and player expectations. They transform raw potential into captivating journeys, ensuring that every player can truly immerse themselves in the world of the game.

If you would like to test your game, talk to us. Our solution offering is not a rigid one. We have resources and plans that can cater to any needs.

How to test a taxi booking app like Uber?

How to test a taxi booking app like Uber? They are extremely complex and demand high data security.  On the top, they have to offer unvarying stability and high UX. If you are thinking about testing. you need assistance from someone who knows what they do.
However, some might be thinking that they have put a lot of effort when it comes to the development of the app, they have extremely skilled developers and they can carry out the process with ease.
But remember one thing, user perspective is what matters, your developers might be partial, and this might be has a huge weightage considering the competition that you are going to face and the huge amount of money hat’s been invested.
Testing is indeed extra cost, but the amount of risk it mitigates is immense.
But the question prevails! How to test a taxi booking app like Uber?
before we get into that, let’s know about the need in detail.

Why thorough testing is needed
Every customer user app needs thorough testing to succeed in the market. No customer would be willing to use a non-secure or slow app. In this digital age, competition is very high and most likely you will not get a second chance. Here are some reasons why a thorough and meticulously planned testing effort is needed for a taxi booking app:

  1. Security of Customer/Driver Data: the app would include the customer’s and drivers’ personal data (PII). Any security breach in this area can lead to legal complications for the app company and owner. 
  2. Integrated Payment and Wallets: Most booking app would have an integrated payment gateway to enable easy payment for the rides. These gateways and payment options need to be tested minutely to make sure the clients’ money is safe. 
  3. Easy to Use UI: The app should be designed in such a way that different types of users including aged people and people who are new to the internet can use the app with ease. 
  4. Accuracy of data: The app needs to be tested to ensure data accuracy in multiple points. This will include the data of the customer, driver, the trip details, the offers, the fares, the distance calculations, and much more. The accuracy of every data displayed on the app needs to be verified for its correctness. 

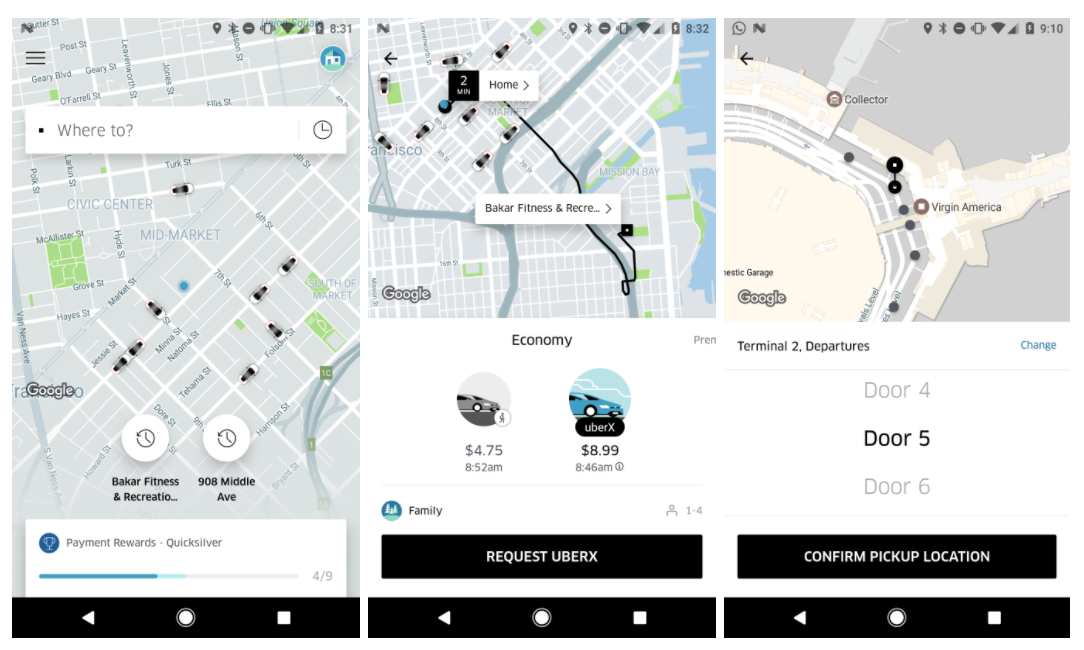
Uber App Screen
What to test in a taxi booking app?
Now that we have understood why testing is so important for the taxi booking app, let us look at some important focus areas and test points. While this list is not exhaustive, it will give you a fair idea of how to get started. Feel free to add points as per the app and requirements in hand.
From a Customer Perspective

  1. Customer Data: The customer data in the app needs to be tested to ensure it is accurate. This will include the personal details, the payment details (if they wish to save), the trip details, favorite pick-up and drop location, the offers available, and more.  
  2. User and driver registration: Registration for both customers and drivers needs to be tested to check the data is getting saved corrected in the server. The users and the drivers should be able to add, edit, and delete their details as well. 
  3. Map Related and live tracking: Testing the map related functionalities are very critical for any taxi booking app. This includes opening the app in the current location, finding cabs in the vicinity, and live tracking of the cab movement before and after confirming the booking. 
  4. Time Tracking: The live movement of the cab should be linked to the time taken to reach the destination or time to reach the customer. These values need to be constantly changed to verify the functionality is working fine. This can be tested by simulating a moving vehicle and then calculating the location and time. A critical requirement here would be the refresh. This needs to be decided by the business, ideally, it should be 1 sec or less, so the customer does not see a lag. But based on the system design and the load the business may decide for 2-5 secs also. 
  5. OTP: Most apps will have an OTP generation system for authenticating the user at the time of registration and even when boarding a cab. The OTP needs to be validated against the customer data with valid and invalid entries. The number of retries allowed is another important yet overlooked point. If the OTP is regenerated, the system should accept only the latest OTP and none of the previous ones should be accepted. Ignore this if not applicable to your app. 
  6. Wallet Transactions and history: Most apps will have an option to load money into the wallet using a pre-established payment gateway. The wallet needs to be checked for money top-up, balance, transaction history, refund, and offers. The same will be true for other payment options like debit card, credit card, UPI, and other options as per the app.
  7. Trip – distance and time: The details regarding the trip needs to be tested. This will include the distance between the pick-up and drop location. The way chosen should be the shortest way with the least traffic based on the congestion points in the location. The estimated time of travel and other details of the trip as per the business needs. 
  8. Trip Modification: The user should be allowed to make changes to the trip. This will include cancellation and changing the destination point. In the case of the latter, the trip distance, time, amount, and route should change accordingly. Check if there is a limit on the number of times the user can make the changes. If there is a limit like 2 or 3 then it needs to be tested that the 4th change is rejected by the system. 
  9. Cab Sharing: Most of the apps would allow the sharing of the cab between people. In this case, it is important to test the distance between the shared pick-up points. This limit must be set by the business. Check with the requirements and then test to make sure the sharing pick-ups are scheduled within that range. 
  10. Driver and cab details: The customers should be able to view all the driver details and his previous customer ratings. They should also be able to see the cab number and the model along with the driver’s contact number. As per the app, these may contain driver pictures as well. 
  11. Push messages and SMS: Every app has its own requirements for SMS, email, and push notifications. These will include notifications for booking confirmation, cab arrival, driver details, OTP, trip completion, the amount payable, cancellation request, feedback request, and others. Each of these needs to be tested to make sure they are time-bound as per the business requirements.
  12. Search: One of the most important aspects of the map search. This will include searching for cabs in the current location and location as per the user’s interest. Suggestions for the location once the user starts typing will be good to have feature. The search should show the cabs available in the area along with a route map. It should inform the customer of the distance and time to the nearest cab. 
  13. Offers: Every now and then, the company may come with offers and discounts for all or specific customers. The offer code and their validity need to be tested along with any specific requirements for availing the offers. The amount being reduced after availing the offer is another test area. 
  14. Feedback and Rating system: The app should include a feedback and rating system for both the customer and the driver. They should be able to give feedback and ratings to each other. These ratings need to be analyzed to improve the drivers and the services provided.
  15. Customer Support and Escalation: The app will have customer support and escalation mechanism in place. This can include support through email, call, or chat. Each must be tested along with the different escalation levels. 

From a Driver Perspective

  1.  Driver Data: Like the customer data, the app will also contain the driver data, his incentive, the number of trips undertaken, the star ratings (if available), his payment schedule, and other details. This again needs to be tested to make sure the mapping in the database or server is correct and the queries used to fetch the data is as expected. 
  2. Trip Visibility and Options: The driver should be able to see the customer search within a specific distance as per his current location as fixed by the business. He should have the option to accept or decline the trip as well. Once accepted the trip should be hidden for the other drivers. 
  3. Benefits and Trip history: Most drivers will be paid based on the number of trips they have undertaken, and the benefits would increase with the increase in the daily or weekly completed trip count. All these details along with the payment options and history should be available for the driver to verify. 
  4. Hiding Customer Personal Data: Customer data is very critical especially the phone numbers. This information need not be shared with the drivers. To contact the customers there should be a hotline number and the customer details should be hidden from the driver. 

Types of Testing 
For all the above test cases, there are different types of testing that will be done. Here is a list of these:

  1. Manual Testing: Critical business functionalities need to be tested manually. Manual testing is also needed in cases where the team does not have the time or money for automation or when the automation feasibility for the features is low. 
  2. Automation Testing: The app will have a lot of validations. If the testing is to be done only once, then automation is not required. But if there are likely to be regular updates or new features added, it would be better to have an automation suite in place to reduce the future testing efforts and save time as well. 
  3. Security Testing: The app server or database contains personal data of the customers and the drivers. This will include the names, address, phone number, mobile number along with the payment details that can include the bank or card numbers. The security of this data is very important. The app should be safeguarded against external attacks. 
  4. Performance Testing: Based on the anticipated load performance testing needs to be done so that the search, map loading time, and other transactions are well within the SLA at peak and off-peak loads.  Based on these results the business will decide to scale-up the infrastructure if needed.
  5. Integration Testing: There are several systems involved in the app. This includes the GPS tracking or mobiles of the driver and customer, the database or server, and the booking app. The integration between these systems needs to be verified for accuracy and data flow. 
  6. DB testing: Customer and driver details along with all the trip information are store in the database. Hence, DB testing is imperative. While testing we need to ensure that the basic operations like adding a record, editing a record, deleting a record, fetching the record are being performed as per the expectation. 
  7. Exploratory Testing: Exploratory testing is a kind of informal testing in which the user would just explore the application trying to go through all the different pages and verify that nothing is broken. 
  8. Responsive Testing: Responsive testing needs to be done to ensure that your taxi booking app renders itself well in devices with different screen sizes and resolution. With so many new devices entering the market and the extensive usage of the internet, responsive testing of the app needs to be taken very seriously. 
  9. UAT Testing: The ultimate testing for any app or software must be the UAT or User Acceptance Testing. UAT gives the usage pattern and the most frequently used areas of the app. This will be helpful in deciding the future features of the app. 

app crash
How do I test the Uber app?
Apps like uber are bound to be installed across many devices with varied OS versions.  Performance testing has to be done at intervals to make sure that the app is working fine and it has what it takes to meet up customer expectations.
While testing make sure that

  • Complete assessment of the business requirement of the apps
  • Identify the important performance testing metrics
  • Create perfect and realistic test scenarios
  • Analyze and validate the test result and measurements
  • Preparation of reports that can also be useful for developers.

Tips for testing apps like uber

  • Apart from the normal workflow of the registration module, you must also make sure that social media login and integration is carried over the system with ease.
  • Check email authentication process to make sure that your domain will not be marked as spam
  • Make sure that there are unnecessary links attached to the mail send by the system
  • Make sure that the user is able to differentiate auto-generated messages
  • Make sure that the geographic information system (GIS)  is in sync with the system and functionalities
  • Check the OS compatibility of the app with various versions
  • Make sure that the information provided to the user is concise and precise
  • Proper localization testing needs to done to make sure that it’s not hurting any sentiments
  • Real drivers and passengers have to be used for testing rather than a simulated environment
  • A payment gateway is integral for taxi booking apps. make sure that it doesn’t have any loophole and is working fine
  • Trace out all the security loopholes in the system
  • Test the authorization workflow and functionality
  • Gamification is indeed the star nowadays. Make sure that it’s in a way that will make the driver and the customer feel rewarded
  • Test the system in varied internet strength and load

Top 10 Taxi booking Apps

  1. Uber
  2. Lyft
  3. Ola Cabs
  4. Taxify
  5. DIDI
  6. Cabify
  7. Lecab
  8. Curb
  9. Gett
  10. GoCatch


Which are the tools that can be used for taxi booking app testing?
While the listed set of testing might be overwhelming, here is a list of tools available in the market to get you started.

  1. Appium and Appium Studio
  2. TestComplete
  3. Calabash
  4. Webload
  5. Zed Attack Proxy
  6. Android Debug Bridge
  7. Lambda Test
  8. Studio Press
  9. DBFit, SQLUnit
  10. Visual Studio Team Edition

Hope you have a fair idea now about how to test a taxi booking app now. This should be enough to get you started and rest you can improvise when you are at it. 

11 Easy Steps to Secure Your Website From Hackers

In this time of heightened cyber-attack you must be aware of how to secure website from hackers. Your website is an important asset to your business. It is very important to protect it from any kind of threat and hacking. Here are some ways that can help you protect your website from hacking.
1. Install security plugins
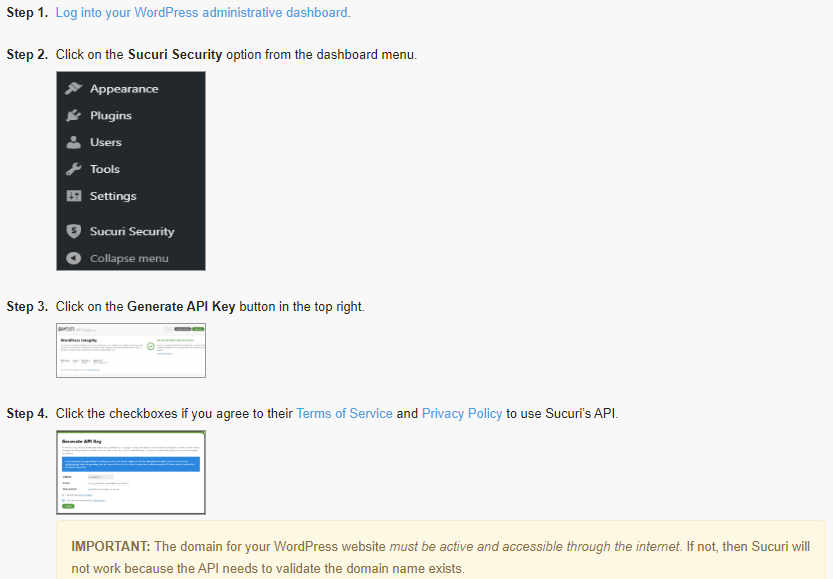
Install security plugins
If your website is built using a content management system, you can easily improve the security of your website using the plugins. Most of the CMS offer security plugins so that you can improve the security of your website.

Security plugins for WordPress:

  • iThemes Security
  • Bulletproof Security
  • Sucuri
  • Wordfence
  • fail2Ban

Security options for Magento:

  • Amasty
  • Watchlog Pro
  • MageFence

Security extensions for Joomla:

  • JHackGuard
  • jomDefender
  • RSFirewall
  • Antivirus Website Protection

These plugins prove helpful in barring security vulnerabilities. You can also opt for siteLock. It supports both CMS managed and HTML pages. SiteLocks does regular monitoring for all security loopholes including malware detection, vulnerability identification, active virus scanning, etc.
2. Use HTTPS
Use HTTPS
SSL (Secure Sockets Layer) certificate helps in secure-transfer of information amid the website and the server. There is a lot of secure information that we need to share through the websites.
The secure transaction ensures the end clients to freely transact their information without worrying about the treats the insecure transfer of sensitive information can bring.

Must Know : Top 10 WordPress Plugins For Developers and Testers

The security of your website plays a very important in today’s world unless your clients are satisfied and trust your security system, they will not share their sensitive information with you. SSL is an important way to convince your customers about the security of their information.
3. Keep your website platform and software up-to-date
Keep your website platform and software up-to-date
One of the main causes of security threats on the website is vulnerabilities in CMS’s extensible components. Many of these extensible components are open source, and hackers could easily detect the security vulnerabilities and take control and exploit your website.
To ensure the security of your website your CMS, plugins needs to be updated.
4. Make sure your passwords are secure
Make sure your passwords are secure
Making your password strong might not seem to be a very unique and dominant idea, but the fact is keeping your password strong plays a very important role. It is important that you keep your password strong.
It should be long enough, with special characters, numbers, letters, etc. Avoid keeping your password on the names of special people in your life and on special dates of your life. It gets easier for hackers to hack such a password.
Not only you, but your team should also follow these rules so that the hackers could not enter your system through any of your team member’s ID.
5. Invest in automatic backups
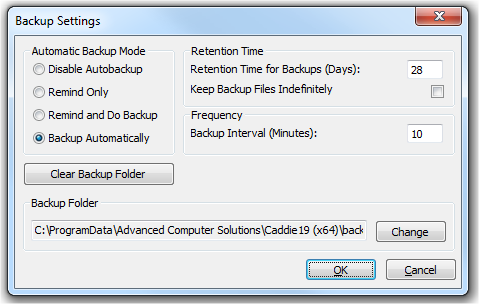
automatic backups
Even after following all the precautionary methods, there are still few chances of you getting attacked by hackers. The best way in such cases is to have a backup copy of your website. In case you do not have a backup copy, you might land lose everything.
Though data breaches are very stressful no matter what, having a backup can give you a levy to recover your website easily. But sometimes you might forget to back up your website, regularly and hence investing in the automatic backup can give you peace of mind.

Must Read : How to Find Bugs in Your App

The above steps are easy to follow and can even be followed by people with minimal technical knowledge, but here we move on to some more complicated ways to protect your website from hackers.
These advanced techniques might require a technically skilled person and also ensure a higher level of security from hackers.
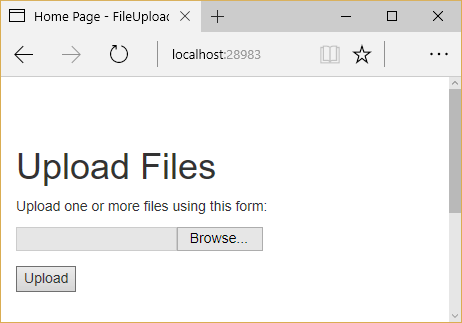
6. Be cautious while accepting file uploads.
Be cautious while accepting file uploads
Allowing uploads to your website can be pretty dangerous. Hackers can upload malicious files to your system and can gain access to your system, overwrite existing files, can bring your website down, etc. hence, it is very important to check the kind of files that are being uploaded to your system.
If not required, do not permit file uploads at all. But if it’s a necessity, do keep a check on it. The following points may help you to protect your website by the hackers.

  • Allow only specific file types to be uploaded to your system.
  • The above point can be easily defied by renaming the file. Hence it is highly recommended to use file type verification.
  • Set maximum file size and reject all the files over this size.
  • Scan files for malware. Use antivirus software to check all files before opening.
  • Use a system to automatically rename a file when uploaded to your system. In such a case hackers will keep looking for their file to accomplish their notorious intentions.
  • Do not include upload folder in the web root, it will keep hackers away from accessing your website using their uploaded file.
  • These steps can prove helpful in defending your website from file uploads risks.

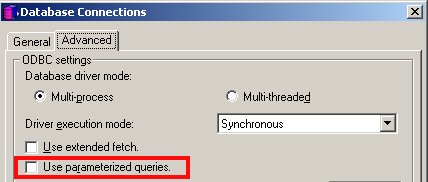
7. Use Parameterized Queries
Use parameterized queries
SQL injections are a widely used method to hack websites by hackers. SQL injections can be exploited if your website has a web form or URL parameters that accept information from outsiders.
It these parameters are way too open they let the hackers exploit your website by inserting them with the codes that allow them to access your database. Though there are many ways to protect your website from hackers using SQL injections the easiest way is to use parameterized queries.
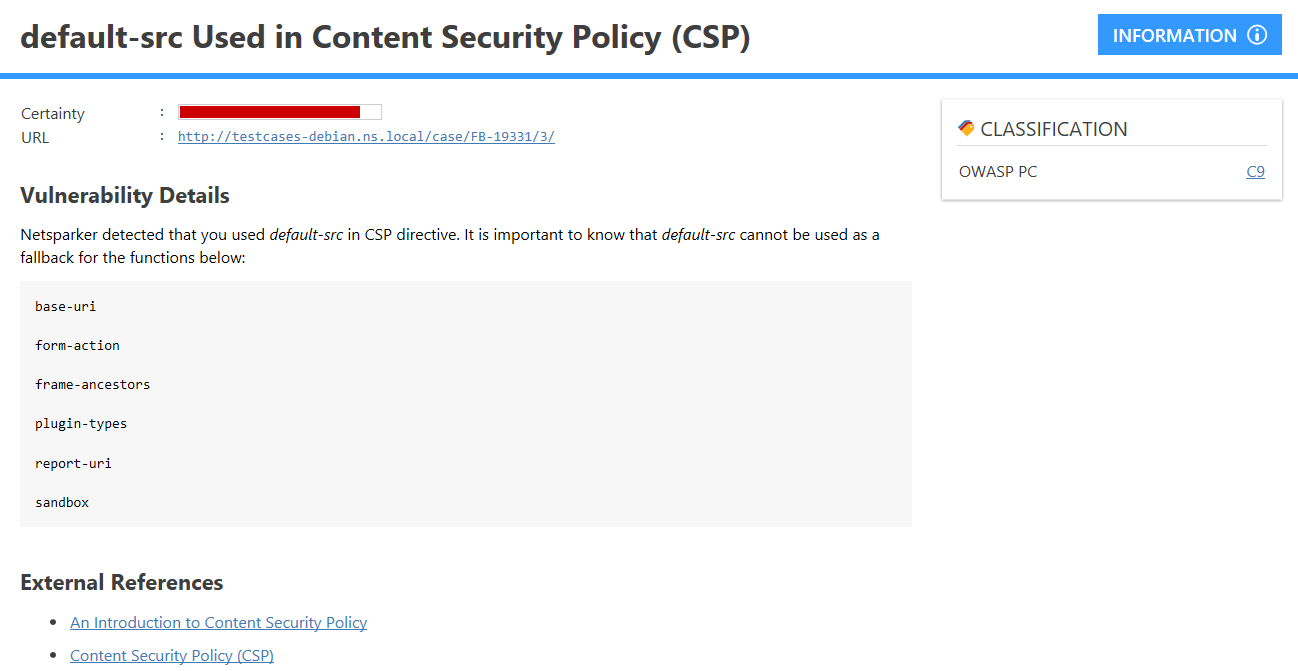
8. Use CSP
Use CSP
Cross-site scripting (XSS) attacks are another very common way that allows hackers to slip malicious JavaScript code into your website. This code can further infect the devices of the users of the website exposed to that code.
The easy way to defend your website from such abuses is to ensure that the code that accepts input that is categorical in accepting the inputs. It protects your website from getting induced to any malicious scripts and keeps it protected.
Content Security Policy (CSP) is also an effective tool to protect your website from XSS attacks. It permits you to allow specify domains a browser should consider.
9. Restrict the permissions for directories and files
Restrict the permissions for directories and files
There are several files and folders inside your web hosting account. They contain data that makes your website work and also includes the permissions on who can read, write, and execute the files and folders.
Ensure these rights are properly set to ensure the highest safety of your website. Any intrusion to these files and folders can put your website security on risk.
10. Be careful about the error messages. 
careful about the error messages
Error messages can play a huge role in putting your website security on risk. How? Here it is: a detailed error message tells you what is wrong with your website and how can you rectify it. It can help you a lot internally. But if the same messages are displayed to your visitors they can exploit these messages and find vulnerabilities in your website and can exploit them.
Ensure that the error messages are not very detailed one that can give hackers a chance to get inside your system. But also make sure that these messages give an idea to the visitors to what to do next in case an error occurs.
11. Do proper validation
Do proper validation
Validation has to be done both on both on the browser side and server-side. Imagine that someone is trying to inject code through one of the mandatory fields. The browser has to reject such an invalid input.
When it comes to validation like this it has been performed on server-side also to ensure that malicious code hasn’t been injected to the website.
Conclusion:
Hacking is a very common practice in the digital world that has put on stake the security of your systems. Your website can too be easily exploited by hackers. It is very important that you take enough preventive methods to secure your website from hackers.

The security threats to your website can not only harm you and your business but can be equally harassing for your audiences. Ensure that you take proper measures to protect your website from hackers.

How to Find Bugs in Your App

Have you ever wondered about how to find bugs in your app? Do you possess testcases that you think is enough to trace out bugs? In this blog we have detailed about the effective steps that can be used to find bugs in your app.
1. Save the Code at Good Place
This first step is not only useful for tracking bugs. It has many other advantages that, truthfully, would give for an entire article. All the files that make up the source code of an application are not simple files that we should have saved in Dropbox or, worse, in a hard disk.
We should not save the source code of an application in places like Dropbox, Google Drive or on a hard drive. They are pretty peculiar files.
They are files that undergo different changes over time and that as a whole have different versions. To coder, these versions of the code have to be easily accessible and must have an explanation of what they represent.

To understand each other, we are talking about different versions of your code files, representing different versions of your application in the market for example, version 1, version 1.1, and version 2.0.
To all this, we have to add that these files have to be easily accessible to all the people who are working on them. The owner of the code has to be in possession of these files, but he has to allow access in a secure way to the developer or developers working on it.

Also Read : How to Test an Ecommerce Website: Points To Remember

The good news? There is a storage system that allows all this and much more that was designed precisely to save code. This system is called Git.
We could say that Git is not just a protocol, a standard or rules to follow, call it what you want. From here, there are different platforms that implement it. The best known today, and the one that has more popularity, is Github.
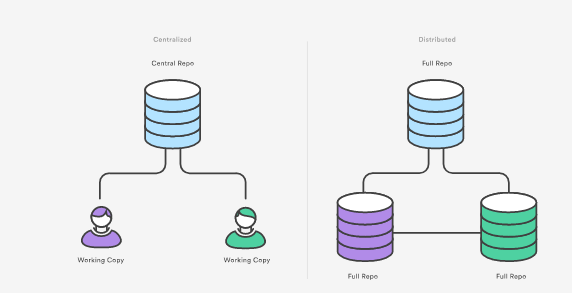
Advantages of Git includes,

  • Distributed Development

Each developer gets a local repository connected to a central repository does not require a network connection for commit creates a reliable environment

  • Workflow Branching Capability

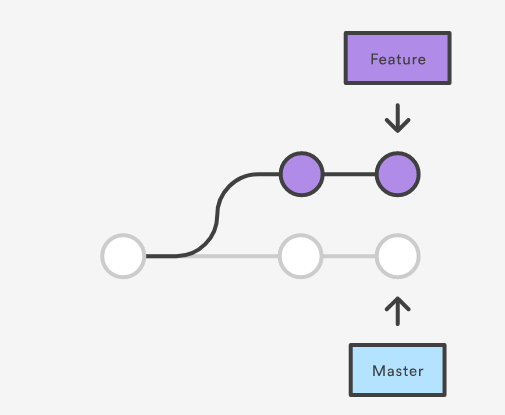
Easy to manage branched system that provides an isolated environment for development. Create a new branch if you wish to work on something new. Ensures master branch have production quality code helps to work as detailed as agile backlog

  • Merge One Branch with Another

Merge one branch with another helps to pull request from one branch to entirely different one owing to that, changes can be tracked easily opens up the chances for discussion regarding their work before integrating with codebase inexperienced developers ruining entire project is minimal since pull request can be created as formal code review

  • Community Support

New addition to the team can get easily used to distributed development Easy to leverage 3rd party libraries others can fork their own source code

  • Faster Release Cycle

Developers can share smaller changes frequently helps well with continuous delivery and integration environment deployment can be automated. You can build and deploy code to servers from the branch of your like

2. Bug Tracking
At this point I am going to assume that we have the code of application in a Github repository.
If we had everything well configured, we, as owners of the application, would have to be the owners of the Github repository and developers, would have to have access to it in order to make the necessary modifications.
So far we have not seen any reason why Github can help us in tracking bugs, but peace of mind, we start now. Every repository in Github has a tab called bugs (bugs), and yes, we will use it for precisely to register the different bugs that happen in your application.
We can create a new bug by clicking on the New Issue button. From there we can add a title and a description. Now this bug will be registered in the repository until someone does something with it.
3. Automating the Bug Log
So far we have solved a small part of the problem. Now we have a registry of bugs to which, both we as owners of the code, and the developer that will be the person in charge of solving them, we can access.
However there is a great disadvantage. At this time the bug log is something manual. To track a bug, we would have to experience it ourselves and then go to the repository to register it and write down the details of it.

Does not seem like a good idea, right? Above all we have to take into account that there will be bugs that will only appear in certain specific cases, with which it is possible that, yes, they will be experienced by other users and not by ourselves.
It is also not necessary to mention that the process of going to create the bug manually to the repository is not an especially productive method.
Another tool to the rescue! In this case it is about Rollbar. Rollbar is a platform that is responsible for tracking bugs in any type of software. We can use it on websites, desktop programs, and programs running on a server and, of course, mobile applications.
4. Configuring Rollbar and Connecting with Github
How can we configure both tools to automate bug logging?
First of all we must create a project in Rollbar and configure it so that it is linked to the Github account. Specifically we will have to link new project to a repository. This repository will obviously be the one that contains all the source code of your application.

Also Read : How to Test a Bank ERP System

Next, we will have a slightly more technical part that the developer must complete. You will have to implement the Rollbar library within the source code of the application. It’s a quick job that can be ready in less than 1 day depending on the level of registration you want to follow.
What will happen once these steps are completed? Any bug, which happens to any user in your application, will be created automatically in the Issues section of Github repository. Automated bug logging!
5. Obtaining More information of Each Bug
Another of the problems we had without Rollbar that was the little information we had about a bug.
For anyone, with or without technical knowledge, it is very difficult to find out at a glance what is causing an application to fail. It does not matter if you have technical knowledge. Maybe you could know where the shots are going, but it would be almost impossible to know the cause at 100%.
6. Solving Bugs and Communication with the Developer
Well, now that we have seen the different tools, the configuration of the same and what benefits we will obtain, we will see what the day to day would be like to track the bugs of application.
In the first place, we should not have any person in charge of recording the bugs. Automatically Rollbar would create them as they happened.
The developer every X time would have to go consulting if there are new bugs and solves them. Once a bug has been solved and the code has been updated in the repository, the bug would be closed.

These are the standard factors that one asks for testing, for each of these clients, more information is required, such as on which network provider the bug was detected or the size of the screen where the bug was, etc.
Finding out bugs can be fun. Correct documentation along with corner cases will help you maximize the result.
Conclusion
These are the basic steps in finding bugs in the developmental phase of software/app once the development has been done, it’s always better to do professional QA (Quality Analysis) with the help of a QA company to make the app as stable as it can get.

Get an eBook : Download PDF

How To Choose The Best Test Management Service

How to choose the best test management service? Have you been baffled by this question?
Testing has been and always will be an important part of any development and creation process.
It is the only way to validate what we created is what we wanted or not. But since most of the software development is now moving to agile managing testing effectively becomes an uphill task.
Coming back to the first question, So what is the very possible way out of this?
There are many test management service providers in the market today. And they can provide you with end to end testing solutions for your business. With the testing work outsourced your team can focus on delivering with better velocity in every sprint.
There are several other advantages as well if you decide to use the help of a test management service provider. Let me now give you an insight into the advantages of using a test management service.

Independent and Impartial Validation:

One thumb rule in testing is that testing is best performed by an independent team located away from the development team for the best results. BY outsourcing your testing tasks you stick to this thumb rule. It also ensures that your testing results are impartial and accurate.

Professional Approach

In product teams focused on development, most of the time testing takes a back seat.
More often than not the processes are bypassed and rules are bent to meet the deadlines.
Consequences? Quality goes for a toss. This problem can be easily by entrusting your testing activities to a competent test management service provider.

Greater Bandwidth For Product Development

In an agile environment that has become the industry norm, the onus is on delivering standalone usable functionality after every iteration.
It is always a race against time for the developers who are not only expected to do a unit testing of their code but also a peer testing for another team member’s code.
By giving this testing task to an independent validating team the developers will get a greater bandwidth for developing their modules and also reduce the pressure for them.

Better Reporting And Tracking

The main idea behind the testing process is not only to find issues but also reporting the defects to the correct teams and tracking them to closure.

A good test management service provider would help with timely and accurate tracking of the issues and bugs.
They would also be able to provide you with the right kind of metrics and statistics which will clearly indicate the quality of your product.
Yes, we now know why it is important to avail of the services of a test management company. But do not make the mistake of selecting just any test management service provider.
You could be taking a huge risk by doing that. Testing is a very important aspect of product success.
You need to be double sure about whom you want to entrust this big responsibility. The testing is one aspect that can make or break your product.
But please don’t panic. In this section, we list some very important points which will help decide the best test management service for your business.

Efficiency

Yes, as simple as it may seem, the efficiency of the testing process is the first and foremost criteria to be considered when choosing a test management service.
By efficiency, we mean not only finding the bugs but also issues that could critically impact the software or product.
They should also be able to think out of the box and suggest changes and enhancements in the product based on its actual use.
Ideally, they would think and use the product as an end customer would do.

Industry Experience

When you decide to outsource some of your work, make sure they are capable enough to handle the work.
Choose a test management company that has an industry standing of at least 5 years or more. Also, take time to look at the profiles of their clients to understand the kind of projects they would have handled.

Focused Testing Approach

For the testing to be more effective and result oriented, it needs to be planned out well.
The best test management service provider would have a focused approach to testing which is more focused on testing the KPI (Key Performance Indicators) features.
At the same time, it will also make sure the complete product is tested effectively with all the possible data flows and integration points.

Experience And Skill

The success of the testing effort is based on the skill, experience, and expertise of the testers. The more skilled your testers are in the product and domain, the better would be the testing performed.
If you are using automation tools, then expertise in automation is also needed.
Now, when you decide to select a test management service, you need to make sure that they have the right set of people who have ample knowledge and expertise in testing products or software which may be similar to your requirement.
For example, if you are developing a mobile app, then you need to make sure the service provider has testers with exposure to mobile app testing.

Hardware Requirements

In some cases, your product or software may require some extra hardware or have some specific user requirements.
Make sure these are communicated well to the service provider at the onset to make sure they can provide the right kind of testing services.
Let us again take the example of a mobile app. While testing a mobile app, one would need to make sure that the app has a responsive design. And to test that they would need access to multiple mobile devices with different screen sizes and resolutions.

Also Read: Top 10 Mobile App Testing Companies in India

On the same lines if your mobile app needs an internet connection to talk to certain backend servers and systems, then the service provider should be able to test this internet connectivity in Wi-Fi, 4G, 3G and hot spot connections for getting accurate results.
Hence the best test management service provider should be able to handle the specific hardware and other requirements needed for complete testing of the product.

Use of Latest Tools And Technologies

The best testing service provider would have access to the latest tools and technologies in the market which would include both free and open source products.
This would ensure that the testing is done with quality and also will be in line with the latest market trends. Some service providers would have only one or two tools and would try to test every product with that.
This is not the right practice. Every product should be tested with tools that are best suited for it based on the development language, platform and also based on where it will be deployed or used.
While selecting the best test management service makes sure they are using the right tools and technologies to test your product.

Speed To Market

One of the main reasons, for selecting a third party for doing the testing, is to save time. Hence it is important the service provider can help you speed up your process and reach the market or clients faster.
In today’s fast-paced world, it is not only important to create value or products which are needed by the clients but getting them to the market first is also the key.
With new products hitting the market almost daily, your speed to market becomes a paramount criterion for product success. Choose a test management service, which can help you improve your speed to market.

Real-Time Connectivity

There are times when your product and software may be to be tested out of different regions to understand how it performs.
This is also a good reason for choosing a test management service provider.

Instead of just mocking the locations on the systems and devices, the provider should be able to provide you with real-time connectivity with people and testers as per your needs across the globe.

Budget

Last but not least the money involved. Understand that when you decide to outsource the work, there is a cost involved. Quality comes with a price.
If someone is providing you this quality dirt cheap, then there are 99% chances they are not genuine or will mess up with your work.
Don’t go for very pricey providers which may not work out for you. Choose the apt one which fits in all the above points along with your pockets too.
Taking the services of the experts in every phase of manufacturing and production is the way things are being developed and produced.
With many specialized teams and companies available it can be quite a challenge to select the one that fits you the best.
The points above would help you choose the best test management service provider for your business. Best of luck.

How to Write an efficient Cucumber Test?

Cucumber is integrated with the testing framework majorly used to introduce behavior driven framework. It allows testers to do the testing according to the behavior of the application.

There are different feature files being written which bridge the gap between different stakeholders of the project. Business Analyst, Customer, and Technical people should come on the same page so that the development of the product can meet the customer’s expectations and bug tracking can be faster as compared to conventional testing.
Now, you know how it is to write feature files. Let’s take an example of a feature file which tests an application login flow.

Feature: Login to the test application

It checks whether the login to the application is performed correctly or not.
Scenario: Successful Login to Test Application
Given User is at the login page
When User enters username as “nancy” and password as “pwd”
And User clicks on login button
Then User is able to successfully login to the Test Application.
Now, writing this feature file in a haphazard manner is very easy but have you ever imagined that there are some effective ways in which you can write your Cucumber Tests which we will be looking at in the below section. Let’s have a look at those:
1. You should use background keyword very wisely. If you want some common steps to run before each scenario of a feature file then you can put those steps in a background scenario. Those steps would run before each scenario in a feature file.

Feature: Test Background Feature

Description: This feature is to test the Background keyword
Given User is at the login page
When User enters username as “nancy” and password as “pwd”
And User clicks on login button
Then User is able to successfully login to the Test Application.

Scenario: Search a product and add the first product to the User basket

Given User type Acer Laptop in search box
When Add the first search result laptop to the basket
Then User basket should display the added item

Know More: Selenium Automation Testing using Cucumber Tool

Scenario: Add selected product and add the same to the User basket

Given User select Lenovo Laptop
When Select on the laptop to add it to the basket
Then User basket should display the added item
2. Every scenario should be independent of any other scenario. Any scenario should not depend on any other scenario for execution. Every scenario should be isolated and in this way, the execution of scenarios should not be dependent on any other scenario.

3. You should use a Scenario Outline when you want one scenario to be executed on a number of times. Just assume the case when you want to test the login scenario for different combinations of username and password. So, in that case, you can specify the combination of username and password for which the scenario will run n number of times.

Feature: Login to the test application using Scenario Outline

Description: It checks whether the login to the application is performed correctly or not for all set of specified users.
Scenario: Successful Login to Test Application using Scenario Outline
Given User is at the login page
When User enters Username as <username> and Password as <password>
And User clicks on login button
Then User is able to successfully login to the Test Application.
Example –
|username|password|
|user1|pwd1|
|user2|pwd2|
|user3|pwd3|
This scenario will run for three sets of users and password. It will, in turn, check the login flow for 3 usernames and password.

Know More: Rest API Testing using Cucumber Tools

4. You should make the scenarios more declarative and not imperative. The declarative styles make the scenarios more readable. It improves the readability of the scenario. Let’s take an example which is written in an imperative way and a scenario which is written in a declarative way. You would feel the difference in the readability of the scenarios.
Example: Imperative Scenario

Feature: Login to the test application

It checks whether the login to the application is performed correctly or not.
Scenario: Successful Login to Test Application
Given User is at the login page
When User enters username as “nancy” and password as “pwd”
And User clicks on login button
Then User is able to successfully login to the Test Application.
Example: Declarative

Feature: Login to the test application

It checks whether the login to the application is performed correctly or not.
Scenario: Successful Login to Test Application
Given User is at the login page
When User login In
Then User should be able to successfully login.

  1. Avoid doing hard coding I step definition files. Always try to parameterize the scenarios by passing username and password.

Feature: Login to the test application using Scenario Outline

Description: It checks whether the login to the application is performed correctly or not for all set of specified users.
Scenario: Successful Login to Test Application using Scenario Outline
Given User is at the login page
When User enters Username as <username> and Password as <password>
And User clicks on login button
Then User is able to successfully login to the Test Application.
Example –
|username|password|
|user1|pwd1|
|user2|pwd2|
|user3|pwd3|
You should write step definition files in which you take parameters from feature file.
@When(“^User enters Username as \”([^\”]*)\” and Password as \”([^\”]*)\”$”)
public void I_enter_Username_as_and_Password_as(String arg1, String arg2) {
driver.findElement(By.id(“email”)).sendKeys(user1);
driver.findElement(By.id(“password”)).sendKeys(pwd1);
driver.findElement(By.id(“login”)).click();
}
6. When you want to conjunct too many steps. You should do it by “and” keyword. Make sure that you do it into two steps and then use “and” keyword. One action per step should be used and it makes the steps more modular. It increases the scenario more readable.

Feature: Login to the test application
It checks whether the login to the application is performed correctly or not.
Scenario: Successful Login to Test Application
Given User is at the login page
When User login In with username and password
And User clicks on login button
Then User should be able to successfully login.

Conclusion

You should follow some steps which will make the cucumber tests more efficient. These steps will make the tests more readable. All the best!

How to Effectively Do Project Management in Software Testing

When it comes to manage and plan the project, then there are so many things that are counted to ensure that things are falling into place. It can be a few pivot elements or maybe the working condition of a project. Everything is counted in a project to ensure that work is done in a proper manner.
Also, the goals are to interpret that all the goals are achieved as per the clarity level and incorporation of the planning scenario.
When a project is not executed properly then it might trigger your company demand. Hence, in such situation testing becomes the life of a project.
It helps to understand the actual quality on a customer level.
Project Management in Software Testing
A project works on a timeline that will include both the phases – development, and testing. This gives a testing team only limited time to get through the whole process.
They have a fix starting and ending time that might be difficult to execute without any prior planning.
During this time you have so much on a plate to handle. Form defining a project as per its testing phase and then working as per its tools and principles, a software tester has to cover them all.
However, planning and managing two different things that are equally important. Hence, the management phase is divided into different categories so that work can be done efficiently.
1. InitiationThe first and foremost thing to following the initiation of a project in the testing During this phase, a project manager will be assigned who will be responsible to analyze and review. It will also help in identifying the procedure and process of the data. Apart from this, it helps in having a deep understanding in terms of project objective and communication between the development team.
2. Plan –The next phase of the development cycle includes a major part of the testing. In this part, if a project planning is not done appropriately then it can be doom to your software or application. This phase has a number of subdivision that much is taken care of in order to gain cent results.
3. ExecuteOnce the whole planning process is set up, you need to be careful while executing it properly. A single mistake in execution can cost you a lot. You need to stick with the plan in order to come up with important details. If you feel that it might require a few changed then do it in the plan module.
4. Monitor and Control –Another of the important phase will be monitoring the whole cycle. It is essential for the management team to keep a track whether the work is done as per the plan or not. Also, the performance of the software is monitored and controlled every time to ensure that you are not making any bigger mistake. It can be due to the communication gap among development and testing team. But this must be resolved on your end only before you hand over the whole project.
 5. Close –Then comes the final stage. Once, the whole project is set out then you need to get the documentation done. This phase will be handing over the whole report to your boss and closing it. Then, it will be released to a client or in the market.
Test Project Effective Management
When the project testing is started to execute then there are errors and risks that will pop out of an application.
It becomes easy to identify where a module was wrong or what must be altered. In order to actually be effective during the whole process of software testing, it is essential to follow the basic tricks.
1. Distribution and Allotment of Tasks
This part will be part of the planning stage where you need to divide the whole workforce as per the size of an application.
It will depend on various factors including the size of the team, schedule of the members, attitude for project and skill set. The essential points to share with the team are:

  • It is essential to have a chat with the whole team to discuss the objectives. It helps in getting the front-end picture of every single individual involved in the task. Apart from this, it is essential to be clear on what member can be involved in automated work while who must handle the manual Giving them a choice will help since they can be available where they are best at.
  • List all the essential details of a member as per their experience and skills together to easily distribute the work among them. However, you need to make sure that junior member and interns are also getting a chance under some supervision.
  • Once you have a rough sketch of the whole work allocation, you need to rotate it around among member so that they can give in their input. If they feel that they can work better while switching work with others then take their opinions under considerations. But focus more on logic and motive behind this all.
  • The reporting for daily work completion. You need to settle on a single thing beforehand. You simply can’t check in software for few members while checking e-mails for others. Hence, come up with a mutual decision for the mode of reporting so that none of them is This way they can communicate the whole progress or issue with you on daily basis.
  • It is also essential to know what all the tools are being used by your team so that you are prepared if a need arise.

This will ensure that your whole team is actually working as per the conditions that are given to them.
2. Resource Management Tips
Resource management is a wider subject then software testing. There is simply so much that the project manager needs to look out to ensure accurate work.

  • Software testers work under some serious deadlines that can be difficult to manage. This becomes even more difficult when they have to manage excessive work with limited staff. If at any point in time, a tester feels that timeline can be hampered then get it to touch with your boss immediately so that he/she can work something out.
  • Never close up any communication line. Just because your manager has given you a task and you have time doesn’t mean that he won’t listen to you. Especially when it comes to testing cases, it is better to have a discussion than to give some worst results.
  • It is common to have queries, technical issue or defect in the whole application. However, it can be resolved if one has a direct impact on an application. In such a case, it is better to be on talking terms with every one of your development team. It will be easy to resolve major technical issues.
  • When it comes to testers schedule then you can’t be sure about it. It will be haywire since emergency can pop up at any time and any place. In such cases, it is better to actually have no expectation that they will stretch the time. Everyone has a personal life and hence you need to make sure that the task is done at the office only with accuracy.
  • It is essential to set up meeting daily or on a particular interval of time. This will help in ensuring that work is under progress and if there are few issues then it can be dealt with.

These are the major point that can help in the proper arrangement of your resources for testing team.
3. Tools and Tracking
As mentioned above, communication and reporting are two of the major part of the testing phase. This will actually prevent any raised eyebrow at your end.

  • During the testing phase, there are going to be instabilities and issues that are tackled by an individual. In such a case, the performance of the task will be effective. If you are regularly updating progress and any sort of issue then management can help a tester to get a possible
  • Another factor is regular use of scrum or checkpoint meetings that can be held to ensure that the project is progressing. Also, if there is any sort of dis-balancing then it can be managed at this point.
  • The regular contact with management can also help in keeping the lines open. Also, it is possible that you are getting hold of an error that was missed out earlier. Hence, appreciation or might be a promotion came in the future.

Conclusion
This step will get a better insight into the whole project so that one can work effortlessly and can easily identify the assignment of whole resources.

How to Test a Music App like Spotify, YouTube Music etc.

Music apps have at last switched people’s state of mind towards music as well as the music market both.
Hence, they flourished in application stores and became one of the best ideas to invest your money
But you must understand that a robust app is a key to your success and for that, you need to test your app from the development stage itself.
A nice music streaming app has a simple UI that makes it simple to sort out a library of a plenty of playlists or songs available over the internet.
It’s likewise totally important that your music application gets stream music properly of different devices.
It should be capable to run on iOS and Android apps, and at times, Windows app and desktop Mac.
banner
10 Factors to Consider for Music App Testing
So, what to test in a music app? While testing the music streaming apps, there are lots of factors and features to be considered for testing.
Every music app feature needs exceptional consideration, and, following the worldwide buzz of moving from song downloading to online music streaming apps, how about we give due consideration to the most important factors of music app features.
If you’re thinking to develop a music app, firstly, you need to observe what all features your music app will have to proficiently test them before launching the app to the market.
The below-listed points are extremely critical factors while considering to develop the music app like Amazon or Apple and eventually, to improve a listening experience for the users.
1. Registration:
Getting to the most used streaming music app is as basic as you can even think with all the base data and personalization, as the registration process on the app is free.
2. User Profile and Approval:
Installed with endpoints to recover an entire data about a person’s profile and approval of each user with the same database of user, for example, email address, Password and so on helps in limiting the spam intervenes.
3. Login and Sharing with Social Media:
Registration can even be easily accessed through online networking systems for additional memberships.
Additionally, with the development of social media networks, users are able to share anything they loved with their friends and family members.
So, maximum music streaming platforms also offer various sharing options, incorporating a probability to follow friends and share content.
4. Music Streaming:
An intriguing component that enables the music app user to remain notified on the latest launch of blockbuster tracks.
A person can tune in to the most recent collection on various music tracks whenever he or she wants to.
5. Suggestions and recommendations as per user’s music choice
A Personalized system to control all the tracks based on the user particular taste in music for a creating a compelling safe platform.
A user can find up as many numbers of tracks and spot the top choices.
The music streaming app can use an algorithm to slowly figure out the music choices of every app user which is one of the most engaging concepts in the advanced music applications industry nowadays.
Exploit deep learning techniques and make this factor a component of your future music streaming application.
Also, music streaming app users ought to have the capacity to locate their favorite artists, songs, music genres, trending music etc. as well as find new releases or genres.
With an advanced search option, they’ll have the capacity to discover precisely what befits their music tastes with an ease and in a very less time.
6. Playlists and presets creation
It is always a good choice to give users a chance to make their very own playlists for various activities and moods.
This feature doesn’t restrict here, as one can even be allowed to share their playlists with different users of the music application.
7. Able to save music when offline
This factor proves to be very useful in the circumstances when individuals are traveling anywhere and are having a hard time to get Wi-Fi or Mobile Internet access.
8. Push Notification:
A must element to keep the users connected with the music app so as to acquire the utmost from the latest updates from artists, friends, and community on the user’s application circle.
9. Sending Invitation to Friends:
Your friends and followers can listen to your preferred music tracks when you invite your friend’s group through the linked email address or social media platforms to dig in all the tracks on the list.
10. Event Calendar
This will be a fabulous element that would be apprehended by concert lovers. The app can assist them to hunt down the upcoming concerts or concert dates or meetups with fan clubs.
Testing Process
Developing and releasing a music streaming application can be a lucrative business, and, particularly when it is a quality app having all the relevant features and factors we’d discussed above.
But how to make those features effective is by implementing right testing strategies.
Significant viewpoints are that it is better to formulate test documentation comprising of Test Strategy, Checklists, and Software Prerequisites information.
All this will support in assuring the flawless user experience and steady streaming of media data.
Here are the important testing processes to perform before releasing the music app:
Functional Testing
Functional testing of music app generally includes a user interface.
A tester will check the application is performing the proposed functions, as directed by the business strategies or described in the specifications.
Functionality testing is performed to eradicate problems like:

  • Issues in connection speed
  • Vague error message
  • Application loading and speed issues
  • Bugs and crashing
  • Errors when screen sizes vary

banner
Usability Testing
Usability testing is done to test the music app for adaptability, usability, and ease of use.
The testing method ensures that the application is now simple to use and provides a proper user experience to the users.
Performance testing
Performance of the music application needs to be tested in every likely situation.
Different real-time situations are reenacted like no or low network, low memory, low battery, server not reachable, and so on.
The application’s behavior ought not to be influenced by every one of these scenarios.
Performance debasement can happen either on the server end or client end.
Thus, performance testing needs to guarantee every one of these situations is checked efficiently.
Installation Testing
This type of testing will help to test whether the user can install, uninstall, and update the music streaming app accurately without any sort of interruption
API Testing
An Application Programming Interface (API) serves to connect the app to the network and to other APIs.
API is the collection of protocols, tools, standards, and code that fixes the digital world unitedly.
Thus, API testing on your music app is done so that the integrations and APIs permit operation in the highly optimal way.
Load Testing
It’s no doubt that the majority of the smartphones rely upon the network carriers for their connectivity.
Load testing needs to guarantee that the music app ought to perform reliably across networks and across device both.
In the event that the music app is at the same time accessed by numerous users then it will extricate the server load, such loads must be recreated and tested for execution.
Cross-Browser and Cross-Platform Testing
Cross-browser and cross-platform testing refer to testing the music app in multiple operating systems and browsers.
It is a pretty critical aspect of quality assurance. The objective of performing this test is to check compatibility testing to assure that the music app functions and seems in the same way over different browsers and platforms.
The music streaming app ought to be compatible with the current browser version and also with operating system adaptability.
For instance, when the app is run on Android it can operate perfectly on Nougat but is not supported on Oreo version.
These kinds of problems can be recognized simply by performing cross-browser and cross-platform testing during app testing process.

Specialists You Require to Successfully Test Music App
Obviously, you cannot manage such a prominent project without relevant professional support.
It is impossible that you have ability and aptitudes to build up and test every aspect of music streaming app all by yourself without taking help from the right specialist.
It’s an excessively multi-step and tedious process.
In this way, you must contract or hire the given professionals:

  • App developers who must thoroughly consider the structure of the platform and compose a readable and clear code. So, you’ll require all – Android, iOS, and web specialists.
  • UI/UX designers whose duty is to create an easy to use and intuitive application interface.
  • Project Manager who’ll supervise the whole development process of music application and will turn into an intermediary for testers and the organization.
  • QA Engineers and testers who’ll test your music streaming application and work beyond any doubt to offer hassle-free use of music app.
  • Marketers ready to create the savvy marketing efforts intended to advertise your music streaming application.

Also Read : Top 10 Mobile App Testing Companies In India