Requirements Elicitation in Software Engineering: A Complete Guide

Requirements Elicitation, a cornerstone in software engineering, is the critical process of gathering and defining the stakeholders’ needs for a software project.

This intricate dance of communication and analysis is not merely about collecting a list of desired features; it’s about deeply understanding the user’s environment, pain points, and aspirations to ensure the final product meets and exceeds expectations.

In this complex procedure, engineers, analysts, and stakeholders collaborate closely, employing various techniques such as interviews, surveys, and observation to capture the nuanced demands of the project.

This initial phase sets the foundation for a software’s development lifecycle, highlighting its pivotal role in successfully realizing robust, user-centric software solutions.

Introduction to Requirements Elicitation

Definition of Requirements Elicitation

Requirements Elicitation is a foundational process in software engineering where stakeholders’ needs, desires, and constraints for a new or altered system are identified, gathered, and understood.

It involves direct interaction with stakeholders, including users, customers, and others involved in the project, to capture detailed system requirements.

This process is not merely about asking what the stakeholders want but involves a deep investigation to uncover and document explicit, implicit, tacit, and future needs.

The goal is to create a comprehensive and accurate requirements document that serves as a cornerstone for all subsequent stages of software development.

Importance in Software Engineering

Requirement elicitation holds paramount importance in software engineering for several reasons:

  • Project Foundation: It sets the foundation for the project by ensuring that the software development team fully understands what needs to be built. This clarity is crucial for defining project scope and preventing scope creep.
  • Stakeholder Satisfaction: By actively involving stakeholders in the elicitation process, it ensures that the final product meets or exceeds their expectations, leading to higher satisfaction and acceptance.
  • Risk Mitigation: Proper elicitation helps identify potential issues and misunderstandings early in the project lifecycle, reducing the risk of project failure due to unmet requirements.
  • Cost Efficiency: Understanding requirements upfront helps in accurate project estimation and planning, reducing the likelihood of costly reworks and delays that stem from incomplete or misunderstood requirements.
  • Quality Enhancement: Detailed and well-understood requirements contribute to better design, development, and testing processes, leading to a higher quality product.

Overview of the Requirements Elicitation Process

The requirements elicitation process typically involves several key phases:

  1. Preparation: Before interacting with stakeholders, it’s crucial to identify who they are, understand their background, and prepare the right set of tools and techniques to facilitate effective elicitation.
  2. Elicitation Techniques Application: Employ techniques tailored to the project and stakeholders involved. Common methods include interviews, focus groups, surveys, document analysis, observation, and prototyping. Each technique has its strengths and is chosen based on the specific context and requirements of the project.
  3. Requirements Documentation: The information gathered from stakeholders is documented in a structured format. This could be in the form of user stories, use cases, requirement specifications, or models. The choice of documentation often depends on the project methodology (Agile, Waterfall, etc.) and the complexity of the system being developed.
  4. Analysis and Negotiation: Analyzing the documented requirements to identify conflicts, redundancies, and gaps. This phase often involves negotiating with stakeholders to prioritize requirements and resolve conflicts arising from differing needs or constraints.
  5. Validation and Verification: Ensuring the requirements document is complete, consistent, and acceptable to all stakeholders. This includes validating that the requirements align with business objectives and verifying that they are feasible within technical, time, and budget constraints.
  6. Baseline and Maintenance: Once validated, the requirements document is often baselined as a reference point for future project activities. Requirements management continues throughout the project, accommodating changes and refinements as the project evolves.

Understanding the Basics

Requirements Elicitation is a critical phase in software development where the stakeholders’ needs, desires, and constraints are identified and documented to guide the design and development of a new or modified system. This process ensures that the software development team fully understands what must be built to meet stakeholders’ expectations effectively. It involves various activities such as interviews, surveys, workshops, and analysis to capture the said and unsaid needs of the users.

Types of Requirements

  1. Functional Requirements:
    • Definition: Specify what the system should do. They describe the interactions between the system and its environment, independent of the implementation.
    • Examples: User login process, data processing logic, and report generation capabilities.
  2. Non-Functional Requirements:
    • Definition: Outline the quality attributes or constraints the system must exhibit. They are not about specific behaviors but how the system performs under certain conditions or constraints.
    • Examples: Performance metrics (response time, throughput), security standards, usability, scalability, and compatibility.
  3. System Requirements:
    • Definition: Detailed specifications describing the software system’s functions, features, and constraints. These can be further divided into software and hardware requirements.
    • Examples: Hardware specifications (CPU, memory, disk space), software dependencies (operating systems, middleware), system integrations, and system behaviors.
  4. User Requirements:
    • Definition: Express the needs and desires of the end-users in terms of tasks they need to perform with the system, often documented in natural language or through use cases.
    • Examples: Ability to export data into various formats, user-friendly interfaces for non-technical users, and custom notification settings.

Stakeholders in Requirements Elicitation

Stakeholders are individuals or groups with an interest in the outcome of the project.

They can have an impact on or have an impact on the project’s success. In requirement elicitation, stakeholders typically include:

  • End-users: Who will directly interact with the system?
  • Business Managers: Those who make strategic decisions based on the system’s output.
  • Project Managers: Who oversees the project’s execution.
  • Development Team: This includes software engineers, designers, and testers who build and maintain the system.
  • Customers: Who commissions the software and funds the project?
  • Regulatory Bodies: Whose standards and regulations must be met by the system.

Challenges in Eliciting Requirements

Eliciting requirements is often fraught with challenges, including:

  1. Communication Barriers: Misunderstandings between stakeholders and the development team due to language, technical jargon, or cultural differences.
  2. Incomplete Requirements: Difficulty in capturing all requirements at the start, leading to changes and revisions later in the project.
  3. Conflicting Requirements: Different stakeholders may have competing or contradictory requirements, necessitating negotiation and prioritization.
  4. Changing Requirements: As the project progresses or external conditions change, requirements may also need to be updated, adding complexity to the project management.
  5. Identifying Tacit Knowledge: Uncovering unspoken or implicit requirements that stakeholders assume but do not communicate.
  6. Stakeholder Engagement: Ensuring all relevant stakeholders are identified, available, and willing to participate in the elicitation process.

Requirements Elicitation Techniques

Technique #1. Brainstorming

Brainstorming in Requirements Elicitation

Brainstorming, as a requirements elicitation technique, embodies a dynamic group activity focused on generating a wide array of ideas, solutions, and requirements for a project.

It thrives on leveraging the collective intelligence and creativity of the participants, usually comprising project stakeholders, team members, and potential users.

This technique is especially valuable in the initial phases of a project, where the goal is to explore various possibilities and identify innovative solutions without the constraints of criticism or feasibility considerations.

Key Objectives and Advantages:

  • Idea Generation: Facilitates the rapid generation of a broad spectrum of ideas, allowing teams to explore various possibilities that might not emerge through individual contemplation.
  • Enhanced Collaboration: Encourages active participation from all stakeholders, fosters a sense of ownership and collaboration across the project team, and ensures a diverse set of perspectives is considered.
  • Creative Freedom: Creates a safe space for free thinking and sharing out-of-the-box ideas, which can lead to innovative solutions and uncover hidden requirements.
  • Problem-Solving: Helps identify and solve complex problems by allowing team members to build on each other’s ideas, leading to more refined and comprehensive solutions.

Process and Implementation:

  1. Preparation: Define the scope and objectives of the brainstorming session, select a diverse group of participants, and choose a facilitator to guide the process.
  2. Idea Generation Phase: Participants are encouraged to freely express their ideas, no matter how unconventional they may seem, without fear of immediate critique or evaluation.
  3. Encouragement of Diverse Ideas: The facilitator encourages the exploration of different angles and perspectives, ensuring a wide-ranging discussion that can lead to innovative solutions.
  4. Building on Ideas: Participants build on each other’s suggestions, enhancing and expanding upon initial concepts, often leading to more refined and creative outcomes.
  5. Documentation: All ideas are recorded verbatim, ensuring nothing is lost or overlooked during the session. This record serves as a valuable resource for subsequent analysis and development phases.
  6. Analysis and Refinement: Following the session, ideas are categorized, evaluated, and refined. This stage may involve prioritization techniques to identify the most promising or critical ideas for further exploration or development.

Challenges and Considerations:

  • Group Dynamics: Managing group dynamics to ensure equal participation and prevent dominance by more vocal participants is crucial for the success of a brainstorming session.
  • Idea Saturation: There may be points during the session where ideas start to wane; the facilitator must employ strategies to reinvigorate the group and stimulate further creativity.
  • Quality vs. Quantity: While brainstorming emphasizes the quantity of ideas over quality, it’s essential to eventually shift focus towards filtering and refining ideas to ensure they align with project goals and constraints.

Technique #2. Interviews

Interviews in requirements elicitation represent a fundamental, direct method for gathering detailed information from stakeholders.

This technique involves structured or semi-structured one-on-one or group discussions with individuals who have a stake in the project, such as end-users, business managers, project sponsors, and others who possess insights into the system’s requirements.

Through interviews, requirements analysts can delve deeply into the stakeholders’ needs, expectations, and experiences, facilitating a thorough understanding of the requirements for the new or improved system.

Key Objectives and Advantages:

  • Depth of Insight: Interviews provide an opportunity to explore complex issues in detail, allowing for a deeper understanding of stakeholder needs and the nuances of their requirements.
  • Clarification and Verification: They offer a direct channel for clarifying ambiguities and verifying assumptions, ensuring the elicited requirements are accurate and fully understood.
  • Flexibility: The format of interviews can be adapted to suit the stakeholder’s familiarity with the subject matter and the specific goals of the elicitation process, ranging from open-ended discussions to more structured question-and-answer formats.
  • Personal Engagement: Interviews facilitate personal interaction, building trust and rapport with stakeholders, which can encourage openness and sharing of critical insights that might not emerge through other elicitation techniques.

Process and Implementation:

  1. Planning: Identify the stakeholders to be interviewed and the objectives for each interview. Prepare a list of questions or topics to be covered, tailored to the interviewee’s role and level of expertise.
  2. Conducting Interviews: Depending on the chosen format (structured, semi-structured, or unstructured), the interviewer guides the conversation through prepared questions or topics while remaining open to exploring new insights that emerge.
  3. Active Listening: It’s crucial for the interviewer to practice active listening, paying close attention to the interviewee’s responses and asking follow-up questions to probe deeper into key areas.
  4. Documentation: Detailed notes or recordings (with the interviewee’s consent) should be taken to ensure that all information is captured accurately for later analysis.
  5. Analysis: The collected data is analyzed after the interview to identify and document the requirements. This may involve coding responses, identifying themes, and prioritizing the requirements based on the information gathered.

Challenges and Considerations:

  • Bias and Influence: Interviewers must be aware of potential biases and strive to maintain neutrality, ensuring that the interviewee’s responses are not unduly influenced by how questions are phrased or presented.
  • Time and Resource Intensive: Conducting and analyzing interviews can be time-consuming, particularly for projects with many stakeholders. Efficient planning and prioritization of interviews are essential.
  • Interpretation and Accuracy: The subjective nature of personal communication requires careful interpretation of responses, particularly for open-ended questions, to ensure that the requirements are accurately understood and documented.

Technique #3. Surveys/Questionnaires

Surveys and questionnaires stand as highly scalable and efficient techniques for requirements elicitation

Surveys and questionnaires stand as highly scalable and efficient techniques for requirement elicitation, enabling data collection from a broad audience in a relatively short period of time.

This method is particularly useful when the project stakeholders are numerous or geographically dispersed, and there’s a need to gather a wide range of opinions, preferences, and requirements for the system under development.

This technique facilitates the quantitative and qualitative stakeholder needs analysis by deploying structured questions.

Key Objectives and Advantages:

  • Broad Reach: Surveys and questionnaires can be distributed to many stakeholders simultaneously, making it possible to gather diverse perspectives efficiently.
  • Quantitative and Qualitative Data: They can be designed to collect quantitative data (e.g., ratings, rankings) and qualitative insights (e.g., open-ended responses), providing a balanced view of stakeholder requirements.
  • Anonymity and Honesty: Respondents might be more willing to provide honest feedback when anonymity is assured, leading to more accurate and truthful responses.
  • Cost-Effective: Compared to other elicitation methods such as interviews and workshops, surveys and questionnaires are more cost-effective, especially when stakeholders are widespread.

Process and Implementation:

  1. Designing the Survey/Questionnaire: Carefully craft questions that align with the objectives of the requirements elicitation. The survey should include a mix of closed-ended questions for statistical analysis and open-ended questions to capture detailed comments and suggestions.
  2. Pilot Testing: Before widespread distribution, conduct a pilot test with a small, representative segment of the target audience to identify any ambiguities or issues in the questionnaire.
  3. Distribution: Choose the most effective means to distribute the survey, considering the stakeholders’ access to and familiarity with digital tools. In some settings, options include email, online survey platforms, or even paper-based questionnaires.
  4. Data Collection: Set a reasonable response deadline, and consider sending reminders to maximize the response rate.
  5. Analysis: Analyze the collected data to identify trends, patterns, and outliers. Quantitative data can be statistically analyzed, while qualitative responses require content analysis to extract meaningful insights.
  6. Feedback and Validation: Share the findings with key stakeholders for validation and to ensure that the interpreted requirements accurately reflect their needs and expectations.

Challenges and Considerations:

  • Design Complexity: Crafting clear, unbiased questions capable of eliciting useful information requires careful consideration and expertise in survey design.
  • Response Rate and Bias: Achieving a high response rate can be challenging, and the results may be biased toward the views of those who chose to respond.
  • Interpretation of Responses: Analyzing open-ended responses and translating them into actionable requirements necessitates a deep understanding of the context and the ability to interpret stakeholder feedback accurately.

Question Types:

  • Closed-Ended Questions: These questions limit responses to a set of predefined options. They are useful for gathering quantitative data that can be easily analyzed. Examples include multiple-choice questions, Likert scale questions for assessing attitudes or preferences, and yes/no questions.
  • Open-Ended Questions: These allow respondents to answer in their own words, providing qualitative insights that can reveal nuanced understanding and novel ideas. While they are more valuable, they require more effort to analyze.
  • Ranking and Rating Questions: These questions ask respondents to prioritize or rate different items according to their preferences or importance. They are useful for understanding the relative significance of various requirements.


Technique #4. Prototyping

Prototyping is a dynamic and interactive requirements elicitation technique that involves creating preliminary versions of a software system to explore ideas, uncover requirements, and gather feedback from users and stakeholders.

Prototyping is a dynamic and interactive requirements elicitation technique that involves creating preliminary versions of a software system to explore ideas, uncover requirements, and gather feedback from users and stakeholders.

This approach allows for a tangible exploration of the system’s functionality and design before developing the full system.

Prototyping bridges the initial concept and the final product, facilitating a deeper understanding and communication among developers, users, and stakeholders. Here’s an in-depth look at how prototyping functions within the context of requirement elicitation:

Purpose and Benefits:

  • Visualization and Concretization: Prototyping converts abstract requirements into tangible forms, enabling stakeholders to interact with a proposed system’s elements. This visualization helps clarify, refine, and validate requirements.
  • Feedback Loop: It creates a continuous feedback loop, allowing users to provide immediate and actionable insights. This iterative process helps identify misunderstandings or missing requirements early in the development cycle.
  • Experimentation and Exploration: Developers and stakeholders can experiment with different approaches and designs to explore the feasibility of certain features or requirements. It encourages innovation and creative solutions.

Types of Prototypes:

  1. Low-Fidelity Prototypes: These are quick and easy to create, often using paper sketches or simple digital mockups. They are useful for initial brainstorming and concept discussions.
  2. High-Fidelity Prototypes: More sophisticated and closer to the final product, these prototypes offer interactive features and a detailed user interface representation. They are used for more detailed feedback and usability testing.
  3. Functional Prototypes: These include working software elements, focusing on functional aspects rather than detailed design. They help in understanding the technical feasibility and functional behavior of the system.

Process and Implementation:

  • Identify Prototyping Goals: Clearly define what aspects of the system the prototype will explore, such as specific functionalities, user interfaces, or workflows.
  • Develop the Prototype: Create the prototype using appropriate tools and technologies based on the goals. The complexity of the prototype can vary depending on the requirements and the stage of the elicitation process.
  • Gather Feedback: Present the prototype to users and stakeholders, encouraging them to interact with it and provide feedback on its functionality, design, and usability.
  • Iterate and Refine: Use the feedback to revise and enhance the prototype. This iterative process may involve several rounds of prototyping and feedback to converge on the final set of requirements.

Challenges and Considerations:

  • Managing Expectations: Ensure that stakeholders understand the purpose of the prototype and do not mistake it for the final product. Clear communication about the scope and objectives of prototyping is crucial.
  • Resource Allocation: While prototyping can save time and resources in the long run by preventing rework, it does require an initial investment of time and resources. Balancing the depth and detail of prototyping against available resources is essential.
  • Integration with Other Techniques: Prototyping is often most effective when used in conjunction with other requirement elicitation techniques, such as interviews, surveys, and workshops. This multi-faceted approach ensures a comprehensive understanding of requirements.

Technique #5. Document Analysis

Document Analysis

Document Analysis is a systematic requirements elicitation technique that involves reviewing and interpreting existing documentation to identify and understand the requirements for a new system.

This method is particularly useful in projects with significant written material, such as reports, manuals, existing system specifications, business plans, and user documentation.

Document analysis helps capture explicit knowledge contained in these materials, offering insights into the system’s current state, business processes, and user needs, which can be invaluable for defining requirements for the new system.

Purpose and Benefits:

  • Leverage Existing Knowledge: It uses documented information, reducing the need for extensive stakeholder consultations in the initial phase.
  • Identify System Requirements: By analyzing existing documentation, analysts can uncover detailed information about the current system’s capabilities, limitations, and areas for improvement.
  • Understand Business Processes: Documents related to business processes provide insights into how the organization operates, which is crucial for ensuring the new system aligns with business objectives.
  • Gap Analysis: Reviewing documents can help identify discrepancies between the current state and the desired future state, guiding the development of requirements to bridge these gaps.

Process and Implementation:

  • Identify Relevant Documents: The first step involves identifying and gathering all documents that could provide insights into the system and its requirements. This includes both technical documentation and business-related materials.
  • Review and Analyze Documents: Conduct a thorough review of the collected documents, extracting relevant information related to the system’s functionality, business processes, user interactions, and any known issues or constraints.
  • Synthesize Findings: Consolidate the information extracted from the documents to understand the existing system and the operational context. This synthesis helps in identifying key requirements for the new system.
  • Validate and Refine Requirements: The preliminary requirements identified through document analysis should be validated with stakeholders and refined based on feedback. This ensures that the requirements accurately reflect the needs and constraints of the project.

Challenges and Considerations:

  • Quality and Relevance of Documentation: The effectiveness of document analysis heavily depends on the quality and relevance of the available documentation. Outdated, incomplete, or inaccurate documents can lead to misunderstandings or misinterpreting requirements.
  • Over-reliance on Existing Material: While existing documents are a valuable source of information, relying solely on document analysis can result in missed opportunities for innovation or improvement. Complementing this technique with other elicitation methods involving direct stakeholder engagement is essential.
  • Integration with Other Techniques: To obtain a comprehensive and accurate set of requirements, document analysis should be used in conjunction with other elicitation techniques such as interviews, workshops, and prototyping. This blended approach ensures that both explicit knowledge contained in documents and tacit knowledge held by stakeholders are captured.

Technique #5 – Storyboarding

Storyboarding in the context of requirements elicitation

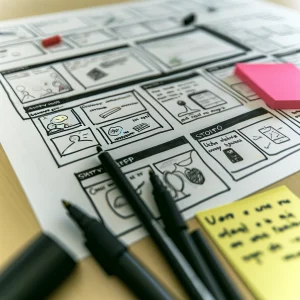
Storyboarding in the context of requirements elicitation is a visual and narrative-driven technique used to capture, communicate, and explore user requirements and experiences for a software system.

Originating from film and animation, storyboarding has been adapted into software development as an effective tool for illustrating the user’s journey, interactions with the system, and the context in which these interactions occur.

It involves creating a series of panels or frames that depict key scenarios or use cases, providing a storyboard that narrates the sequence of actions, decisions, and events a user goes through when interacting with the system.

Key Components of Storyboarding:

  • Scenes: Each panel or frame represents a specific scene or step in the user’s interaction with the software, often starting from the initiation of a task and concluding with its completion or the achievement of a goal.
  • Characters: Storyboards include representations of the user(s) or actor(s) involved in the scenario, providing a persona that interacts with the software.
  • Actions: The actions or operations the user performs and system responses illustrate how tasks are executed and objectives are achieved.
  • Annotations: Textual annotations accompany visual elements to provide context, describe user motivations, explain system functionality, or highlight requirements and constraints.

Benefits of Storyboarding:

  • Enhanced Communication: Storyboards facilitate a shared understanding among stakeholders, developers, and designers by visually conveying complex scenarios and user interactions.
  • User-Centered Design Focus: By centering the narrative around the user’s experience, storyboarding emphasizes the importance of designing solutions that meet real user needs and preferences.
  • Early Validation: Allows for the early exploration and validation of design concepts and requirements with stakeholders, enabling feedback and revisions before significant development efforts are undertaken.
  • Creativity and Innovation: Encourages creative thinking about possible solutions and innovations by visualizing user interactions and exploring different scenarios.

Process of Storyboarding in Requirements Elicitation:

  1. Identify Scenarios: Select key scenarios or use cases critical to understanding user interactions with the system. These scenarios should cover a range of normal, exceptional, and alternative flows.
  2. Define Characters: Create personas for the users involved in the scenarios to add depth to the narrative and ensure the system’s design addresses their specific needs.
  3. Sketch the Storyboard: Draw or use digital tools to create a sequence of panels that depict the user’s journey, including interactions with the system, decision points, and outcomes.
  4. Annotate and Describe: Add annotations to the storyboard to clarify actions, motivations, system responses, and any specific requirements or constraints the scenario highlights.
  5. Review and Iterate: Share the storyboard with stakeholders for feedback and use their input to refine the scenarios, requirements, and design concepts.

Challenges:

  • Time and Skill: Creating effective storyboards can be time-consuming and requires a certain level of artistic skill or specialized tools.
  • Complexity Management: Managing and integrating numerous storyboards can be challenging for complex systems with multiple user roles and interactions.

Technique #6: Ethnography

Ethnography, within the realm of requirements elicitation

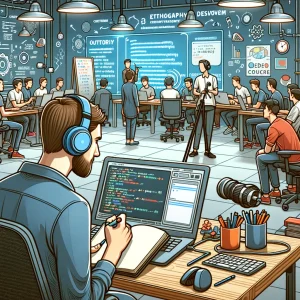
Ethnography, within the realm of requirements elicitation, refers to a qualitative research approach that deeply immerses researchers in the natural environment of their subjects to observe and understand their behaviors, practices, and interactions with technology.

This anthropological method is adapted to software development to gain insights into user needs, experiences, and the context in which a system will operate. It involves studying users in their work or life settings rather than in artificial environments or laboratory conditions.

Application for Requirements Elicitation:

  • Direct Observation: Researchers observe users going about their daily tasks, noting how they interact with existing systems and identifying pain points, inefficiencies, and unmet needs that the new system could address.
  • Participatory Observation: Sometimes, researchers actively participate in the environment they are studying to get a firsthand understanding of the user experience and the challenges users face.
  • Interviews and Informal Conversations: Engaging with users in their natural settings allows researchers to gather nuanced insights through casual conversations, in-depth interviews, and group discussions.
  • Artifact Collection: Gathering physical or digital artifacts that users interact with (e.g., documents, tools, software) provides additional context about their tasks and workflows.

Benefits:

  • Deep Contextual Understanding: Ethnography offers an in-depth understanding of the user’s work environment, social interactions, and the cultural factors that influence their interactions with technology.
  • User-Centered Design Insights: The rich, qualitative data collected can inform a more user-centered design process, ensuring that the system meets real user needs and fits seamlessly into their existing workflows.
  • Identification of Tacit Needs: This approach can uncover implicit needs and requirements that users themselves might not be consciously aware of or able to articulate in a traditional elicitation setting.

Challenges:

  • Time and Resource Intensity: Ethnographic studies can be time-consuming and resource-intensive, requiring extended periods of observation and analysis.
  • Interpretation and Bias: The qualitative nature of the data collected requires careful interpretation, and researchers must be mindful of their own biases in observing and reporting on user behavior.
  • Scalability: Given its intensive nature, ethnography may not be practical for all projects, especially those with tight timelines or limited resources.

Integration with Software Development:

Ethnography’s insights are particularly valuable in the early stages of software development, helping to define the problem space and identify user requirements.

The findings from ethnographic research can feed into the creation of personas, user stories, and use cases, guiding the design and development of the system.

When combined with other requirements elicitation techniques, such as interviews, surveys, and workshops, ethnography can provide a comprehensive understanding of user needs and the context within which the system will be used.

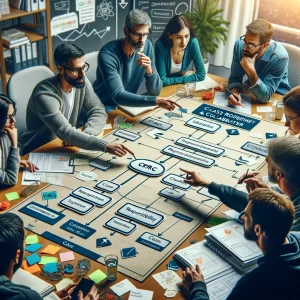
Technique #7: Use Case Approach

Use Case Approach:

The Use Case Approach in requirements elicitation is a method that focuses on identifying and defining the interactions between a user (or “actor”) and a system to achieve specific goals.

This approach helps in capturing functional requirements by describing how the system should behave from the user’s perspective, providing a clear and concise way to communicate system behavior to both technical and non-technical stakeholders.

It plays a crucial role in the early phases of software development, ensuring that the software functionality aligns with user needs and expectations.

Key Components of the Use Case Approach:

  • Actors: Represents the users or other systems interacting with the subject system. Actors are external entities that initiate an interaction with the system to accomplish a goal.
  • Use Cases: Describes a sequence of actions the system performs that yields an observable value result to an actor. A use case is a specific situation or scenario under which the system interacts with its environment.
  • Scenarios: Detailed narratives or sequences of events, including main, alternative, and exceptional flows, illustrating how actors interact with the system across different use cases.

Process and Implementation:

  1. Identify Actors: Identify all potential system users and other systems that might interact with it. This includes direct users, indirect users, and external systems.
  2. Define Use Cases: For each actor, define the specific interactions they have with the system. This includes the main objectives or tasks the actor wants to accomplish using the system.
  3. Write Scenarios: For each use case, write detailed scenarios that describe the steps the actor and the system take to achieve the goal. This includes the ideal path (main scenario) and variations (alternative and exception scenarios).
  4. Prioritize Use Cases: Prioritize the use cases based on factors such as business value, frequency of use, and complexity. This helps focus development efforts on the most critical aspects of the system.
  5. Validation and Refinement: Validate the use cases and scenarios with stakeholders to ensure they accurately represent user requirements. Refine the use cases based on feedback.

Benefits of the Use Case Approach:

  • User-Centric: Focuses on user interactions, ensuring the system meets the actual needs and expectations of its users.
  • Clear Communication: Provides a common language for discussing system requirements among stakeholders, including non-technical users.
  • Identification of Functional Requirements: Helps in systematically identifying all the functional requirements of a system through the exploration of various user interactions.
  • Facilitates Testing and Validation: Use cases can be directly used as a basis for developing test cases and validation criteria.

Challenges:

  • Complexity in Large Systems: Managing and maintaining the use cases can become challenging for systems with many use cases.
  • Overlooking Non-Functional Requirements: While excellent for capturing functional requirements, the use case approach may overlook non-functional requirements unless explicitly addressed.

The Use Case Approach in requirements elicitation is a powerful tool for understanding and documenting how a system should interact with its users. Focusing on the user’s goals and describing system interactions from the user’s perspective ensures that the developed system can perform its intended functions effectively and meet user expectations.

Technique #7: CRC (Class Responsibility Collaboration) in requirements elicitation

CRC (Class-Responsibility-Collaborator)

CRC (Class-Responsibility-Collaborator) cards are a brainstorming tool used in the design and development phases of software engineering, particularly useful in object-oriented programming for identifying and organizing classes, their responsibilities, and their collaborations.

Although not traditionally framed within the requirements elicitation phase, CRC cards can play a significant role in understanding and refining requirements by fostering a clear understanding of how different parts of the system interact and what their purposes are.

Here’s how CRC cards can be beneficial in requirement elicitation:

Understanding CRC Cards

  • Class: Represents a category or type of object within the system.
  • Responsibility: Outlines what the class knows and does (i.e., its attributes and methods).
  • Collaboration: Indicates how the class interacts with other classes (who the class works with to fulfill its responsibilities).

Role in Requirements Elicitation

  1. Clarifying System Structure: By identifying classes and their interactions early on, stakeholders can gain a clearer understanding of the system’s proposed structure and functionalities.
  2. Facilitating Discussion: The simplicity of CRC cards makes them excellent tools for facilitating discussions among developers, analysts, and stakeholders. They can help in uncovering hidden requirements and ensuring a common understanding.
  3. Identifying Key Components: Through the process of defining classes and their responsibilities, key components of the system that are necessary to meet the requirements can be identified.
  4. Enhancing Collaboration: The collaborative aspect of CRC cards encourages stakeholders to actively participate in the development process, promoting a deeper engagement and understanding of the system requirements.
  5. Iterative Refinement: CRC cards can be easily updated, allowing for iterative refinement of classes and their relationships as more information is gathered or requirements change.

Implementing CRC Cards in Requirements Elicitation

  • Workshops: Organize CRC card sessions with stakeholders to collaboratively define and refine system components.
  • Visualization: Use CRC cards to create visual representations of the system architecture and how different parts interact, aiding in the identification of potential issues or requirements not yet considered.
  • Documentation: Transition the insights gained from CRC card sessions into formal requirements documentation, ensuring that the system’s design aligns with stakeholder needs.

Relation Between Requirement Engineering And Requirement Requirements Elicitation

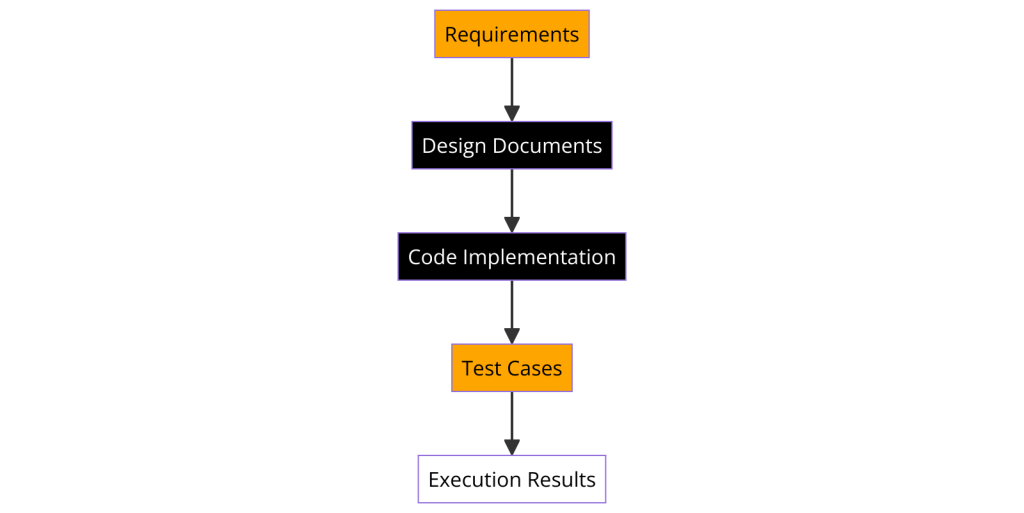
Requirements Engineering (RE) is a comprehensive discipline within software engineering that encompasses all activities related to the identification, documentation, analysis, and management of the needs and constraints of stakeholders for a software system. Requirements elicitation is a critical phase within this broader discipline, focusing specifically on the initial gathering of these needs and constraints from stakeholders. The relationship between Requirements Engineering and Requirements Elicitation can be understood through their roles, objectives, and how they contribute to the development process.

Role in Software Development:

  • Requirements Engineering: Serves as the foundational process in software development that ensures the final product is aligned with user needs, business objectives, and operational constraints. It covers the entire lifecycle of requirements management, from discovery through maintenance and evolution post-deployment.
  • Requirements Elicitation: This acts as the initial step in the RE process, where the goal is to discover the needs, desires, and constraints of the stakeholders through various techniques such as interviews, surveys, and observation.

Objectives:

  • Requirements Engineering: Aims to establish a clear, consistent, and comprehensive set of requirements that guide the design, development, and testing phases of software development. It seeks to manage changes to these requirements effectively throughout the project lifecycle, ensuring the software remains aligned with stakeholder expectations and business goals.
  • Requirements Elicitation: Focuses on accurately capturing stakeholders’ explicit and tacit knowledge to understand what they expect from the new system, why they need it, and how it will fit into their current operational context.

Contributions to Software Development:

  • Requirements Engineering:
    • Ensures a systematic approach to handling requirements, reducing the risk of project failures due to misaligned or misunderstood stakeholder needs.
    • Facilitates clear communication between stakeholders and the development team as a continuous reference point for validating the software’s alignment with intended outcomes.
    • Helps prioritize requirements based on business value, technical feasibility, and stakeholder impact, guiding resource allocation and project planning.
  • Requirements Elicitation:
    • Provides the initial set of data that forms the basis for all subsequent requirements engineering activities, including analysis, specification, validation, and management.
    • Helps in identifying potential challenges, constraints, and opportunities early in the development process, allowing for proactive planning and design adjustments.
    • Engages stakeholders from the outset, fostering a sense of ownership and collaboration that can enhance project outcomes and stakeholder satisfaction.

Integration within the Development Process:

The seamless integration of requirements elicitation into the broader requirements engineering process is crucial for the success of software projects. Elicitation feeds vital information into the RE process, which then undergoes analysis, specification, and validation to produce a well-defined set of system requirements. This iterative process of refinement and feedback ensures that the evolving understanding of stakeholder needs is accurately reflected in the project’s goals and deliverables.

“Many Business Analysts Use a Combination of Requirements Elicitation Techniques”

When you begin delving into every strategy, you understand that it is tough to do as an independent action.
For instance, brainstorming regularly occurs as a significant aspect of a requirements workshop that can also have an interview segment.
Or on the other hand, to plan an interview, you must first do some record analysis to think of a list of inquiries.

Or on the other hand, to motivate your interviewees to provide you with great data, they need to see a model.

The Requirements Elicitation methods can be joined in whatever way to accomplish the outcome you ask for from their venture. Also, we won’t get to choose elicitation methods from outside of business analysis, which is another approach to increasing your business analysis abilities.

How to Prepare for Requirements Elicitation?

• The first step is to take time and do some research, have multiple discussions,s and find out the business need of the project
• Understanding of the business need will make sure that scope creep and gold plating won’t happen
• Make sure that you have chosen the right technique for requirement elicitation
• The analyst must ensure that an adequate number of stakeholders are added to the project
• Make sure that the stakeholders are actively engaging from the requirement phase itself
• Stakeholders include SMEs, customer end users, project managers, project sponsors, operational support regulators, etc.
• All of them can’t be included in each project. Include stakeholders based on requirements

Final words…

In the business context, it is needed to have a viable method for market surveying to comprehend what a consumer needs and how to be productive over contenders.

We must concentrate on the most proficient technique to influence the users to accomplish their objectives.

The Requirements Elicitation collection procedure will help understand a consumer’s necessities, particularly in the IT business.
Your company’s structure, political atmosphere, the essence of your venture, and your qualities and choices will have much to do with which techniques work best for you.

Top 10 Programming Languages For Software Development 2024

In today’s digital age, programming languages are the backbone of technology, shaping how we interact with devices and the internet.

With over 63.6% of developers using JavaScript and around 53% utilizing HTML/CSS, these tools are not just for creating websites but are central to the evolution of technology and its applications.

Python, SQL, and TypeScript also stand out for their versatility and demand in the job market, particularly in data science, which is becoming increasingly pivotal across various industries.

Most used Programming Language Statista

(Source)

As we delve into the Top 10 Programming Languages for Software Development, we’ll explore the languages that are not only popular among developers but also crucial for anyone looking to advance in the tech-driven business world.

This exploration is not just about understanding the syntax or the functionality; it’s about recognizing the languages that are shaping our future, from web development to artificial intelligence, and how learning these languages can open doors to new opportunities and innovations.

#1) JavaScript

JavaScript-logo

JavaScript, a linchpin of the digital realm, enables the dynamic and interactive elements we’ve come to expect on websites and web applications. Here’s a deeper look into its technical aspects, widespread preference, community support, learning paths for beginners, and diverse use cases:

Technical Aspects

  • Interpreted Language: Executes without prior compilation, facilitating rapid development cycles.
  • High-Level: Abstraction from complex machine details allows focus on functionality.
  • Client and Server-Side: Versatile use across web development thanks to Node.js.

Why It’s Preferred?

  • Ease of Learning: Approachable for beginners with a straightforward syntax.
  • Universal Support: Compatibility with all major web browsers.
  • Event-Driven: Ideal for creating responsive and interactive user interfaces.

Community Support

  • Vast Resources: Platforms like Mozilla Developer Network (MDN) and Stack Overflow offer extensive tutorials and forums.
  • Frameworks and Libraries: Strong communities support the enhancement of development capabilities by frameworks and libraries like React, Vue, and Angular.

Learning Path for Beginners

Use Cases

  • Web Development: From Interactive Websites to Complex Web Applications.
  • Server-Side Applications: Utilize Node.js for back-end development.
  • Mobile Apps: Frameworks like React Native for cross-platform mobile app development.

JavaScript’s ability to span across full development stacks makes it indispensable for both aspiring and seasoned developers, offering endless opportunities for innovation in web development, software engineering, and beyond.

#2) Python

Python Logo

Python, celebrated for its simplicity and power, is a high-level, interpreted programming language that has garnered a vast following for its application in web development, testing data analysis, artificial intelligence (AI), and more.

Here’s a detailed breakdown of Python’s appeal, its learning resources, community support, and typical use cases:

Technical Aspects

  • Interpreted and High-Level: Python’s code is executed line-by-line, which simplifies debugging and allows developers to focus on programming concepts rather than intricate details.
  • Dynamic Typing: Variables in Python do not need an explicit declaration to reserve memory space, making the code shorter and more flexible.
  • Extensive Standard Library: Offers a wide range of modules and functions for various tasks, reducing the need for external libraries.

Why It’s Preferred

  • Readability and Simplicity: Python’s syntax is clear and intuitive, making it an ideal starting point for beginners in programming.
  • Versatile Application: From web and software development to data science and machine learning, Python’s applications are broad and varied.
  • Rapid Prototyping: Quick and easy to develop prototypes, allowing for faster project development.

Community Support

  • Robust Community: A global community of developers contributes to a rich ecosystem of libraries, frameworks, and tools.
  • Learning Resources: Abundant resources available for learners, including official documentation, tutorials, forums, and online courses from platforms like Coursera, edX, and Codecademy.

Learning Path for Beginners

  • Core Concepts: Start with basics like syntax, control flow, data structures, and object-oriented programming.
  • Project-Based Learning: Engage in small projects to apply what you’ve learned, such as building a web scraper or a simple web application.

Use Cases

  • Web Development: Frameworks like Django and Flask simplify the development of robust web applications.
  • Data Science and Machine Learning: Libraries like NumPy, pandas, Matplotlib, and TensorFlow make Python a favorite among data scientists and AI researchers.
  • Automation: Python’s simplicity makes it ideal for scripting and automating routine tasks, from file management to network configuration.

Python’s combination of simplicity, versatility, and powerful libraries creates a unique platform for developers to build sophisticated applications across various domains, making it one of the most sought-after programming languages in the tech industry.

#3) HTML/CSS

HTML/CSS logo

HTML (HyperText Markup Language) and CSS (Cascading Style Sheets) form the foundational building blocks of web development, dictating the structure and style of websites across the internet. Here’s a concise overview of their significance, how beginners can learn these languages, community support, and their primary use cases:

Technical Aspects of HTML/CSS

  • HTML: Defines the structure and layout of a web page using markup tags. It is responsible for creating and organizing sections, paragraphs, headings, links, and block elements on web pages.
  • CSS: Manages the visual presentation of a web page, including layouts, colors, fonts, and animations. It allows for the separation of content (HTML) from design (CSS), enabling more flexible and controlled styling options.

Why They’re Preferred

  • Universality: HTML and CSS are essential for creating web pages; knowledge of these languages is fundamental for web developers.
  • Accessibility: Easy to learn, with a vast amount of resources available for beginners.
  • Compatibility: Supported by all web browsers, ensuring that websites can be viewed consistently across different platforms.

Community Support

  • Extensive Documentation and Tutorials: Resources like the Mozilla Developer Network (MDN), W3Schools, and CSS-Tricks offer comprehensive guides and tutorials.
  • Forums and Communities: Platforms such as Stack Overflow, Reddit’s web development communities, and coding bootcamps provide support and advice for learners.

Learning Path for Beginners

  • Start with HTML: Learn the basics of HTML tags, elements, attributes, and document structure.
  • Advance to CSS: Once comfortable with HTML, move on to CSS to start styling your web pages. Learn about selectors, properties, values, and responsive design principles.
  • Practice by Building: Apply your knowledge by creating simple web pages and experimenting with different designs.

Use Cases

  • Web Page Development: The primary use of HTML/CSS is to create and style web pages for websites.
  • Responsive Design: CSS is crucial for developing responsive designs that work on various devices and screen sizes.
  • Web Applications: Together, they’re used to design user interfaces for web applications, ensuring usability and accessibility.

HTML and CSS are indispensable tools in the web developer’s toolkit, laying the groundwork for web design and development. Their simplicity and wide-ranging support make them ideal starting points for anyone looking to delve into the world of web development.

#4) SQL

SQL LOgo

SQL (Structured Query Language) is a specialized programming language designed for managing and manipulating relational databases. It is the standard language for relational database management systems (RDBMS) and allows users to perform tasks such as querying data, updating databases, and managing database structures. Here’s a closer look at SQL’s core aspects, learning resources, community support, and primary use cases:

Technical Aspects of SQL

  • Data Manipulation: SQL is used for inserting, querying, updating, and deleting data within a database.
  • Data Definition: It allows for the creation and modification of schemas, tables, and other database objects.
  • Data Control: SQL includes commands for setting access controls on data and databases.

Why It’s Preferred

  • Universality: SQL is supported by virtually all RDBMS, making it a critical skill for database management and data analysis.
  • Flexibility: It can handle data in both small-scale applications and massive, complex database systems.
  • Powerful Data Processing: Capable of efficiently querying and manipulating large datasets.

Community Support

  • Extensive Documentation: Most database systems offer detailed documentation on their SQL implementation and best practices.
  • Online Forums and Platforms: Communities like Stack Overflow, Reddit’s database and SQL forums, and dedicated SQL learning sites provide a wealth of knowledge and troubleshooting assistance.

Learning Path for Beginners

  • Basics of SQL: Start with understanding the basic structure of relational databases, SQL syntax, and basic queries.
  • Advanced Queries: Learn to write complex queries, including joins, subqueries, and set operations.
  • Database Design and Management: Gain skills in designing database schemas, indexing, and transactions.

Use Cases

  • Data Analysis: SQL is indispensable for data analysts and scientists to extract insights from data stored in relational databases.
  • Database administration: It is a tool that database administrators use to effectively manage and maintain database systems.
  • Web Development: Backend developers use SQL to interact with the database layer of web applications.

SQL’s role in data management and analysis is fundamental, making it a vital skill for professionals in data-intensive fields. Its ability to work across different database systems adds to its versatility and utility in the tech industry.

#5)TypeScript

Typescript logo

TypeScript, developed by Microsoft, is a powerful programming language that builds on JavaScript by adding static type definitions. Types provide a way to describe the shape of an object, providing better documentation, and allowing TypeScript to validate that your code is working correctly. Here’s an in-depth look at TypeScript’s features, why it’s gaining popularity, resources for learning, community support, and its use cases:

Technical Aspects of TypeScript

  • Static Typing: TypeScript’s core feature, static typing, enables developers to define variable types, ensuring type correctness at compile time.
  • Compatibility with JavaScript: TypeScript is a superset of JavaScript, meaning any valid JavaScript code is also valid TypeScript code.
  • Advanced Features: Includes interfaces, enums, generics, and advanced type inference, offering tools for building robust applications.

Why It’s Preferred

  • Error Detection: Early catching of errors through static typing helps reduce runtime errors.
  • IDE Support: Enhanced editor support with autocompletion, type checking, and source navigation.
  • Scalability: Makes code more readable and maintainable, which is crucial for larger projects.

Community Support

  • Comprehensive Documentation: The official TypeScript website offers thorough documentation and tutorials.
  • Vibrant Community: Forums like Stack Overflow, GitHub, and Reddit have active TypeScript communities for sharing knowledge and solving problems.
  • Frameworks and Libraries Support: Many popular JavaScript frameworks and libraries have TypeScript definitions, facilitating its use in diverse projects.

Learning Path for Beginners

  • Understanding TypeScript Basics: Start with the syntax and types, gradually moving to more complex features like interfaces and generics.
  • Practice: Convert small JavaScript projects to TypeScript to understand practical differences and advantages.
  • Explore Advanced Concepts: Dive into advanced types, decorators, and how to use TypeScript with frameworks like Angular, React, or Vue.js.

Use Cases

  • Web Applications: TypeScript is widely used in front-end development, especially in projects where codebase scalability and maintainability are crucial.
  • Server-side Development: With Node.js, TypeScript can be used for backend development, benefiting from its strong typing system.
  • Cross-Platform Mobile Development: Frameworks like Ionic and React Native support TypeScript for developing mobile applications.

TypeScript’s combination of JavaScript compatibility and static typing benefits makes it a compelling choice for developers looking to enhance their productivity and code quality, especially in complex projects requiring scalability and maintainability.

#6) Bash/Shell

Bash/Shell Logo

Bash (Bourne Again SHell) and other shell scripting languages are vital for automating tasks, managing system operations, and developing in a Unix/Linux environment. Here’s an overview of Bash/Shell’s functionalities, the reasons behind its widespread use, resources for learning, community support, and common use cases:

Technical Aspects of Bash/Shell

  • Command Line Interpreter: Bash processes commands from a script or direct input into the command line, executing system operations.
  • Scripting Capabilities: Allows for writing scripts to automate tasks, ranging from simple command sequences to complex programs.
  • Pipelining: Commands can be combined using pipes (|) to use the output of one command as the input to another, enhancing functionality and efficiency.

Why It’s Preferred

  • Powerful Scripting: Automates repetitive tasks, streamlines system management, and facilitates data manipulation.
  • Ubiquity in Unix/Linux: Bash is the default shell on most Unix and Linux systems, making it essential for system administration and development.
  • Customization and Control: Users can customize their environment, manage system functions, and execute batch jobs efficiently.

Community Support

  • Documentation: Comprehensive documentation is available via man pages (man bash), offering detailed insights into commands and functionalities.
  • Online Communities: Platforms like Stack Overflow, Unix & Linux Stack Exchange, and dedicated forums provide a space for queries and discussions.
  • Tutorials and Guides: Numerous online resources offer tutorials for beginners and advanced users, including Linux Command, Bash Academy, and tutorials on YouTube.

Learning Path for Beginners

  • Basics: Start with learning the command line basics, understanding shell commands, and practicing in the terminal.
  • Scripting: Gradually move to writing simple bash scripts, learning about variables, control structures, and I/O redirection.
  • Advanced Techniques: Explore advanced scripting concepts like functions, regular expressions, and sed & awk for text manipulation.

Use Cases

  • System Administration: Automating system maintenance tasks, user management, and backups.
  • Development Workflow: Automating build processes, testing, and deployment for software projects.
  • Data Processing: Utilizing command-line tools and scripts for processing and analyzing data efficiently.

Bash and shell scripting empower users with the ability to automate complex tasks, manipulate data, and manage systems efficiently, making them indispensable tools in the toolkit of developers, system administrators, and power users.

#7 ) JAVA

Java logo

Java, a robust, object-oriented programming language, is a cornerstone for many types of software development projects, from mobile applications on Android to large-scale enterprise systems and interactive web applications. Here’s an exploration of Java’s core features, why it remains a preferred choice among developers, learning resources, community support, and its primary use cases:

Technical Aspects of Java

  • Object-Oriented: Java is based on the principles of objects and classes, facilitating modular, flexible, and extensible code.
  • Platform-Independent: Java code runs on any device that has the Java Virtual Machine (JVM), embodying the principle of “write once, run anywhere” (WORA).
  • Memory Management: Automatic garbage collection helps manage memory efficiently, reducing the risk of memory leaks and other related issues.

Why It’s Preferred

  • Stability and Scalability: Java’s long history and widespread use have led to a stable and scalable platform for developing large-scale applications.
  • Rich APIs: Extensive set of APIs for networking, I/O, utilities, XML parsing, database connection, and more, facilitating diverse application development.
  • Strong Community Support: A vast ecosystem of libraries, frameworks, and tools, supported by a large and active developer community.

Community Support

  • Documentation and Tutorials: The official Oracle Java documentation, along with platforms like Java Code Geeks and Baeldung, offer comprehensive guides and tutorials.
  • Forums and Q&A Sites: Sites like Stack Overflow, the Oracle Technology Network, and Java forums provide platforms for discussion and problem-solving.
  • Development Tools: Robust development tools like Eclipse, IntelliJ IDEA, and NetBeans enhance productivity and offer extensive community support.

Learning Path for Beginners

  • Basic Concepts: Understand Java syntax, data types, control structures, and object-oriented programming concepts.
  • Intermediate Skills: Advance to more complex topics like exception handling, collections framework, multithreading, and GUI development with Swing or JavaFX.
  • Build Projects: Apply your knowledge to real-world projects, such as building a simple Android app, a web application using Servlets and JSP, or desktop applications.

Use Cases

  • Android Development: Java is the official language for Android app development, offering APIs tailored for mobile app development.
  • Enterprise Applications: Java Enterprise Edition (Java EE) provides a standard for developing scalable, multi-tiered, reliable, and secure enterprise applications.
  • Web Applications: Frameworks like Spring and Hibernate facilitate the development of robust and efficient web applications and services.

Java’s blend of performance, reliability, and cross-platform capabilities, along with its extensive libraries and community support, make it an enduring choice for developers across the globe, catering to a wide range of software development needs.

#8) c#

c# logo

C#, pronounced as “C Sharp,” is a modern, object-oriented, and type-safe programming language developed by Microsoft. It is part of the .NET framework, designed to enable developers to build a wide range of applications including but not limited to web, mobile, and desktop applications. Here’s a closer look at C#’s core features, its appeal to developers, learning resources, community support, and typical use cases:

Core Features of C#

  • Object-Oriented: Emphasizes the use of objects and classes, making it ideal for scalable and maintainable code.
  • Type-Safe: Offers strong type-checking at compile-time, preventing mix-ups between integers and strings, for example, thereby reducing errors.
  • Rich Library: The .NET framework provides an extensive set of libraries for various applications, from web services to GUI development.
  • Cross-Platform: With .NET Core, C# applications can run on Windows, Linux, and macOS, expanding its usability.

Why Developers Prefer C#

  • Productivity: C#’s syntax is clear and concise, which along with its powerful IDEs like Visual Studio, enhances developer productivity.
  • Versatility: Capable of developing a wide range of applications, from web applications with ASP.NET to game development using Unity.
  • Community and Microsoft Support: Strong backing by Microsoft ensures regular updates and extensive documentation, while a large community offers libraries, frameworks, and tools.

Learning Resources

  • Official Documentation: Microsoft Docs provides comprehensive tutorials and documentation.
  • Online Courses and Tutorials: Platforms like Pluralsight, Udemy, and Coursera offer numerous courses ranging from beginner to advanced levels.
  • Community Forums: Stack Overflow, GitHub, and Reddit host active C# communities for sharing knowledge and solving programming challenges.

Learning Path for Beginners

  • Start with Basics: Learn syntax, control structures, data types, and object-oriented programming principles.
  • Intermediate Concepts: Explore error handling, generics, delegates, events, and LINQ (Language Integrated Query).
  • Build Projects: Apply knowledge by building applications, such as a simple web application using ASP.NET or a game prototype with Unity.

Use Cases

  • Web Development: ASP.NET, a web application framework, enables the creation of dynamic websites, services, and apps.
  • Desktop Applications: Windows Forms and WPF (Windows Presentation Foundation) are used for creating rich desktop applications.
  • Game Development: Unity, a popular game development platform, uses C# as its primary programming language, allowing for the development of games across all major platforms.

C#’s blend of modern language features, strong type safety, and versatile application across various software development fields makes it a preferred choice for developers aiming to build high-quality, scalable, and robust applications.

#9) C

C logo

Dennis Ritchie at Bell Labs created the fundamental programming language C, which is well-known for its effectiveness, simplicity, and flexibility. It serves as the cornerstone for many modern languages like C++, C#, and Objective-C. Here’s a detailed exploration of C’s characteristics, its sustained popularity, resources for learning, community support, and typical application areas:

Core Features of C

  • Simplicity and Efficiency: C provides a straightforward set of keywords and a minimalistic syntax, focusing on directly manipulating hardware resources.
  • Portability: Programs written in C can be compiled across different platforms without significant changes, making it highly portable.
  • Low-Level Access: Offers close-to-hardware programming capabilities, allowing for fine-grained control over system resources.

Why Developers Value C

  • Foundation for Modern Languages: Understanding C provides a solid foundation for learning C++, C#, and other C-derived languages.
  • Performance: Its ability to execute programs close to the hardware ensures maximum efficiency, crucial for system programming.
  • Wide Range of Applications: From embedded systems to operating systems and everything in between, C’s versatility is unmatched.

Learning Resources

  • Official Documentation and Books: “The C Programming Language” by Kernighan and Ritchie is considered the definitive guide for C programming.
  • Online Platforms: Websites like Codecademy, Coursera, and edX offer courses tailored for beginners and advanced programmers.
  • Community Forums: Stack Overflow and Reddit’s r/programming provide active platforms for discussion, troubleshooting, and advice.

Learning Path for Beginners

  • Master the Basics: Start with syntax, variables, data types, and control structures.
  • Advance to Pointers and Memory Management: Understanding pointers is crucial for effective C programming.
  • Practice with Projects: Implement simple projects like a calculator, a file reader, or basic data structures to apply learned concepts.

Use Cases

  • System Programming: C is extensively used in developing operating systems, compilers, and network drivers due to its close-to-metal performance.
  • Embedded Systems: Its efficiency makes it ideal for programming microcontrollers and embedded systems.
  • Cross-Platform Development: C programs can be easily ported to various platforms, making it a popular choice for applications requiring high portability.

C’s enduring relevance in the tech landscape is a testament to its design principles of efficiency, simplicity, and flexibility. Its role as a fundamental language in computer science education and application development continues to make it an essential skill for programmers.

#10) PHP

PHP logo

PHP, originally created by Rasmus Lerdorf in 1994, stands for Hypertext Preprocessor. It’s a widely-used open-source scripting language especially suited for web development and can be embedded directly into HTML. Here’s an overview of PHP’s key features, why it remains a popular choice among web developers, learning resources, community support, and typical application scenarios:

Core Features of PHP

  • Server-Side Scripting: PHP is primarily used for server-side scripting, enabling dynamic content generation on web pages before they are sent to the client’s browser.
  • Ease of Use: Compared to other scripting languages, PHP is relatively easy for newcomers to learn, while offering many advanced features for professional programmers.
  • Cross-Platform: PHP runs on various platforms (Windows, Linux, Unix, Mac OS X, etc.) and supports a wide range of databases.

Why Developers Choose PHP

  • Flexibility and Scalability: PHP is flexible, scalable, and can be used to build small websites to massive web applications.
  • Rich Ecosystem: A vast array of frameworks (Laravel, Symfony), tools, and libraries enhance productivity and functionality.
  • Strong Community Support: A large and active community ensures a wealth of resources, frameworks, and code snippets are readily available.

Learning Resources

  • Official PHP Manual: Offers comprehensive documentation and tutorials for PHP programming.
  • Online Learning Platforms: Sites like Udemy, Coursera, and Codecademy provide courses for beginners and advanced PHP developers.
  • Community Forums and Q&A Sites: Stack Overflow and the official PHP mailing list are great places for getting help and sharing knowledge.

Learning Path for Beginners

  • Basics: Start with PHP syntax, variables, control structures, and built-in functions.
  • Database Interaction: Learn how to use PHP to interact with databases, particularly MySQL, for web applications.
  • Project-Based Learning: Engage in building simple projects, such as a blog or a small e-commerce site, to apply what you’ve learned.

Use Cases

  • Web Development: PHP is used for creating dynamic web pages and applications. WordPress, one of the most popular content management systems, is built on PHP.
  • Backend Development: It serves as the server-side language for most of the web backends, handling database operations, user authentication, and business logic.
  • E-commerce and CMS: PHP is the backbone of many e-commerce platforms (Magento, WooCommerce) and content management systems beyond WordPress, like Drupal and Joomla.

PHP’s blend of simplicity, extensive library support, and strong community backing makes it a steadfast choice for web developers looking to craft dynamic and interactive websites. Its ongoing evolution continues to keep it relevant in the fast-paced world of web development.

Snap Shot Of Their Differences In A Table

Feature JavaScript Python HTML/CSS SQL TypeScript Bash/Shell Java C# C PHP
Type High-level, Interpreted High-level, Interpreted Markup & Style Sheet Domain-specific Superset of JavaScript Command Language, Scripting High-level, Compiled High-level, Compiled Low-level, Compiled High-level, Interpreted
Paradigm Multi-paradigm Multi-paradigm N/A Declarative, Domain-specific Multi-paradigm Procedural, Scripting Object-oriented, Class-based Object-oriented, Class-based Procedural Scripting
Primary Use Web Development Web, AI, Data Analysis Web Design Database Management Web Development System Scripting Web, Mobile, Enterprise Web, Desktop, Mobile, Games System Programming Web Development
Ease of Learning Easy Easy Easy Moderate Moderate Moderate Moderate Moderate Hard Easy
Community Support Vast Vast Vast Large Growing Large Large Large Large Large
Performance Fast for web tasks Slower than compiled languages N/A Optimized for data operations Fast for web tasks Depends on tasks High, JVM dependent High, .NET dependent Very high Fast for web tasks
Cross-Platform Yes Yes Yes Yes Yes Yes Yes Yes Yes Yes
Typing Dynamic Dynamic N/A Static Static Dynamic Static Static Static Dynamic
Frameworks and Libraries Numerous (React, Angular) Numerous (Django, Flask) N/A N/A Compatible with JS libraries N/A Numerous (Spring, Hibernate) Numerous (.NET Framework, .NET Core) Limited Numerous (Laravel, Symfony)
Learning Resources Extensive Extensive Extensive Extensive Extensive Extensive Extensive Extensive Extensive Extensive

Also Read: Top 20 Programming Languages For App Development

Conclusion

Choosing the right programming language for software development depends on various factors such as project requirements, team expertise, performance considerations, and industry trends.

While the languages mentioned above are among the top choices in today’s software development landscape, it is essential to stay updated with emerging technologies and adapt to changing demands.

Whether you are building web applications, mobile apps, enterprise software, or games, understanding the strengths and weaknesses of different programming languages will empower you to make informed decisions and write efficient, maintainable code.

By staying abreast of developments in the programming world and continuously honing your skills, you will be well-equipped to tackle the challenges of modern software development and contribute meaningfully to the advancement of technology.

TestCafe vs Selenium : Which is better?

In the realm of web testing frameworks, TestCafe and Selenium stand out for their unique approaches to automation testing. TestCafe, a Node.js tool, offers a straightforward setup and testing process without requiring WebDriver.

Its appeal lies in its ability to run tests on any browser that supports HTML5, including headless browsers, directly without plugins or additional tools.

On the other hand, Selenium, a veteran in the field, is renowned for its extensive browser support and compatibility with multiple programming languages, making it a staple in diverse testing scenarios.

This comparison delves into their technical nuances, assessing their capabilities, ease of use, and flexibility to determine which framework better suits specific testing needs.

Firstly, we’ll understand the role of both automation tools and later see a quick comparison between them.

All About TestCafe

Developed by DevExpress, TestCafe offers a robust and comprehensive solution for automating web testing without relying on WebDriver or any other external plugins.

It provides a user-friendly and flexible API that simplifies the process of writing and maintaining test scripts. Some of its key features include:

  1. Cross-browser Testing: TestCafe allows you to test web applications across multiple browsers simultaneously, including Chrome, Firefox, Safari, and Edge, without any browser plugins.
  2. Easy Setup: With TestCafe, there’s no need for WebDriver setup or additional browser drivers. You can get started with testing right away by simply installing TestCafe via npm.
  3. Automatic Waiting: TestCafe automatically waits for page elements to appear, eliminating the need for explicit waits or sleep statements in your test scripts. This makes tests more robust and reliable.
  4. Built-in Test Runner: TestCafe comes with a built-in test runner that provides real-time feedback during test execution, including detailed logs and screenshots for failed tests.
  5. Support for Modern Web Technologies: TestCafe supports the testing of web applications built with modern technologies such as React, Angular, Vue.js, and more, out of the box.


Read About:Learn How to Use Testcafe For Creating Testcases Just Like That

Installation of TestCafe

Installing TestCafe is straightforward, thanks to its Node.js foundation. Before you begin, ensure you have Node.js (including npm) installed on your system.

If you haven’t installed Node.js yet, download and install it from the official Node.js website.

Here are the steps to install TestCafe:

Step 1: Open a Terminal or Command Prompt

Open your terminal (on macOS or Linux) or command prompt/powershell (on Windows).

Step 2: Install TestCafe Using npm

Run the following command to install TestCafe globally on your machine. Installing it globally allows you to run TestCafe from any directory in your terminal or command prompt.

npm install -g testcafe

Step 3: Verify Installation

To verify that TestCafe has been installed correctly, you can run the following command to check its version:

testcafe -v

If the installation was successful, you will see the version number of TestCafe output to your terminal or command prompt.

Step 4: Run Your First Test

With TestCafe installed, you can now run tests. Here’s a quick command to run an example test on Google Chrome. This command tells TestCafe to use Google Chrome to open a website and check if the title contains a specific text.

testcafe chrome test_file.js

Replace test_file.js with the path to your test file.

Note:

  • If you encounter any permissions issues during installation, you might need to prepend sudo to the install command (for macOS/Linux) or run your command prompt or PowerShell as an administrator (for Windows).
  • TestCafe allows you to run tests in most modern browsers installed on your local machine or on remote devices without requiring WebDriver or any other testing software.

That’s it! You’ve successfully installed TestCafe and are ready to start automating your web testing.

How To Run Tests In TestCafe

Running tests with TestCafe is straightforward and does not require WebDriver or any other testing software. Here’s how you can run tests in TestCafe:

1. Write Your Test

Before running tests, you need to have a test file. TestCafe tests are written in JavaScript or TypeScript. Here’s a simple example of a TestCafe test script (test1.js) that navigates to Google and checks the title:

import { Selector } from 'testcafe';

fixture `Getting Started`
.page `https://www.google.com`;

test(‘My first test’, async t => {
await t
.expect(Selector(‘title’).innerText).eql(‘Google’);
});

2. Run the Test

Open your terminal (or Command Prompt/PowerShell on Windows) and navigate to the directory containing your test file.

To run the test in a specific browser, use the following command:

testcafe chrome test1.js

Replace chrome with the name of any browser you have installed (e.g., firefox, safari, edge). You can also run tests in multiple browsers by separating the browser names with commas:

testcafe chrome,firefox test1.js

3. Running Tests on Remote Devices

TestCafe allows you to run tests on remote devices. To do this, use the remote keyword:

testcafe remote test1.js

TestCafe will provide a URL that you need to open in the browser on your remote device. The test will start running as soon as you open the link.

4. Running Tests in Headless Mode

For browsers that support headless mode (like Chrome and Firefox), you can run tests without the UI:

testcafe chrome:headless test1.js

5. Additional Options

TestCafe provides various command-line options to customize test runs, such as specifying a file or directory, running tests in parallel, or specifying a custom reporter. Use the --help option to see all available commands:

testcafe --help

Example: Running Tests in Parallel

To run tests in parallel in three instances of Chrome, use:

testcafe -c 3 chrome test1.js

All About Selenium

Selenium provides a suite of tools and libraries for automating web browsers across various platforms. Selenium WebDriver, the core component of Selenium, allows testers to write scripts in multiple programming languages such as Java, Python, C#, and JavaScript. I

ts key features include:

  1. Cross-browser and Cross-platform Testing: Like TestCafe, Selenium supports cross-browser testing across different web browsers such as Chrome, Firefox, Safari, and Internet Explorer.
  2. Large Community Support: Selenium has a large and active community of developers and testers who contribute to its development, provide support, and share best practices.
  3. Flexibility: Selenium offers flexibility in terms of programming language and framework choice. You can write test scripts using your preferred programming language and integrate Selenium with popular testing frameworks such as JUnit, TestNG, and NUnit.
  4. Integration with Third-party Tools: Selenium can be easily integrated with various third-party tools and services such as Sauce Labs, BrowserStack, and Docker for cloud-based testing, parallel testing, and containerized testing.
  5. Support for Mobile Testing: Selenium Grid allows you to perform automated testing of web applications on mobile devices and emulators, making it suitable for mobile testing as well.

How To Install Selenium

Installing Selenium involves setting up the Selenium WebDriver, which allows you to automate browser actions for testing purposes.

The setup process varies depending on the programming language you’re using (e.g., Java, Python, C#, etc.) and the browsers you intend to automate. Below is a general guide to get you started with Selenium in Java and Python, two of the most common languages used with Selenium.

For Java

Install Java Development Kit (JDK):

  • Ensure you have the JDK installed on your system. If not, download and install it from the official Oracle website or use OpenJDK.
  • Set up the JAVA_HOME environment variable to point to your JDK installation.

Install an IDE (Optional):

  • While not required, an Integrated Development Environment (IDE) like IntelliJ IDEA or Eclipse can make coding and managing your project easier.

Download Selenium WebDriver:

Add Selenium WebDriver to Your Project:

  • If using an IDE, create a new project and add the Selenium JAR files to your project’s build path.
  • For Maven projects, add the Selenium dependency to your pom.xml file:
<dependencies>
<dependency>
<groupId>org.seleniumhq.selenium</groupId>
<artifactId>selenium-java</artifactId>
<version>LATEST_VERSION</version>
</dependency>
</dependencies>

For Python

Install Python:

  • Ensure Python is installed on your system. If not, download and install it from the official Python website.
  • Make sure to add Python to your system’s PATH during installation.

Install Selenium WebDriver:

  • Open your terminal (Command Prompt or PowerShell on Windows, Terminal on macOS and Linux).
  • Run the following command to install Selenium using pip, Python’s package installer:
pip install selenium

Browser Drivers

Regardless of the language, you will need to download browser-specific drivers to communicate with your chosen browser (e.g., ChromeDriver for Google Chrome, geckodriver for Firefox). Here’s how to set them up:

Download Browser Drivers:

Set Up the Driver:

  • Extract the downloaded driver to a known location on your system.
  • Add the driver’s location to your system’s PATH environment variable.

Verify Installation

To verify that Selenium is installed correctly, you can write a simple script that opens a web browser:

For Java

import org.openqa.selenium.WebDriver;
import org.openqa.selenium.chrome.ChromeDriver;
public class SeleniumTest {
public static void main(String[] args) {
System.setProperty(“webdriver.chrome.driver”, “PATH_TO_CHROMEDRIVER”);
WebDriver driver = new ChromeDriver();
driver.get(“https://www.google.com”);
}
}

For Python

from selenium import webdriver

driver = webdriver.Chrome(executable_path=‘PATH_TO_CHROMEDRIVER’)
driver.get(“https://www.google.com”)

Replace PATH_TO_CHROMEDRIVER with the actual path to your ChromeDriver.

This guide should help you get started with Selenium. Remember, the exact steps may vary based on your development environment and the browsers you want to automate.

Also Read : Why is TestNG Awesome? Advantages of Integrating it with Selenium

Comparison Between TestCafe And Selenium

Feature TestCafe Selenium
Language Support JavaScript, TypeScript Java, C#, Python, Ruby, JavaScript, Kotlin, PHP
Browser Support Runs on any browser that supports HTML5. Includes support for headless browsers and mobile browsers via device emulators. Wide range of browsers including Chrome, Firefox, Internet Explorer, Safari, Opera, and Edge. Requires additional drivers for each browser.
WebDriver Requirement Does not require WebDriver or any external dependencies. Requires WebDriver to interact with web browsers.
Installation and Setup Simple setup with no dependencies other than Node.js. Easily installed via npm. More complex setup due to the need for installing WebDriver for each browser.
Test Execution Executes tests directly in the browser using a server. Can run tests on remote devices. Communicates with browsers through the WebDriver protocol.
Parallel Test Execution Built-in support for running tests concurrently across multiple browsers or devices. Supports parallel test execution with additional tools like Selenium Grid or third-party frameworks.
Cross-Browser Testing Simplified cross-browser testing without additional configurations. Requires configuration and setup for each WebDriver to enable cross-browser testing.
Integration with CI/CD Easy integration with popular CI/CD tools like Jenkins, TeamCity, Travis CI, and GitLab CI. Broad support for integration with various CI/CD systems.
Mobile Testing Supports mobile testing through device emulation in browsers. Supports real mobile devices and emulators through Appium integration.
Record and Replay Provides a feature to record actions in the browser and generate test code (with TestCafe Studio). Third-party tools and plugins are required for record and replay capabilities.
Community and Support Active community with support available through forums and chat. Commercial support is available through DevExpress for TestCafe Studio. Very large and active community with extensive resources, forums, and documentation.
Use Case Ideal for teams looking for a quick setup and easy JavaScript/TypeScript integration. Best suited for projects that require extensive language support and integration with various browser drivers and mobile testing through Appium.

Conclusion: Which one is Better? Based On Our Experience.

Both TestCafe and Selenium offer powerful capabilities for web testing, but the choice between them depends on specific project requirements, such as the preferred programming language, ease of setup, browser support, and testing environment complexity.

TestCafe might be more appealing for projects that prioritize ease of use and quick setup, while Selenium provides greater flexibility and language support, making it suitable for more complex automation tasks that may involve a wider range of browsers and integration with mobile testing frameworks like Appium.

What is Software Testing Traceability Matrix, Its Types & Significance?

A Software Testing Traceability Matrix (STM) is a document that links and maps test cases to their respective requirements, ensuring that each requirement has been adequately tested.

It serves as a verification tool to confirm that all software requirements, as defined in the requirements specification document, are covered by test scenarios and cases.

The matrix facilitates identifying missing tests, understanding the impact of changes, and ensuring comprehensive test coverage.

By maintaining traceability from requirements through to test cases and defects, STMs provide clear visibility into the test coverage, project progress, and quality assurance process, aiding in effective project management and delivery.
Traceability Matrix

Benefits of Using Traceability Matrix

The Software Testing Traceability Matrix (STM) is critical for several technical and project management reasons:

  1. Ensures Coverage: STM guarantees that all requirements are tested, minimizing the risk of untested functionality being released. It systematically matches requirements with test cases, ensuring comprehensive coverage.
  2. Impact Analysis: It facilitates efficient impact analysis by identifying which test cases are affected by changes in requirements, thereby streamlining regression testing and reducing the risk of introducing defects.
  3. Defect Traceability: STM links defects to their corresponding requirements and test cases, making it easier to pinpoint the source of defects, understand their impact, and prioritize fixes.
  4. Project Management: It gives stakeholders a transparent overview of testing progress and requirement coverage, aiding in project tracking, planning, and decision-making.
  5. Compliance and Audit: For projects under regulatory scrutiny, STM demonstrates due diligence and adherence to quality standards by providing auditable evidence of requirement coverage and testing.
  6. Efficiency in Test Maintenance: By clearly linking requirements to test cases, STMs simplify the maintenance of test suites, especially in agile and rapidly changing environments.
  7. Communication: It enhances communication among team members by providing a clear and common understanding of what needs to be tested, the testing scope, and the rationale behind test case selection.

Types of Software Testing Traceability Matrix

Mentioned below are the key types of software testing traceability matrixes:

Forward Traceability

Forward traceability focuses on mapping requirements to test cases. It ensures that every requirement has corresponding test cases designed to validate it. This type of traceability ensures completeness in testing efforts by confirming that all specified functionalities are covered by test cases.

Forward Traceability in Software Testing

Backward Traceability

Backward traceability involves tracing test cases back to the originating requirements. It ensures that every test case has a clear association with one or more requirements. This type of traceability helps in validating the necessity of each test case and identifying any redundant or obsolete ones.

Backward Traceability in Software testing.

Bidirectional Traceability

Bidirectional traceability combines both forward and backward traceability, establishing a two-way mapping between requirements and test cases.

It ensures not only that each requirement has corresponding test cases but also that each test case is linked back to the originating requirements. This comprehensive approach provides a thorough understanding of the testing coverage and its alignment with the project requirements.

Bidirectional Traceability in Software Testing

Vertical Traceability

Vertical traceability extends beyond requirements and test cases to encompass other artifacts throughout the software development lifecycle, such as design documents, code modules, and user manuals.

It enables stakeholders to trace the evolution of various elements across different phases of development, ensuring consistency and coherence in the final product.

diagram illustrating Vertical Traceability

Horizontal Traceability

Horizontal traceability focuses on establishing relationships between artifacts within the same development phase. For example, it may involve linking test cases to each other based on shared test objectives or dependencies.

This type of traceability enhances collaboration and coordination among testing teams, ensuring that efforts are synchronized and aligned toward common goals.

 diagram illustrating Horizontal Traceability in Software Testing

Basic Parameters to be included in TM (Traceability Matrix)

  • Requirement ID
  • Type and description
  • Test case no:
  • Requirement coverage in a number of test cases
  • Test design status and the execution of the test status
  • Unit test cases
  • Integration test cases
  • System test cases
  • Risks
  • UAT (User Acceptance Test) Status
  • Defects and current status

Tips for Effective Software Testing Traceability

  1. Start Early: Incorporate traceability at the beginning of the project. Early integration ensures that all requirements are captured and traced throughout the project lifecycle.
  2. Maintain Consistency: Use a consistent format for documenting requirements, test cases, and defects. Consistency makes it easier to trace and manage these artifacts as the project evolves.
  3. Automate Where Possible: Utilize tools that support traceability and automate the process of linking requirements, test cases, and defects. Automation reduces manual errors and saves time.
  4. Regular Updates: Keep the traceability matrix updated with changes in requirements, test cases, and defect status. Regular updates ensure the matrix remains an accurate reflection of the project state.
  5. Involve Stakeholders: Engage project stakeholders in the traceability process. Their input can provide additional insights, ensuring comprehensive coverage and alignment with project objectives.
  6. Review and Audit: Periodically review the traceability matrix for completeness and accuracy. Audits can uncover gaps in test coverage or discrepancies in the traceability links.
  7. Use Unique Identifiers: Assign unique identifiers to requirements, test cases, and defects. Unique IDs simplify the process of tracing and reduce confusion.
  8. Prioritize Traceability for Critical Requirements: Focus on establishing clear traceability for high-priority and critical requirements. Ensuring these requirements are thoroughly tested and traced is vital for project success.
  9. Train the Team: Educate your team on the importance of traceability and how to effectively use the traceability matrix. Well-informed team members are more likely to maintain accurate and useful traceability records.
  10. Leverage Traceability for Impact Analysis: Use the traceability matrix to conduct impact analysis for proposed changes. Understanding the relationships between requirements, test cases, and defects helps in assessing the potential impact of changes.

How to Create TM (Traceability Matrix)?

Creating a Traceability Matrix (TM) involves systematically linking project requirements with their corresponding test cases, test results, and any related issues or defects. This ensures that every requirement is adequately tested and accounted for. Here’s a step-by-step guide to creating an effective Traceability Matrix:

Step 1: Identify Your Requirements

  • Gather Requirements: Start by collecting all project requirements from the requirements documentation. This includes functional, non-functional, and system requirements.
  • Assign Unique Identifiers: Give each requirement a unique identifier (ID) for easy reference and tracking.

Step 2: Outline Your Test Cases

  • List Test Cases: Identify all test cases that have been designed to verify the requirements. This includes both automated and manual test cases.
  • Assign Identifiers to Test Cases: Similar to requirements, assign a unique ID to each test case for easy referencing.

Step 3: Create the Matrix Structure

  • Choose a Tool: Decide on a tool or software to create the matrix. This can range from simple tools like Microsoft Excel or Google Sheets to more sophisticated test management tools that offer traceability matrix features.
  • Set Up the Matrix: Create a table with requirements listed on one axis (usually the vertical axis) and the test cases listed on the other (usually the horizontal axis).

Step 4: Map Requirements to Test Cases

  • Link Test Cases to Requirements: For each requirement, indicate which test cases are intended to verify it. This can be done by placing a mark, such as a checkmark or a test case ID, in the cell where the requirement row and test case column intersect.
  • Ensure Full Coverage: Make sure every requirement has at least one test case linked to it. If any requirement is not covered, you may need to create additional test cases.

Step 5: Include Additional Information (Optional)

  • Add Test Results: You can extend the traceability matrix to include the results of each test case (Pass/Fail/Blocked).
  • Link to Defects: If applicable, include columns to link failed test cases to reported defects or issues, providing a direct trace from requirements to defects.

Step 6: Maintain the TM

  • Update Regularly: Keep the TM updated with any changes in requirements, additions or modifications of test cases, and updates in test results or defect status.
  • Review for Completeness: Periodically review the TM to ensure it accurately reflects the current state of the project and all requirements are adequately tested.

Step 7: Utilize the TM for Reporting and Analysis

  • Analyze Test Coverage: Use the TM to identify any gaps in test coverage and address them.
  • Support Impact Analysis: Leverage the TM to assess the impact of requirement changes on existing test cases and defects.

Creating and maintaining a Traceability Matrix is a dynamic process that requires ongoing attention throughout the project lifecycle. It’s a powerful tool for ensuring that all project requirements are met and that the final product is of high quality.

Template for Traceability Matrix

traceability_matrix

(Source)

Traceability Matrix Workflow

Traceability Matrix Workflow

Conclusion

A Software Testing Traceability Matrix is a fundamental tool for managing and tracking the testing process in software development projects. By establishing clear correlations between requirements, test cases, and other artifacts, an STM enhances transparency, facilitates impact analysis, and ensures comprehensive test coverage. 
Understanding the different types of traceability matrices—forward, backward, bidirectional, vertical, and horizontal—empowers teams to tailor their testing approach according to project requirements and objectives. Ultimately, leveraging traceability matrices effectively contributes to delivering high-quality software products that meet stakeholder expectations and industry standards.

Know More: 10 Best Software Testing Tools For 2020

What is CMMI? (Capability Maturity Model Integration): How To Achieve It?

What is CMMI?

CMMI is a process improvement framework that provides organizations with guidelines for developing and refining their processes to improve performance, quality, and efficiency. It offers a structured approach to process improvement by defining a set of best practices that organizations can adopt and tailor to their specific needs.

Established by the Software Engineering Institute at Carnegie Mellon University, it was developed as a process enhancement tool for software development. It is now managed by the CMMI Institute.

CMMI can be applied to product and service development, service establishment, management, and delivery. It helps guide process improvement across a project, division, or entire organization.

CMMI models are used to identify and address essential elements of effective product development and maintenance processes.

What are the 5 levels of CMMI?

One of the defining features of CMMI is its maturity model, which provides a structured framework for assessing and improving an organization’s process maturity. CMMI defines five maturity levels, each representing a different stage in the organization’s journey toward process improvement and excellence.

Maturity Level 1: Initial

At Level 1, organizations have ad hoc, chaotic processes that are often unpredictable and poorly controlled. There is a lack of defined processes, and success depends on individual effort and heroics. Organizations at Level 1 typically struggle with inconsistency, cost and schedule overruns, and high failure rates.

Maturity Level 2: Managed

At Level 2, organizations begin to establish basic processes, discipline, and control. They define and document standard processes for project management, engineering, and support activities. While processes may still be somewhat reactive, there is a focus on planning, tracking, and ensuring that work is performed according to established procedures.

Maturity Level 3: Defined

At Level 3, organizations have well-defined and standardized processes that are tailored to specific projects and organizational needs. There is a focus on process improvement and optimization, with an emphasis on institutionalizing best practices and lessons learned. Processes are proactive and consistently applied across the organization.

Maturity Level 4: Quantitatively Managed

At Level 4, organizations implement quantitative process management practices to control and manage process performance. They collect and analyze data to understand variation, predict outcomes, and make data-driven decisions. There is a focus on continuous measurement and improvement to achieve predictable and stable process performance.

Maturity Level 5: Optimizing

At Level 5, organizations focus on continuous process improvement and innovation. They actively seek out opportunities to improve processes, products, and services through experimentation, innovation, and organizational learning. There is a culture of excellence and a commitment to driving ongoing improvement and innovation throughout the organization.

History And Evolution Of CMMI

The Capability Maturity Model Integration (CMMI) is a process-level improvement training and appraisal program that was developed by the Software Engineering Institute (SEI) at Carnegie Mellon University. It is a methodology used to develop and refine an organization’s software development process. The CMMI model provides organizations with the essential elements of effective processes, which will improve their performance.

  • Early 1980s: The concept of a maturity framework for software development processes began to take shape due to the U.S. Department of Defense’s concerns about the quality of software projects.
  • 1986: The Software Engineering Institute (SEI) was established by the U.S. Department of Defense at Carnegie Mellon University. The SEI aimed to advance software engineering and quality assurance practices.
  • 1987: The SEI introduced the Capability Maturity Model (CMM) for Software (SW-CMM), which outlined five levels of process maturity for software development.
  • Late 1990s: Recognizing the need for a more integrated approach that included different aspects of software development and organizational functions beyond software engineering, the SEI began developing the CMM Integration (CMMI).
  • 2000: The initial version of CMMI was released, integrating various CMMs into a single improvement framework. This model was designed to be more comprehensive and flexible, allowing for customization to meet the needs of different organizations.
  • 2002: CMMI Version 1.1 was released, providing minor updates and clarifications based on user feedback.
  • 2006: CMMI Version 1.2 was introduced, offering significant improvements in usability, clarity, and consistency.
  • 2010: CMMI Version 1.3 was released, which further refined the model and introduced more flexibility in its application across different areas, including services and development.
  • 2018: CMMI V2.0 was launched, focusing on performance improvement, increasing the model’s relevancy in today’s agile and competitive business environment.

Evolution of CMMI

Evolution of CMMI

Key Components of CMMI

CMMI is structured around a set of key components that define its framework and guide process improvement. These components include:

  • Maturity Levels: CMMI defines five maturity levels that organizations can achieve as they improve their processes. These levels, ranging from Level 1 (Initial) to Level 5 (Optimizing), represent increasing process maturity and capability levels.
  • Process Areas: CMMI identifies areas organizations should focus on to improve performance. These process areas cover various aspects of project management, engineering, and support functions, such as requirements management, project planning, configuration management, and process improvement.
  • Goals and Practices: Each process area in CMMI defines specific goals that organizations should strive to achieve and practices they should implement to meet them. These goals and practices serve as benchmarks for evaluating the effectiveness of an organization’s processes and identifying areas for improvement.
  • Appraisal Method: CMMI provides an appraisal method for evaluating an organization’s adherence to its defined processes and assessing its maturity level. This appraisal method involves a structured assessment process conducted by trained appraisers to determine the organization’s level of process maturity and identify areas for improvement.

Different and Important CMMI Models

CMMI is not a one-size-fits-all approach; instead, it offers multiple models tailored to different domains and organizational needs. These models provide a structured framework for organizations to benchmark their current practices, identify areas for improvement, and establish a roadmap for achieving higher levels of maturity. Some of its key models include:

CMMI for Development (CMMI-DEV)

CMMI-DEV is one of the most widely used CMMI models and is specifically tailored for organizations involved in software and systems development. It provides a comprehensive set of best practices for managing and improving the development lifecycle, from requirements management to product delivery and maintenance. Some key process areas covered in CMMI-DEV include:

  • Requirements Management
  • Project Planning
  • Configuration Management
  • Supplier Agreement Management
  • Measurement and Analysis
  • Process and Product Quality Assurance
  • Verification and Validation

CMMI for Services (CMMI-SVC)

CMMI-SVC is designed for organizations primarily delivering services, such as consulting firms, IT service providers, and outsourcing companies. It focuses on establishing and improving processes related to service delivery, customer satisfaction, and service management. Its key process areas include:

  • Service System Development
  • Service Delivery
  • Service System Transition
  • Service System Acquisition
  • Service System Maintenance
  • Supplier Agreement Management
  • Process and Service Delivery Management

CMMI for Acquisition (CMMI-ACQ)

CMMI-ACQ is tailored for organizations involved in acquisition and procurement activities, such as government agencies, defense contractors, and purchasing departments. It provides guidance on managing the acquisition lifecycle, from soliciting requirements to accepting and managing supplier contracts. Its key process areas include:

  • Acquisition Requirements Development
  • Acquisition Planning
  • Acquisition and Technical Management
  • Acquisition Verification and Validation
  • Acquisition Evaluation
  • Supplier Agreement Management
  • Acquisition Process Management

These are just a few examples of the CMMI models available, each tailored to specific domains and organizational contexts. Organizations can choose the model that best aligns with their business objectives, industry requirements, and process improvement goals.

CMMI is both a process model and a behavioral model. It can be used to manage the logistics of refining performance by creating determinate standards; it can also develop a structure for boosting prolific and effective behavior throughout the system.
To conclude, the CMMI model is a pool of dependable best practices that help improve the quality, standards, and efficiency of software development processes. It includes various process areas like project planning, configuration management, etc.

Why is the Capability Maturity Model Integration (CMMI) Model important?

The CMMI model is being widely used by organizations to streamline and enhance their software development processes. It can also ensure that an organization will be able to complete the software within the given timelines and the allocated resources.
Being developed in the US defence sector, it is being widely trusted and used by organizations worldwide. Here are a few benefits of Capability Maturity Model Integration:

Consistency

CMMI radically enhances project predictability and consistency. It enhances the consistency of the complete process, thereby increasing the steadiness and reliability of the project.

Cost Saving

CMMI assists in early and more effective error detection and hence reduces the cost of rework considerably. It also reduces the cost burden because of schedule variability. It assists in enhanced cost predictability. The overall CMMI model plays a major role in cost savings in the software development process.

Self-Improvement

Organizations using CMMI are easily able to differentiate themselves by naturally improving process management and are becoming more competitive. Adopting CMMI is gradually becoming a benchmark for improved and enhanced process management.

Market demand

CMMI offers a set of industry best practices that enable the teams to reap the maximum benefit of it. Organizations are using it to best meet their customer’s demands. Also, the growing popularity of the process has given it a competitive edge and has established it as a benchmark for more efficient and streamlined software development.

Performance demand

CMMI helps improve the existing organizational processes and standards by analyzing their faults and overcoming them. Hence, CMMI can largely increase the performance of the processes. With extensive competition and high-performance demand, CMMI is gradually becoming a hot favorite of software organizations worldwide.

Process improvement

CMMI consists of a set of best practices or process management. Leveraging CMMI ensures process improvement. It includes 25 different process areas to provide an all-inclusive business process enhancement solution. The process areas in CMMI include 2 kinds of goals, 2 practices, and a large amount of useful data.

How To Implement CMMI In The Testing Process?

Implementing the Capability Maturity Model Integration (CMMI) in the testing process is a strategic approach to enhancing the quality and effectiveness of testing activities within an organization. Here are some key steps to effectively implement CMMI in the testing process:

  1. Understand CMMI Framework: Before embarking on implementation, it’s essential to have a solid understanding of the CMMI framework, including its maturity levels, process areas, goals, and practices relevant to testing activities.
  2. Assess Current Testing Processes: Conduct a thorough assessment of the current testing processes within the organization to identify strengths, weaknesses, and areas for improvement. This assessment will serve as a baseline for measuring progress and identifying specific areas where CMMI practices can be implemented.
  3. Define Testing Goals and Objectives: Clearly define the goals and objectives of testing within the context of the organization’s overall business objectives. Establish measurable targets for improving testing processes, such as increasing test coverage, reducing defects, and improving time-to-market.
  4. Tailor CMMI Practices: Tailor the CMMI practices to suit the organization’s specific testing needs and objectives. Identify relevant process areas and practices from the CMMI framework that can be implemented or adapted to improve testing processes.
  5. Develop Testing Processes: Develop and document standardized testing processes based on the selected CMMI practices. Clearly define roles, responsibilities, workflows, and guidelines for conducting testing activities, including test planning, test design, test execution, defect management, and test reporting.
  6. Implement Best Practices: Implement best practices identified from the CMMI framework to improve testing effectiveness and efficiency. This may include practices related to requirements management, test case development, test automation, peer reviews, and continuous improvement.
  7. Training and Skill Development: Provide training and skill development opportunities for testing professionals to ensure they have the necessary knowledge and expertise to implement CMMI practices effectively. Foster a culture of learning and continuous improvement within the testing team.
  8. Monitor and Measure Progress: Continuously monitor and measure progress towards achieving the defined testing goals and objectives. Use key performance indicators (KPIs) to track metrics such as defect density, test coverage, test execution time, and customer satisfaction.
  9. Iterative Improvement: Continuously review and refine testing processes based on feedback, lessons learned, and changing business needs. Embrace a culture of iterative improvement to drive ongoing enhancements in testing effectiveness and maturity.

SCAMPI or Standard CMMI Appraisal Method for Process Improvement

Standard CMMI Appraisal Method for Process Improvement is a CMMI-endorsed assessment method that is used by CMMI society. This process is clearly defined in the SCAMPI Method Definition Document inside the CMMI appraisal reference documents. It is divided into 3 classes: Class A, B, and C.

  • SCAMPI A: The most widely used appraisal method is SCAMPI A, which is generally used after multiple processes have been executed. SCAMPI A is used to set benchmarks for organizations and provides official ratings. An on-site, certified lead appraiser performs it.
  • SCAMPI B: It is used to discover a target CMMI maturity level and is less official than SCAMPI A. It is also used to forecast success for evaluated practices and to evaluate where the business stands in the maturity process.
  • SCAMPI C: SCAMPI C is smaller, a supplier, and cheaper than SCAMPI A or B. It evaluates a business’s established practices and identifies how to align them with CMMI practices. It can address managerial issues or smaller processes. It is riskier than SCAMPI A and B but is more cost-effective.

Involvement of CMMI In Software Testing?

Implementing CMMI (Capability Maturity Model Integration) in software testing offers numerous benefits and addresses several key needs within the quality assurance and testing processes. Here’s why CMMI is important for software testing:

  1. Enhanced Quality Assurance: CMMI provides a structured framework for quality assurance processes, ensuring that software testing is thorough, systematic, and aligned with the project’s objectives and requirements.
  2. Process Standardization: It helps in standardizing the testing processes across the organization, leading to consistency in how testing is planned, executed, and managed.
  3. Continuous Improvement: CMMI emphasizes continuous process improvement, allowing organizations to regularly evaluate and enhance their testing processes for better efficiency and effectiveness.
  4. Risk Management: Implementing CMMI helps identify potential risks early in the testing phase, enabling timely mitigation strategies to be deployed, which in turn reduces the likelihood of project delays or failures.
  5. Stakeholder Confidence: Achieving a certain CMMI maturity level signals to clients, stakeholders, and regulatory bodies that an organization follows industry-best practices in software testing, thereby boosting their confidence in the product’s quality.
  6. Defect Reduction: By following a structured approach to testing, organizations can significantly reduce the number of defects in the software, leading to higher quality products.
  7. Efficiency and Productivity: CMMI helps streamline the testing process, reducing redundancy and waste, which in turn improves the efficiency and productivity of the testing team.
  8. Benchmarking and Performance Measurement: It provides metrics and benchmarks for evaluating the performance of testing processes, aiding in the identification of areas for improvement.
  9. Competitive Advantage: Organizations that implement CMMI for software testing can gain a competitive edge by demonstrating their commitment to quality and process excellence.
  10. Alignment with Business Objectives: CMMI ensures that testing processes are aligned with the organization’s business objectives, contributing to the overall strategic goals of the company.

How to implement CMMI in the testing process?
The implementation of CMMI to the testing process is very limited. But recently software testing companies have discovered that they can implement CMMI to their testing process to meet the crunched deadlines and to deliver the better-tested product.
Result?

  • Better quality of deliverables.
  • Enhanced customer satisfaction.
  • Assists in cost-saving.
  • Assures stability and high performance of the deliverables.

Let us now learn how we can implement CMMI to testing process:

  • Pick up the trained staff members
  • Create groups for the testing process
  • Refer to CMMI consultants
  • Implement testing processes
  • Pick the apt tools
  • Implement the CMMI model to the testing process
  • Gather client’s feedbacks
  • Enhance the implemented practices.

Test management using CMMI

  • Identify validation criteria for the integration environment
  • Create an integration environment
  • Create verification environment
  • Define test methods

CMMI tools
There are various CMMI tools available in the market. Choice of these tools depends on the business’s needs. During the Maturity level 2 or 3, you can take the help of your CMMI consultant to design customized tools. You might have to consider the following tools:

  • Bug tracker
  • Project and document management
  • Requirement and design management
  • Metrics tools
  • Estimation
  • Integration application
  • Decision and analysis tools

Conclusion:
CMMI is a powerful framework for process improvement that offers organizations a structured approach to enhancing their performance, quality, and efficiency.

By defining best practices, benchmarking maturity levels, and providing guidance for process improvement, CMMI helps organizations achieve their business objectives and maintain a competitive edge in today’s dynamic marketplace. Whether in software development, healthcare, aerospace, or any other industry, organizations can benefit from adopting CMMI and embracing a culture of continuous improvement and excellence.

FAQs

Application of CMMI Across Industries

While CMMI has its origins in software engineering, its principles and practices are applicable to a wide range of industries and domains. Organizations in sectors such as aerospace, defense, healthcare, finance, automotive, and telecommunications have successfully adopted CMMI to improve their processes and achieve their business objectives.

In the aerospace and defense industry, for example, CMMI is widely used to ensure the safety, reliability, and compliance of complex systems and technologies. In healthcare, CMMI helps organizations enhance patient care, optimize clinical processes, and comply with regulatory requirements. In finance, CMMI enables organizations to manage risks, improve operational efficiency, and deliver innovative products and services to customers.

Here’s a brief comparison:

Feature CMMI ISO
Focus Process maturity and improvement Quality management systems and standardization across various industries
Approach Maturity levels for process improvement Set of standards for quality management systems and practices
Industries Primarily software development, engineering, and services Broad range of industries including manufacturing, technology, services
Flexibility Prescriptive to some extent, with a focus on improvement at different maturity levels Flexible, with principles that can be adapted to any organization size or type
Certification Appraisal system that evaluates organizational maturity levels Certification against the standard to demonstrate compliance
Objective To improve processes in order to enhance performance and quality To ensure products and services consistently meet customer and regulatory requirements
Global Recognition Highly recognized in IT and software development sectors Universally recognized across various sectors

Brief Overview:

  • CMMI is more focused on the maturity of processes and continuous improvement, making it suitable for organizations looking to enhance their processes systematically, especially in software development, IT, and engineering fields. It provides a structured path for process improvement across different maturity levels.
  • ISO standards, particularly ISO 9001 for quality management systems, are designed to ensure that organizations meet the needs of customers and other stakeholders while meeting statutory and regulatory requirements related to a product or service. ISO standards are applicable to a wide range of industries.

Which is better?

The choice between CMMI and ISO depends on the organization’s specific needs:

  • If the goal is to improve and optimize software development or service processes through a maturity framework, CMMI might be more appropriate.
  • If the goal is to implement a quality management system with broad applicability across various processes and industries, an ISO standard like ISO 9001 would be suitable.

Ultimately, the decision should be based on the organization’s specific goals, the industry in which it operates, and the specific improvements it seeks to achieve. Some organizations choose to implement both CMMI and ISO standards to leverage the strengths of each framework.

What Is CMMI Assessment?

A CMMI (Capability Maturity Model Integration) assessment is a systematic process used to evaluate an organization’s process maturity and adherence to the CMMI model. CMMI is a process and behavioral model that helps organizations streamline process improvement and encourage productive, efficient behaviors that decrease risks in software, product, and service development. The assessment is crucial for organizations aiming to improve their performance, efficiency, and capability to deliver high-quality products and services.

Purpose of CMMI Assessment

  • Evaluate Process Maturity: To determine the current level of process maturity of the organization against the CMMI levels (ranging from Level 1 to Level 5).
  • Identify Improvement Areas: To pinpoint strengths and weaknesses in existing processes and identify areas for improvement.
  • Benchmarking: To compare the organization’s processes against industry best practices and standards.
  • Certification: For organizations seeking formal recognition of their process maturity level.

Types of CMMI Assessments

  1. Informal Assessments: These are self-assessments conducted internally to get a preliminary understanding of the organization’s alignment with CMMI practices.
  2. Gap Analysis: A more structured form of assessment aimed at identifying the gaps between current processes and CMMI best practices.
  3. Formal Assessments (Appraisals): Conducted by certified CMMI appraisers, formal assessments are thorough and are required for official certification. The Standard CMMI Appraisal Method for Process Improvement (SCAMPI) is the most recognized method, with SCAMPI A being the most rigorous form, leading to official recognition of the organization’s maturity level.

Process of CMMI Assessment

  1. Preparation: Involves selecting the appraisal team, planning the assessment, and gathering necessary documentation and evidence of processes.
  2. Training: Ensuring the appraisal team and organizational members understand CMMI concepts and the appraisal process.
  3. Data Collection: Collecting evidence through document reviews, interviews, and observations to assess adherence to CMMI practices.
  4. Data Validation: Validating the collected information to ensure it accurately reflects the organization’s processes.
  5. Findings and Feedback: Identifying strengths, weaknesses, and areas for improvement. The appraisal team then provides these findings to the organization.
  6. Final Report: The assessment culminates in a final report detailing the organization’s maturity level and recommendations for improvement.

Outcomes of CMMI Assessment

  • Maturity Level Rating: Organizations are rated on a scale from Level 1 (Initial) to Level 5 (Optimizing), indicating their process maturity.
  • Improvement Plan: Based on the assessment findings, organizations develop an improvement plan to address identified gaps and weaknesses.
  • Enhanced Capability: Implementing recommendations from the assessment can lead to improved processes, efficiency, and product quality.

CMMI assessments are valuable for organizations looking to systematically improve their process maturity, enhance performance, and ensure their products and services meet high quality and efficiency standards.

Where To Learn CMMI?

Learning Capability Maturity Model Integration (CMMI) involves understanding its framework, principles, and how to apply them to improve processes within an organization. Here’s a structured approach to learning CMMI:

1. Understand the Basics

  • Read the CMMI Model: Start with the latest version of the CMMI model, such as CMMI for Development, CMMI for Services, or CMMI for Acquisition, depending on your area of interest.
  • Official CMMI Website: Visit the CMMI Institute’s website for resources, official guides, and introductory materials.

2. Take Formal Training

  • CMMI Courses: Enroll in CMMI training courses offered by the CMMI Institute or its authorized training providers. These courses range from introductory to advanced levels.
  • Workshops and Seminars: Attend workshops and seminars on CMMI. These are often offered at industry conferences and can provide practical insights and networking opportunities.

3. Get Practical Experience

  • Join a CMMI Project: Gain experience by participating in a project within an organization that is implementing or has implemented CMMI. Hands-on experience is invaluable.
  • Case Studies: Study case studies of organizations that have successfully implemented CMMI. This can provide practical insights into the challenges and benefits of applying CMMI.

4. Engage with the CMMI Community

  • Forums and Discussion Groups: Join CMMI forums and discussion groups online. Engaging with the community can provide support, answer questions, and offer advice based on real-world experience.
  • CMMI Conferences: Attend CMMI conferences to learn from experts, meet practitioners, and stay updated on the latest developments and best practices.

5. Read Books and Articles

  • CMMI Books: There are several comprehensive books on CMMI that cover its methodology, application, and case studies.
  • Research Articles: Academic and industry publications can provide deeper insights into specific aspects of CMMI and its implementation.

6. Certification

  • Consider Certification: After gaining a solid understanding and practical experience, consider pursuing CMMI certification. Becoming a CMMI-certified professional can validate your knowledge and skills.

7. Continuous Learning

  • Stay Updated: CMMI models and best practices evolve. Stay informed about the latest versions and updates to the CMMI model by regularly visiting the CMMI Institute website and participating in continued education opportunities.

Additional Resources

  • CMMI Appraisals: Understanding the appraisal process can provide insights into how organizations are evaluated against the CMMI standards. Consider learning about the different types of appraisals (e.g., SCAMPI A, B, C).

Learning CMMI is a journey that combines theoretical knowledge with practical application. Engaging with the material, the community, and real-world projects is key to deeply understanding how to effectively implement CMMI practices in an organizational setting.


Manual Software Testing Services – Why Testbytes Stand Out!

In today’s digital landscape, quality software isn’t a luxury; it’s a necessity. While automation is crucial, manual testing remains an indispensable pillar of Quality Assurance (QA). A recent World Quality Report (2023-24) found that 73% of businesses aim for a balanced testing approach, integrating manual and automated methods. The reason? Manual testing’s unique strengths.

Testbytes adopts a unique manual testing methodology that stands out in the industry. Our approach integrates traditional testing techniques with innovative strategies to enhance accuracy and efficiency in identifying bugs and usability concerns. 

By prioritizing user-centric scenarios, Testbytes ensures that applications are technically sound, intuitive, and engaging for end-users. This holistic approach underscores the importance of manual testing in delivering high-quality software products in today’s digital landscape.

Testbytes Manual Testing Process 

  • Requirement Analysis: The process begins with in-depth software requirements analysis. Testers gain an understanding of the functional and non-functional aspects of the application to ensure comprehensive test coverage.
  • Test Plan Creation: A test plan is developed based on the requirement analysis. This document outlines the strategy, objectives, schedule, resource allocation, and scope of the testing activities.
  • Test Case Development: Testers create detailed test cases that include specific conditions under which tests will be executed and the expected results for each condition. This step is crucial for systematic testing and covers various aspects such as functionality, usability, and performance.
  • Test Environment Setup: The necessary testing environment is set up before executing the test cases. This includes configuring hardware and software requirements that mimic the production environment as closely as possible.
  • Test Execution: Testers manually execute the test cases and document the outcomes during this phase. They compare the actual and expected results to identify any discrepancies or defects.
  • Peer Testing (Added Step):
    • Integration into Workflow: After individual test case execution, peer testing is introduced as an additional step. This involves having another tester, who did not originally write or execute the test case, review and re-run the tests.
    • Benefits: Peer testing brings a fresh perspective to the testing process, often uncovering issues the original tester might have overlooked. It enhances test coverage and accuracy by leveraging the collective expertise of the testing team.
    • Execution: Testers can perform peer testing in pairs or small groups, discussing findings and insights collaboratively. This step encourages knowledge sharing and can lead to more innovative testing approaches.
  • Defect Logging and Management: Any defects found during test execution and peer testing are logged in a tracking system. This includes detailed information about the defect, reproduction steps, and severity level.
  • Test Closure: The testing process concludes with a closure report summarizing the testing activities, coverage, defect findings, and an overall assessment of the application’s quality. This report helps stakeholders make informed decisions about the software release.

Manual Testing Process

Our Creative Approach Towards Manual Testing

Creating Charters and Use Cases from Requirements

We begin by translating the project requirements into detailed charters and use cases. This approach ensures a comprehensive understanding of the application’s expected functionality and user interactions. For each use case, identify the actors involved and outline their impact on the system and the expected outcomes. This methodical preparation lays a solid foundation for effective testing.

Utilizing Exploration Strategies and Guiding Principles

Implement exploration strategies and guiding principles in software testing to direct the execution of test charters. 

Similar to simulated user journeys or focused feature investigations, exploration strategies reveal defects that formal testing methods may overlook. Guiding principles, akin to practical wisdom or best practices, assist testers in efficiently traversing the intricate software environments. 

Distribute a weekly agenda among the team members, detailing the specific exploration strategies and guiding principles to be applied, promoting a unified approach and cooperative endeavor toward enhancing product quality

Applying IPSOVI in Manual Testing:

The IPSOVI technique offers a structured approach for manual testing, covering every software aspect: Input, Process, Storage, Output, Verification, and Interface.

Testers identify inputs, assess processing logic, examine data storage, validate outputs, check verification mechanisms, and test interfaces for external communication. 

This comprehensive method involves creating specific test cases, executing them to observe application behavior, and systematically documenting defects related to IPSOVI components. 

Collaboration and review with the development team ensure thorough coverage and improvement. 

Applying IPSOVI enhances software evaluation, leading to more reliable, high-quality applications by ensuring all critical areas are rigorously tested and validated.

Enhancing Manual Testing with Visual Validation Tools

Visual Validation Tools revolutionize manual testing by automating the visual comparison of applications across devices and platforms, ensuring UI consistency and enhancing user experience. Here’s how they contribute technically:

  • Automated Screenshot Comparisons: Quickly identify visual discrepancies across various environments.
  • Cross-Platform Consistency: Guarantee uniform appearance on different devices and browsers.
  • Pixel-Perfect Validation: Detect minute visual deviations with precision.
  • CI/CD Integration: Incorporate visual checks into automated pipelines for early issue detection.
  • Focus on UX: Free manual testers to concentrate on subjective user experience.

Exploration Strategies and Guiding Principles

Mind Mapping Techniques in Manual Testing

Mind Mapping in manual testing enhances organization and creativity, offering a visual approach to test planning and execution. Here’s how it benefits the testing process:

  • Visual Test Planning: Create intuitive diagrams representing test scenarios, requirements, and strategies.
  • Enhanced Communication: Facilitate clear, visual communication among team members.
  • Efficient Test Case Design: Organize and develop test cases by visually mapping out application features and their interactions.
  • Improved Coverage: Identify gaps in testing by visually assessing coverage areas.
  • Quick Reference: During testing cycles, use mind maps as a dynamic, easy-to-navigate reference tool.

How Do We Do Manual Testing Ticket Management: 

Effective ticket management is crucial in manual testing to streamline issue tracking, resolution, and communication. By leveraging specialized tools and techniques, teams can enhance productivity and ensure software quality. Here’s how to approach ticket management in manual testing:

Centralized Ticketing System

  • Tool Integration: Adopt a centralized ticketing system like JIRA, Trello, or Asana to log, track, and manage defects. These platforms provide a unified view of all issues, facilitating better prioritization and assignment.
  • Features Utilization: Use tagging, statuses, and filters to categorize tickets by severity, type, and responsibility. This helps in quick navigation and the management of tickets.

Effective Ticket Logging

  • Detailed Reports: Ensure each ticket includes comprehensive details like reproduction steps, expected vs. actual results, and environment specifics. Attachments such as screenshots or videos can provide additional context.
  • Standardization: Develop a template or guideline for reporting issues to maintain consistency and clarity in ticket descriptions.

Prioritization and Triage

  • Severity Levels: Define and use severity levels (Critical, High, Medium, Low) to prioritize issue resolution based on impact and urgency.
  • Triage Meetings: Conduct regular triage meetings to review, assign, and re-prioritize tickets, ensuring that critical issues are addressed promptly.

Team Collaboration and Communication

  • Cross-functional coordination: Facilitate collaboration between testers, developers, and project managers within the ticketing system through comments, updates, and notifications.
  • Feedback Loop: Implement a feedback loop for resolved tickets, where testers verify fixes and provide feedback, ensuring issues are thoroughly addressed before closure.

Continuous Improvement

  • Analytics and Reporting: The ticketing system’s tools generate reports on common issues, resolution times, and testing progress. This data can inform process improvements and training needs

Manual Testing Ticket Management: Tools and Techniques

Effective ticket management is crucial in manual testing to streamline issue tracking, resolution, and communication. By leveraging specialized tools and techniques, teams can enhance productivity and ensure software quality. Here’s how to approach ticket management in manual testing:

Centralized Ticketing System

  • Tool Integration: Adopt a centralized ticketing system like JIRA, Trello, or Asana to log, track, and manage defects. These platforms provide a unified view of all issues, facilitating better prioritization and assignment.
  • Features Utilization: Use tagging, statuses, and filters to categorize tickets by severity, type, and responsibility. This helps in quick navigation and management of tickets.

Effective Ticket Logging

  • Detailed Reports: Ensure each ticket includes comprehensive details like reproduction steps, expected vs. actual results, and environment specifics. Attachments such as screenshots or videos can provide additional context.
  • Standardization: Develop a template or guideline for reporting issues to maintain consistency and clarity in ticket descriptions.

Prioritization and Triage

  • Severity Levels: Define and use severity levels (Critical, High, Medium, Low) to prioritize issue resolution based on impact and urgency.
  • Triage Meetings: Conduct regular triage meetings to review, assign, and re-prioritize tickets, ensuring that critical issues are addressed promptly.

Team Collaboration and Communication

  • Cross-functional coordination: Facilitate collaboration between testers, developers, and project managers within the ticketing system through comments, updates, and notifications.
  • Feedback Loop: Implement a feedback loop for resolved tickets, where testers verify fixes and provide feedback, ensuring issues are thoroughly addressed before closure.

Continuous Improvement

  • Analytics and Reporting: The ticketing system’s tools generate reports on common issues, resolution times, and testing progress. This data can inform process improvements and training needs.

Conclusion

Our methodologies are not just procedures; they are the blueprint for success in a digital age defined by user expectations and technological advancements. As we navigate the complexities of software development, our focus remains unwavering: to deliver products that exceed expectations, foster engagement, and drive success.

Don’t let quality be an afterthought in your software development process. Choose Testbytes for manual testing services prioritizing precision, user experience, and efficiency.

Contact us today to learn how our unique approach can elevate your software products, ensuring they are ready to meet the demands of today’s digital landscape. Let’s work together to create exceptional digital experiences that captivate, engage, and endure.

How to Install Appium Server and Node on Windows through Command Line

Are you ready to dive deeply into the exciting world of mobile application testing with Appium but feeling a tad overwhelmed about where to begin? You’ve hit the jackpot by landing here!
Consider this guide your go-to pal, guiding you through the ins and outs of setting up Appium Server and Node.js on your Windows machine, and guess what? We’re doing it all using the charm of the Command Line.
That’s right—we’re skipping the maze of GUI setups in favor of some good old-fashioned command-line wizardry.

We’re here to simplify the whole process into easy-to-follow steps that even those new to the game can tackle without breaking a sweat.

Whether you’re preparing to put your innovative app through its paces or aiming to make your testing workflow as smooth as silk, getting Appium and Node.js up and running on your system is your starting line.

So, why not pour yourself a cup of your preferred drink, and let’s tackle this setup together, one command at a time? Stick with us, and before you know it, you’ll be all set to dive into your testing quests with gusto!

banner

Let’s understand How the Architecture of Appium Works

Appium is basically an HTTP server. This server is written in Node.js and it helps to create multiple web Driver session against different platforms. This Appium server receives request from java client which listens for commands from Appium Server.
Let’s have a look at Appium in detail with this video representation.

The way of working of Appium server is almost the same as in selenium RC. The way iOS and android interact with server is quite different. In case of Ios, an Appium proxy commands to a UIAutomation Script. This script would be running in MAC environment.
This application in Ios is called Instruments. In case of android almost everything is same where the server proxy commands to a UIAutomator test case. UIAutomator is a native UI Automation framework which supports junit test cases.
Now let us look at the command line way in which you can install Appium Server on your windows machine.

Installing Appium Server and Node on Windows

Mentioned below is a step-by-step guide on how to install Appium Server and Node on a Windows machine using the command line:

Step #1: Install Node.js

  • Open a command prompt by pressing Win + R, typing cmd, and pressing Enter.
  • Check if Node.js is already installed by running the following commands:
  • Node -v npm -v 
  • If Node.js is not installed, download the latest version from the official website and follow the installation instructions.

Step #2: Install Appium Server

  • Open the command prompt and install Appium globally using npm:
  • npm install -g appium 
  • Verify the installation by checking the Appium version:

appium -v 

Step #3: Install Appium Dependencies for Android

If you plan to automate Android applications, you must install Appium dependencies for Android. Follow these steps:

  1. Install the Android SDK:
  • Download Android Studio from the official website.
  • Run the installer and follow the on-screen instructions.
  • Open Android Studio, go to “Configure” > “SDK Manager,” and install the necessary SDK components.
  1. Set the ANDROID_HOME environment variable:
  • Open the System Properties window by right-clicking on “This PC” or “Computer” and selecting “Properties.”
  • Click on “Advanced System settings” > “Environment Variables.”
  • Add a new system variable named ANDROID_HOME and the path to the Android SDK as the variable value.

Add Android tools to the system PATH:

  • Edit the Path variable in the System Variables section and add the following paths:

perlCopy code

%ANDROID_HOME%\platform-tools %ANDROID_HOME%\tools %ANDROID_HOME%\tools\bin 

Step #4: Install Appium Dependencies for iOS (Mac only)

If you plan to automate iOS applications, you must install Appium dependencies for iOS. Follow these steps:

  • Install Xcode from the Mac App Store.
  • Install Appium dependencies using npm:

npm install -g appium-doctor 

  • Run appium-doctor to check for any missing dependencies:

Follow the instructions provided by Appium-doctor to install any missing dependencies.

Step #5: Start Appium Server

  • Open a command prompt and start the Appium server:
  • Appium will start, and you’ll see logs indicating that the server is listening on a specific address and port.

Note: If you encounter any issues related to ports being in use, you can specify a different port using the –port option:

bashCopy code

appium –port 4725 

Step 6: Test Appium Installation

After installing Appium successfully, it is time to test the installation by running a simple test script. Create a new file with a .js extension (e.g., test.js) and add the following code:

const wdio = require(‘webdriverio’); const opts = { port: 4723, capabilities: { platformName: ‘Android’, platformVersion: ‘YOUR_ANDROID_VERSION’, deviceName: ‘YOUR_DEVICE_NAME’, app: ‘PATH_TO_YOUR_APK’, automationName: ‘UiAutomator2’, }, }; const driver = wdio.remote(opts); (async () => { await driver.init(); const field = await driver.$(‘ID_OR_XPATH_OF_AN_ELEMENT’); await field.setValue(‘Hello, Appium!’); await driver.deleteSession(); })(); 

Replace the placeholder values (YOUR_ANDROID_VERSION, YOUR_DEVICE_NAME, PATH_TO_YOUR_APK, and ID_OR_XPATH_OF_AN_ELEMENT) with appropriate values for your Android device and application.

Run the test script using the following command:

node your_test_script.js

If everything is set up correctly, Appium will launch your application on the specified device, interact with the specified element, and close the session.

Why Appium?

If you are wondering why Appium is a preferred choice for mobile testing, here are some of the common reasons:

  • Cross-Platform Compatibility: Appium supports Android and iOS, allowing you to write tests for both platforms using a single codebase.
  • Programming Language Agnostic: You can write Appium tests in multiple programming languages, including Java, Python, C#, and more.
  • Open Source: Because Appium is open source, a worldwide community of developers is constantly improving it. This ensures that it stays up-to-date with the latest mobile technologies.
  • No App Modification: Appium tests your app in the same way that users use it, without modifying the app. This provides a more realistic testing environment.

Prerequisites of Installing Appium

Before installing Appium, make sure you have the following prerequisites:

  • Java Development Kit (JDK): Appium is built on Java, so you must install the JDK on your machine. You can download the latest JDK version from the official Oracle website.
  • Android Studio: If you plan to automate Android applications, install Android Studio to set up the necessary Android dependencies. Download Android Studio from the official website.
  • Xcode: For automating iOS applications, you’ll need Xcode. Install it from the Mac App Store if you’re using a Mac.
  • Node.js: Appium is built on Node.js, so you need to have Node.js installed. Download the latest version from the official Node.js website.

Conclusion

Hence, now you got to know that installation of Appium is damn easy with the command line rather than doing it manually. NPM is a wonderful package installer and makes your task easier. Install it and start the automation. All the best!!

FAQs

Why is Appium important in iOS and Android App testing? Is it because of its architecture?

Appium plays a pivotal role in iOS and Android app testing, primarily due to its unique architecture, which allows for seamless cross-platform testing.

This tool operates on a client-server model, enabling testers to write tests in their preferred language using standard APIs. Its significance lies in the ability to test native, hybrid, and mobile web apps without needing to alter the app code.

By supporting Android and iOS platforms, Appium facilitates a more efficient testing process, reducing the time and resources spent on writing and maintaining separate tests for each platform.

This approach not only enhances productivity but also ensures consistency in testing across different environments.

How Appium Architecture Works?

Test Script Initialization:

  • The developer writes a test script using their preferred programming language and the corresponding Appium client library.

Appium Server Startup:

  • The developer starts the Appium Server, specifying the desired capabilities such as the platform (Android or iOS), device details, application path, and other relevant configurations.

Connection Establishment:

  • The Appium client library in the test script initiates a connection to the Appium Server by providing the server’s address (IP and port) and the desired capabilities for the test session.

WebDriver Commands:

  • The test script, through the Appium client, sends WebDriver commands to the Appium Server. These commands include actions like tapping on an element, entering text, or navigating between screens.

Translation and Execution:

  • The Appium Server translates the WebDriver commands into corresponding actions supported by the mobile platform. For example, a WebDriver “click” command might translate to a tap on the screen.

Interaction with Mobile Device:

  • The translated commands are then executed on the mobile device, interacting with the application just as a user would. This interaction includes gestures, input, and navigation.

Response Handling:

  • The Appium Server captures the responses from the mobile device and communicates them back to the Appium client. These responses may include success or failure indicators, as well as any relevant data.

Test Script Completion:

  • The test script processes the responses received from the Appium Server, making decisions based on the success or failure of each command. The script may also include assertions to verify the expected behavior of the application.

Session Closure:

  • Once the test script completes its execution, the Appium Server closes the WebDriver session, releasing the resources associated with the test session.

How To Start the Appium server in CMD?

To start the Appium server via the Command Prompt (CMD) on Windows or Terminal on macOS/Linux, you first need to have Appium installed. If you haven’t installed Appium, you can install it using Node.js’s package manager (npm) with the following command:

npm install -g appium

Once Appium is installed, you can start the server by opening CMD or Terminal and running the following command:

appium

This command starts the Appium server with the default settings, typically listening on port 4723. If you want to specify a different port or customize other settings, you can use various flags. For example, to start the Appium server on port 5000, you can use:

appium -p 5000

For more advanced configurations and options, you can refer to the official Appium documentation or use the appium --help command to see a list of all available command-line options.

Is node js mandatory for Appium?

Yes, Node.js is mandatory for Appium. Appium is built on the Node.js platform and uses JavaScript for its execution. The installation of Appium itself is typically managed through npm (Node Package Manager), which is a part of Node.js.

Therefore, having Node.js installed on your system is a prerequisite for installing and running Appium for automated mobile application testing.

How to install Appium using npm on Windows?

To install Appium on Windows using npm, follow these steps:

  1. Open Command Prompt as an administrator.
  2. Ensure Node.js is installed by running node -v. If not installed, download and install it from nodejs.org.
  3. Install Appium by executing npm install -g appium.
  4. Verify the installation with appium -v.

This installs Appium globally on your Windows system, making it accessible from any command prompt.

How do I run an Appium server?

To run an Appium server, follow these simple steps:

  1. Open your command prompt or terminal.
  2. Type appium and press Enter.

This command starts the Appium server with default settings. You can customize its behavior using various flags (e.g., appium --port 4723 to specify a different port).

How to install node on Windows Terminal?

To install Node.js on Windows using Windows Terminal, follow these steps:

  1. Visit the official Node.js website (nodejs.org) to download the Windows installer.
  2. Choose the version you need (LTS for stability or Current for the latest features).
  3. Once downloaded, run the installer (.msi file) and follow the installation prompts. Ensure to select the option to add Node.js to the PATH if asked.
  4. After installation, open Windows Terminal.
  5. Verify the installation by running node -v and npm -v to check Node.js and npm versions, respectively.

This process installs Node.js and npm (Node Package Manager), enabling you to run Node.js applications and install packages globally.

How to install node test?

To verify that Node.js is installed on your system:

  • Open your terminal or command prompt.
  • Type node -v and press Enter. This command will show the installed Node.js version, indicating that Node.js is installed.
  • You can also check npm (Node Package Manager), which comes with Node.js, by typing npm -v and press Enter. This will display the installed npm version.

Installing a Package Named “test”

If there’s a specific npm package you’re looking to install named “test” (this is a hypothetical scenario as there might not be a package with this exact name meant for general use), you can install it using npm with the following command:

npm install test

For installing any package for development purposes and saving it to your project’s package.json file, you can use:

npm install test –save-dev

Replace “test” with the package name you intend to install. If you’re experimenting with or learning about npm packages, you can replace “test” with a real package name, like “express” for a web server framework or “jest” for testing.

Note

If you’re new to Node.js and npm, it’s worth mentioning that “test” is often used in documentation and tutorials as a placeholder for the actual package name you wish to install or the command to run tests defined in a package.json file. To run tests defined in your package’s package.json, you would use:

npm test

This command runs the test script specified in the “scripts” section of package.json.

Game Testing Tutorial: How To Perform Game Testing ?

Video games hold a substantial share of the software market, creating a constant demand for innovation and complexity in the gaming industry.

Game development involves a collaborative effort among various professionals, including game designers, writers, visual artists, sound designers, and, crucially, game testers.

Therefore, it is important to be aware of the comprehensive process of game development and the pivotal role played by game testing in the entire process. Understanding the intricate phases of game development and the strategic implementation of testing strategies is essential for delivering a flawless gaming experience to users.

Game Development Process: Step-by-Step

Phase #1

Conceptualization The game development journey starts with conceptualizing the game, involving brainstorming to formulate the core idea, theme, and unique selling points.

Existing intellectual properties in various media or original concepts might serve as inspiration for this fundamental idea. This stage is critical for aligning the game’s vision across the development team and stakeholders.

Phase #2

Pre-Production In pre-production, detailed game design documents (GDDs) are prepared, outlining gameplay mechanics, narratives, character designs, and environment concepts.

This phase sees the creation of technical prototypes to validate gameplay ideas and mechanics.

Storyboards and concept art are developed to visually represent game narratives, environments, and characters, facilitating a shared understanding and vision among the creative team.

Phase #3

Production The production phase marks the bulk of game asset creation and coding. It involves the detailed development of game levels, character models, textures, animations, and game-specific logic.

Programming teams work on developing the game engine (if custom), integrating third-party libraries, and coding game mechanics, physics, AI behavior, and user interface elements.

This phase requires rigorous coordination between artists, designers, and programmers to ensure consistency and adherence to the game’s vision and design documents.

Phase #4

Post-Production Post-production focuses on refining the game through extensive QA testing. The game, now in its alpha state, is scrutinized for bugs, performance issues, and gameplay imbalances.

Feedback from alpha testing leads to adjustments and bug fixes, progressing the game to a beta state for wider testing, including compatibility testing and compliance checks with platform-specific standards.

This phase is iterative, with multiple testing cycles, feedback, and refinement until the game meets quality and compliance benchmarks for launch readiness.

Phases in game testing

Marketing

Marketing Simultaneously with late development stages or post-production, the marketing phase ramps up to generate anticipation and demand. This includes creating promotional materials, engaging with media and influencers, and showcasing the game at industry expos.

Marketing strategies are tailored based on target demographics and platforms, focusing on highlighting the game’s features and unique aspects.

For indie developers or smaller studios, this phase might also involve direct community engagement through social media and crowdfunding platforms to build a supportive player base pre-launch.

What do you think the Game Testing Stage is intended to reveal?

The testing stage is a critical component of the game development process.

In addition, revealing potential bugs in the program—for example, in-game objects not running legitimately—. It should likewise check for irregularities in the fictional structure of the game, consistency (and culmination) of artwork, and additionally be testing the gameplay—is the game connecting with, too simple, or too hard, for instance?

Who is a Game Tester?

Game testers play a pivotal role in ensuring the quality of a game before its final release. They thoroughly test games on various platforms, including consoles and desktops, to identify bugs and defects. Without game testers, games could suffer from numerous issues, potentially damaging the reputation of the development company.

What are the requirements to Become a Game Tester

  • Attentive behavior
  • Understanding of video game console controllers
  • Awareness of SDLC
  • Good communication skills
  • Great writing skills
  • Primary computer programming aptitudes

Central Skills

  • Principles and perception
  • Analytical thinking
  • Knowledge of computer hardware parts
  • Investigating and exploring aptitudes
  • Versatility to tedious and redundant obligations

Typically, gaming companies don’t have a specific degree requirement. The skills are quite often tested at the interview. Still, education plays a significant role in game testing. The titans of the gaming industry prefer to hire employees with degrees in:

  • software development
  • computer programming
  • Computer science or some other technical field.

What does a Games Tester do?

Some of the key responsibilities of a game tester include the following:

  • Be repetitive and unpredictable to identify and break down potential issues.
  • Test different versions of games on various platforms.
  • Explore specific areas of the game and test all available options.
  • Play through different modes and characters to reveal glitches.
  • Report errors, spelling mistakes, and language issues.
  • Document bug reports in a bug-tracking system.
  • Understand the difference between reporting bugs and reporting features.
  • Test the game repeatedly in various conditions to ensure stability.
  • Analyze new game versions to check if previous bugs have been addressed.


The process involved in Game Testing

By far, we know that testing has an imperative function in Game development. A game is tested at the distinctive level of its development procedure. Usually, in the software engineering method, the Software test design document contains all the data about testing the product. However, game testing is not quite the same as testing the software.

testbytes-mobile-app-testing-banner

There are numerous steps included other than test cases for a game, generally in light of the fact that almost all game testing is black box testing. The developers generally don’t test their own games, nor do they have time to test them completely, nor is it a wise idea to test games by themselves.

Before presenting their code for integration with the rest of the game or as third-party code for use by other game developers, game developers only test small portions of it.

6 Steps of the game testing are as follows:

  1. Plan and Outline the Test – Although quite a bit of this plan was done before in the programming test plan document, still with each new prototype of the game, this document should be returned to upgrade any adjustments in the test cases, specifications, and new setup support. The game tester ought to guarantee that no new issues are presented.
  2. Set up the Test – All the teams should upgrade their code, documents, tests, and test environment and regulate it with each other. The test development group should mark the bugs settled and the test time taken to confirm them.
  3. Play out the Test – Run the test suit once more. In the event that any bug is discovered, test around the error to ensure that the bug is real.
  4. Report the Outcomes – Complete insights about the bugs are reported.
  5. Repair the Bug – The game testing team engages in this step by uncovering the bug to the development team and giving direct testing to track the bug.
  6. Return to Stage 1 and Retest – A new build is delivered after one cycle.

The game test is performed in a structured way. Regardless of the size of the game and the time required for creating the game, all game testing should follow the fundamental structure.

Parts of Games That Undergo Testing

  • the menu and the menu functions
  • art (character model, terrain or world, texture, objects, crowd, etc.)
  • animation (the likeness and quality of the realism, movement, and frame rate)
  • music
  • audio and the sound effects (in connection with the facial animation, e.g., the animation series and lip sync)
  • any movie clips
  • camera (zoom in and out, cinematic view, replay)
  • title screens
  • game logic and flow
  • world/scene/level
  • the action properties
  • the player’s properties
  • the situation to advance to the subsequent level (what are the commands?)
  • the application of environmental objects
  • the object/event triggers
  • increasing levels of difficulty
  • the scoring
  • the AI logic (for both offensive play and defensive play; player positioning and movement)
  • statistics (pre-game and in-game, like high score and player statistics)
  • SFX – Special effect
  • NIS – Non-Interactive Sequence
  • the gamepad
  • the vibration/shock effect of the gamepad
  • the usability of the button functions
  • the application of multi-button actions (also known as button mashing)
  • the use of analog and digital mode
  • legal text
  • the game options (game start or menu selection, game pause, pause menu options, hints, and scrolling, such as driving by the accessible choices on the screen, so forth.)

Types of Game testing that need to be followed in the Testing Process

The game development cycle on all platforms has phases that are known as milestones. The milestones show that the game is at a specific level of development. The milestones, usually, are first playable, alpha phase, beta phase, gold phase, and post-release phase. The initial playable version is related to that of a demo version; here, the feel of the game is perceived and evaluated.

In a simplistic view, testing is recognizing bugs found in the game so the issue can be resolved. There are diverse types of tests that can be classified as black-box testing and clear-box testing. Their testing goal and general procedures are trivialities (e.g., test planning, test design, testing execution, regression testing, and bug reporting), yet their aim stresses various parts of the game. Let’s know what those techniques are:

Black Box Testing

It centers on the playability or functional parts of the game. For instance, testing the UI (e.g., the utilization of buttons and the selection menus), the “look and feel” (e.g., the designs and animation), and the real gameplay.

For Black Box testing, the game tester must know how to play the game, the utilization of the gamepad, and the game flow and the rules.

Blackbox Testing in Game testing

Clear Box Testing

It centers on the design and integration parts of the game software. For instance, the utilization of a database, pipelines, the integration and reconciliation of game segments like the AI engine, the rendering engine, sound, etc.

For Clear Box testing, the game tester must comprehend what coding is. The software tester employs a run-time troubleshooting environment, encourages the code or pieces of code with input, i.e., setting variables, data, and so forth, and interprets the test outcome.

Clear Box Testing in game testing

Functional Testing

 Its purpose is likely to be to recognize deviations from functional necessities. It comes down to driving through the game repeatedly to distinguish issues and the environments in which they can be rectified.

Functional Testing Diagram

Stress/Load Testing

When testing the games, it is fitting to create conditions that require a huge computational load. So, the game tester can check system execution in an unpleasant condition. With load testing, it is less demanding to see and fix possibly perilous code segments in time. Test for odd circumstances, like loading a game with no memory card, running the game for 48 hours, and checking how the game reacts.

Stress/Load Testing in Game Testing

Combinatorial Testing

 This type of testing is a process of experimental design that is applied for commercial software testing and to create test cases. Using combinatorial testing for game testing improves test performance efficiency, produces high-grade quality, decreases cost, and ensures reliable phase containment.

Every conceivable sequence of values of the parameters is incorporated into this test. Here the parameters are chosen from game elements, functions, events, character attributes, play options, settings, customization choices, and so forth.

combinatorial testing flow diagram

Compatibility Testing

 Much of the time, game programming is performed on laptops or PCs. Notwithstanding, numerous games can be intended for different devices: smartphones, game consoles, communicators, and so forth. Game development is performed on the test systems of these gadgets, yet they vary greatly from the original. In this way, later on, a few challenges may arise when beginning the game on the original gadget.

Plus, one should give careful consideration to the authorization of programming. In case of any aberrations, the game can be returned for correction, which takes additional time and a loss of funds. So, it is vital to check whether the game fulfills the necessities of the devices.

Feature Testing

 This testing is performed to confirm the smooth functioning of the features in the game. For covering discrete features, detailed test cases are more appropriate. Task-based experiments require a predominant level of detail. At the point when there is an assortment of features for various player statuses, test frameworks get convenient and beneficial.

Critical Path Test

Critical path testing is a procedure to recognize the critical paths in the game. This type of testing technique uncovers the conditions that cause disappointment.

Play Testing

Playtesting is the technique of game testers playing the game to break down non-useful features like fun variables, balance, difficulty levels, and so forth. Here, a selected team of testers plays the incomplete variants of the game to check the work process.

Limitation testing:

The games are regularly converted into the languages of the nations where they are assumed to be made available on the market. It happens that translators can’t give a totally exact interpretation, which would be completely reliable with the game events. Indeed, even if interpreted appropriately, it may not indicate the circumstances and abrade on the ears of the local speakers. Thus, after localization, it is helpful to test the game by natives of those nations where the ultimate game would be available.

Smoke Testing

 It is performed to test a new CD burn. The name Smoke Testing originates from the engineering lab testing new automobile engines. Before a new engine is taken for road testing, the engineers would just begin the engine and check whether it runs. In the event that smoke turns out from the motor, they would know promptly that a few sections don’t work appropriately.

Much like making another form, the game tester will essentially run the game; if it continues crashing, the tester will know a few sections are incorrect.

Regression Testing

 This type of game testing is done to retest the unaltered parts of the product. Here, test cases are re-checked to investigate whether the operation of the past elements of the application works fine and that new changes have not presented any new mistakes or vulnerabilities.

Multiplayer Testing

 Multiplayer testing is an entirely different beast in itself. Numerous players, all the while, associate with the game world, with game servers, with PC-controlled opponents, and with each other. Such huge numbers can turn out badly.

Furthermore, it regularly requires a complete team of game testers, various troublesome risk-based decisions to make, and the need to invest boundless amounts of time and energy in testing distinctive situations.

A comprehension of multiplayer game configuration and how to test proficiently as a group is required for this sort of game testing technique.

Sound Testing

 Sound testing is common in all products that make some sort of sound or play media. But games have a one of a kind feature that other software does not need to consider on a similar level. Game music must include the user in the game and upgrade the gameplay. Not only should the sound play without missing or shuttering components, but it ought to likewise add to the gameplay. This demands broad sound aptitude and a particular comprehension of game audio. Quite a specific master of domain awareness.

Ad-hoc Testing

 Ad-hoc testing is likewise, at times, alluded to as general testing. It is a less organized test. Ad hoc testing enables the game tester to investigate paths in view of their instinct. There are two types of ad hoc testing.

In the first place, there is free testing, which is a testing game with no arrangement or documentation. The other is direct testing, which is a solitary test performed spontaneously to answer a particular issue.

Test Flow Diagrams

Test flow diagrams are practiced to produce models depicting game behavior from the player’s point of view. Game testing involves examining the model along every potential path to examine unexpected game situations. A test Flow diagram is a formal way to test design. Since it is graphical in nature, it is simple to review, investigate, and give feedback on the test designs.

Complex test flow diagrams can interpret compact features, but typically, small test flow diagrams are preferable.

Test Trees

A test tree is a usability procedure for sorting out test cases that supports selecting an appropriate set of tests for a given arrangement of code changes. Test Tree enhances the general comprehension of complex game traits and deals with conceivably complicated functions, particularly when these functions connect with other game principles, elements, and functions.

The test tree is developed by disintegrating the element into a subset until the bottom nodes distinguish elements to utilize or spec to perform while game testing.

What is Bug Hunting?

Bug Hunting is a regular practice for some game testing companies worldwide, yet some test administrators wrongly feel they go Hunting when their game testers casually play with the application, keeping in mind the end goal of discovering “border case errors.”. Bug Hunts are Informal Testing activities; this should not be mixed up with playing with the system without a reason or goal.

  • Bug Hunts should be directed as team activities.
  • Bug Hunts are there so as to include non-testers and find less-ordinary bugs.
  • Bug Hunts require the system to be steady to be helpful.

Thus, to accomplish something (and not waste your time and efforts!!) on performing these Bug Hunts, you have to follow a particular procedure, execute planning and preparation activities, as well as observe and control the procedure all through its execution.

Types of Game Bugs in Game Testing

Crash

A crash bug is a severe issue that freezes or completely shuts down the game, often leading to a “Crash to Desktop” (CTD) scenario. Executing particular commands, loading into new areas, or coming across specific enemies are just a few examples of the in-game actions that can cause these bugs. Crashes are considered high-priority bugs, and game developers prioritize eliminating them to ensure a smooth gaming experience..

mobile app

General

General bugs are issues that do not halt game progression but still disrupt the gameplay experience. For example, a character disappearing unexpectedly, though not affecting the main storyline, can be classified as a general bug.

While these bugs may not be game-breaking, they can lead to player frustration and impact the game’s overall quality.

Minor

Minor bugs are small issues that have a minimal impact on gameplay but still need attention.

Examples include a character’s mouth not moving during dialogue or other subtle graphical glitches. Although minor bugs may not be prioritized, they contribute to the overall polish and professionalism of the game.

Severe

Severe bugs hinder the player’s progress without causing a game crash. These bugs can range from a disappearing character crucial for advancing a quest to a malfunctioning door preventing access to the next game area.

While not as critical as crash bugs, severe bugs are significant and must be addressed to maintain a coherent gaming experience.

Graphics

Graphics bugs primarily involve issues with the visual elements of the game, including texture errors and map imperfections. An example of a graphics bug is an incorrect ground texture applied to a door.

Addressing graphics bugs is essential for maintaining the aesthetic appeal and immersion of the game.

Sound

Sound bugs relate to issues with in-game audio, such as incorrect timing or missing music cues. These bugs can occur anywhere in the game, from the main menu to the closing credits.

Sound bugs can disrupt the game’s overall atmosphere and must be corrected for a complete gaming experience.

Algorithm Bugs

Algorithm bugs occur at collision detection points within the game. Incorrectly placed walls or floors can cause players to leave the intended map boundaries, indicating a failure in collision detection.

Fixing algorithm bugs is crucial to prevent players from getting stuck or experiencing unintended interactions within the game environment.

Fatal

Fatal bugs are game-breaking issues that prevent players from advancing further due to critical functionality failures.

An example is a jumping bug where a player needs to jump to progress, but the jumping mechanism fails, hindering progression. Fatal bugs demand immediate attention to ensure the game works correctly at all levels.

Configuration Trigger

Configuration trigger bugs occur when game settings have not been adequately tested, leading to failures.

These bugs can affect graphics and sound settings, potentially causing textures to disappear or altering audio configurations.

Configuration trigger bugs are uncommon in well-known games made by skilled programmers, but they can appear in online games that are downloadable.

How to Write a Bug Report Effectively?

A career as a computer games tester isn’t all fun and buffoonery. When you find a bug, you have to report it. Composing a game error report may look like a basic assignment. However, it is accompanied by a lot of duties. This is a correspondence from which other individuals will construct a plan of action with respect to game improvement. Those activities frequently incorporate submitting costly assets to settle the issue.

Here are a few tips for creating a bug report as a game tester. An adequate game bug report contains:

  • Title or Subject –

  1. Compile the critical elements of the issue.
  2. A basic overview of what, where, why, when, and how it is generated, featuring the most vital contemplations.
  3. Shows how extreme it is.
  4. Others utilize it to design a course of action; thus, it should be comprehended at once.
  • Classification

  1. A concise depiction of what, where, why, when, and how is generated with each and every detail.
  2. Here you ought to portray precisely “everything” about the issues.
  3. Classify it in such a manner that the reader can follow it entirely from the classification and comprehend totally what is going on.
  4. You may utilize industry-standard language to help precisely depict the issue.
  • Generation Steps –

  1. Well-ordered guide on the best way to replicate the issue.
  2. You ought to consider the individual heeding this guide has never observed the product and may even be new to the platform. Show them correctly what to do to reproduce the issue.
  3. Abstain from industry-standard language to guarantee the guide can be trailed by anybody.
  • Extra Information –

  1. Give additional helpful data.
  2. Assessment and theory, you can discuss how this bug may influence the player and conceivable inevitabilities created by the issue (such as bad customer reviews)
  3. Conclusions about different ways this may influence the game.

(Note: This segment is unnecessary in creating a report, though.)


What are the Opportunities as a Game Tester

Game-producing organizations, to achieve more profits, are always contracting computer game testers. So, finding the right source for the organization, whoever is hiring, is absolutely necessary. There are essentially three sorts of game testers. These are:

  1. Freelance Game Tester: The game testers who are freelancing are all around experienced and search out organizations that outsource forthcoming games to test the games. These testers are regularly the backbone of the game testing method. These game testers are usually contracted on a project-to-project basis. These testers are mostly used for black-box testing. Promptness, clarity, and communication in writing are critical attributes you should have.
  2. Full-Time Corporate Video Game Tester: There are potential people for being hired by big game-producing companies for full-time. For individuals who have a passion for playing games, no other activity can be as fascinating as this. Furthermore, the main capability required for this sort of employment is experience. No degrees or certificates are mandatory.
  3. Second-Party Testers: These game testers work on the testing team of a secondary or subsidiary organization under a bigger company. The second-party game testers can be either fully employed or contracted. Because of their close association with game developers, they frequently obtain access to more advanced tools. This usually results in a powerful focus on test cases and white-box testing. Most second-party testers are at least somewhat experienced in the game testing process.

Further, if you are looking forward to embracing video game testing as your profession, you must become more acquainted with the levels of game testing that are in charge of testing distinctive parts of the game. Quality assurance, Alpha testing, and Beta testing are the three primary kinds of game testing processes you will dependably need to begin with when you select this field as a profession. Alongside, there are other testing processes too.

Levels of Game Testing

  1. Alpha Testing

    • The initial testing phase is where the game is evaluated for major bugs.
    • Involves internal testing by the development team.
  2. Beta Testing

    • A select group of outside users test the game during pre-release testing.
    • Aims to identify potential issues and gather user feedback.
  3. Quality Assurance (QA) Testing

    • Comprehensive testing phase to ensure the game meets quality standards.
    • Conducted by experienced game testers.

What is Gold Testing or Post-Release Testing?

This is the testing stage, where the game is completely tested, has been launched to the general population has a totally finished product, and players have total access to the game.

Despite the fact that the game is completely completed, there is plenty of chances where a player can discover glitches or even game-crashing bugs. Under these circumstances, the developers need to discharge patches with a specific goal to fix them.

In the Gold testing level, every single crucial bug (hangs, crashes, and function disappointments) is resolved. 90% of every single significant bug (performance and functionality) is solved.

85% of every minor bug (system execution problems that hit a few users) is settled. Furthermore, release-level performance (i.e., 60-fps frame rate) is accomplished.

During its life cycle, if the game was delivered with even a couple of terrible bugs, it’s the ideal opportunity for an update or patch.

For each patch, the dev team must return to the whole list of bugs and consolidate some new, clean features. Every individual bug patch or polish element implies more testing (yet should be prepared).

Each new fix must be tested to detect whether it works with the base game and prior patch versions.

Mobile Game Testing

While many testing techniques overlap between different platforms, mobile game testing presents its own set of challenges and considerations. Ensuring a mobile game functions seamlessly, adheres to specific requirements, and provides an exceptional user experience is no small feat, especially given the diverse array of mobile configurations. 

The Significance of Mobile Game Performance

Mobile games captivate players with striking graphics, animations, and rich media. However, if the performance of a mobile game is lacking, these captivating elements become futile. Gamers expect a smooth, uninterrupted experience with consistent progress in gameplay. The importance of performance assessment cannot be overstated, as it directly impacts the player’s satisfaction and engagement.

Testing Navigation Flow, Usability, and User Experience

Emphasizing the genuine user experience, mobile game testing necessitates using actual devices rather than relying on emulators. Intricacies such as battery consumption, the impact of battery chargers, and potential intrusions significantly influence the overall user experience and entertainment value. Testing on real devices allows for a more accurate assessment of these factors.

Graphics Execution and Early-Stage Performance Tests

The graphics execution of a mobile game is intricately linked to user experience. While striking graphics and animations enhance the visual appeal, their effectiveness diminishes if the game’s performance lags. To address potential performance blockages, it is essential to conduct performance tests during the early stages of game development. Identifying and resolving performance issues early in the development process ensures a streamlined gaming experience.

Three Basic Phases of Mobile Game Testing

  • Device Performance Testing
  1. Start-Up of Game: The initial screen should appear within 1-2 seconds of pressing the game icon. b. Memory Consumption: Adding functionalities increases memory usage, requiring careful management. c. Software/Hardware Variation: Test the game on various devices with different RAM and processor specifications. d. Battery Time: Continuous gameplay should not excessively drain the battery or cause the device to overheat. e. App in Background: Resuming the game from the background should retain its previous state. f. Usage with Other Apps: The game should run seamlessly when used simultaneously with other applications.
  • Network Performance Testing
  1. Jitters: Networks using packet switches cause address delays in data transmission. b. Network Speed: Test the game on 2G, 3G, and 4G or 5G networks, including mobile networks and Wi-Fi.
  • Testing API/Server Performance
  1. API Calls: Limit the number of calls from the game to ensure optimal performance. b. Information To and From Server: Efficiently handle data transmission between the game and server. c. Server Down Time: Implement failover database servers to ensure continuous availability in case of server issues.


Conclusion

Effective game testing is a structured and comprehensive process that involves various types of testing techniques. From functional testing to stress testing and bug hunting, each step is crucial in ensuring a flawless gaming experience for users. Understanding the components of games that undergo testing, the types of testing involved, and the techniques used are essential for game testers and developers to deliver high-quality games to the market. The iterative nature of the testing process ensures continuous improvement and refinement, ultimately contributing to the success of the gaming industry.

How To Use Apache JMeter To Perform Load Test On Mobile App

In an era where mobile app performance is critical, Apache JMeter emerges as a powerful tool for conducting thorough load tests.

This technical guide delves into using JMeter to simulate real-world user traffic and network conditions, critically analyzing how a mobile app withstands varied load scenarios.

It involves configuring JMeter for mobile environments, setting up proxy settings for accurate request capture, and crafting realistic user interaction scripts.

The process aims to uncover performance metrics, such as response times and error rates, essential for pinpointing scalability and efficiency issues.

This comprehensive approach ensures that your mobile application is not only functional but also resilient under heavy user load, a key to maintaining a competitive edge in the dynamic app market.

app testing

Understanding Load Testing and Its Significance for Mobile Apps

Load testing involves simulating real-world usage scenarios to evaluate how an application behaves under different levels of demand. For mobile apps, factors like network latency, varying device capabilities, and fluctuating user loads can significantly impact performance.

Load testing helps identify potential bottlenecks, such as server overloads or inefficient code, allowing developers to optimize their apps for a smoother user experience. It enables them to anticipate and address performance issues before they affect end-users, thereby enhancing reliability and satisfaction.

Getting Started with Apache JMeter

Apache JMeter is an open-source Java-based tool renowned for its versatility in performance testing, including load testing mobile applications. Mentioned below is the guide that can help you get started with Apache JMeter:

Download and Install Apache JMeter: Visit the official Apache JMeter website and download the latest version. Installation instructions are provided for different operating systems, ensuring a smooth setup process.

Familiarize Yourself with the Interface: Apache JMeter features a user-friendly interface with various components such as Thread Group, Samplers, Logic Controllers, and Listeners. Understanding these components is crucial for creating effective test plans.

Prepare Your Mobile App for Testing: Ensure your mobile app is ready for testing by deploying it on a test environment accessible to Apache JMeter. This may involve configuring the network.

JMeter Configurations

To perform a load test on mobile applications using Apache JMeter, you’ll need to set up JMeter and configure your mobile device to connect through a proxy. Here’s a summarized guide based on information from multiple sources:

Install Apache JMeter: Ensure Java Development Kit (JDK) is installed on your PC. Download Apache JMeter and run it.

Configure JMeter for Recording:

  • Add a Thread Group to your Test Plan in JMeter.
  • Add a Logic Controller, such as a Recording Controller, to the Thread Group.
  • Add a Listener, like the View Results Tree, to observe requests and responses.
  • Add an HTTP(S) Test Script Recorder to your Test Plan. Set the port (e.g., 8080 or 8888) that will be used for recording.

Configure Mobile Device for Proxy:

  • Connect both your PC and mobile device to the same Wi-Fi network.
  • On your mobile device, go to Wi-Fi settings and modify the network settings to use a manual proxy.
  • Set the proxy hostname to your PC’s IP address and the proxy port to the one you specified in JMeter.

Install JMeter’s Certificate on Mobile Device:

  • Find the ApacheJMeterTemporaryRootCA.crt file in JMeter’s bin folder.
  • Transfer and install this certificate on your mobile device. You may need to set a screen lock password if prompted.

Record Mobile App Traffic:

  • Start the HTTP(S) Test Script Recorder in JMeter.
  • Operate the mobile app as normal. JMeter will record the HTTP requests made by the app.
  • Stop the recording in JMeter once you’re done and save the Test Plan.

Run and Analyze the Test Plan:

  • Execute the recorded script in JMeter.
  • Use the View Results Tree Listener to analyze the responses of each request.

A video tutorial to make the process clearer:

Designing Effective Load Test Plans

Creating comprehensive load test plans is essential for obtaining meaningful insights into your mobile app’s performance. Here’s a step-by-step guide to designing effective load test plans using Apache JMeter:

  1. Identify Test Scenarios: Start by identifying the key user scenarios or workflows within your mobile app. These could include actions such as logging in, browsing products, making purchases, or interacting with multimedia content.
  2. Define User Behavior Profiles: Determine the distribution of user interactions based on factors like frequency, concurrency, and duration. This helps simulate realistic usage patterns during load tests.
  3. Configure Thread Groups: Thread Groups in Apache JMeter allow you to define the number of virtual users (threads) and their behavior. Adjust parameters such as ramp-up time and loop counts to simulate gradual increases in user load.
  4. Select Appropriate Samplers: Samplers represent different types of requests sent to the server, such as HTTP requests for REST APIs or JDBC requests for database interactions. Choose the relevant samplers based on your mobile app’s architecture and functionalities.
  5. Add Timers and Logic Controllers: Timers help introduce delays between user actions, mimicking real-world user behavior. Logic Controllers enable conditional and iterative execution of test elements, enhancing test realism and flexibility.
  6. Configure Assertions: Assertions verify the correctness of server responses, ensuring that the mobile app functions as expected under load. Define assertions to validate response status codes, content, or performance thresholds.
  7. Set Up Listeners for Result Analysis: Listeners capture and display test results in various formats, including tables, graphs, and summary reports. Choose appropriate listeners to monitor key performance metrics such as response times, throughput, and error rates.

Executing and Analyzing Load Tests

Once your load test plan is configured, it’s time to execute the tests and analyze the results. Follow these steps to execute load tests using Apache JMeter:

  1. Start the Test: Run the load test plan within Apache JMeter by clicking the “Start” button. Monitor the progress as virtual users simulate user interactions with the mobile app.
  2. Monitor System Resources: Keep an eye on system resource utilization during load tests, including CPU, memory, and network bandwidth. Excessive resource consumption may indicate performance bottlenecks that require attention.
  3. Collect and Analyze Results: After the load test completes, review the results collected by Apache JMeter’s listeners. Pay attention to performance metrics such as response times, latency, throughput, and error rates. Identify any anomalies or areas for improvement.
  4. Generate Reports: Apache JMeter offers built-in reporting capabilities to generate comprehensive test reports in formats like HTML, CSV, or XML. Share these reports with stakeholders to communicate test findings and recommendations effectively.

Conclusion

So, after understanding the complete process, we can conclude certain benefits linked with JMeter mobile performance testing:

  • Zero investment since it is an open-source tool!
  • Accessible on both Android and iOS devices.
  • The simplest and most efficient tool to check mobile performance.
  • It is very user-friendly and has an interactive UI.

Hopefully, after going all through this guide, you will be capable of recording a JMeter script for mobile performance testing.

FAQs